
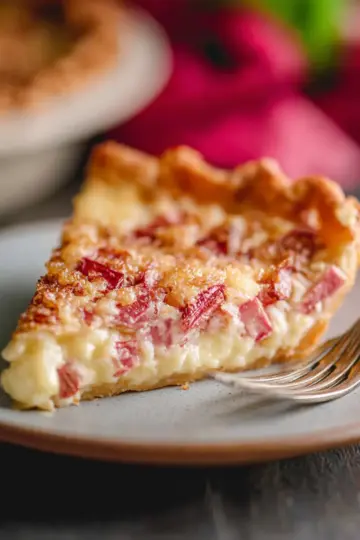
Introduction to No Crust Rhubarb Pie
Have you ever craved the familiar tartness of a classic rhubarb pie but found yourself daunted by the prospect of making a crust? Say hello to No Crust Rhubarb Pie! This delightful dessert captures all the flavors you love about traditional rhubarb pie while simplifying the process. With a buttery, sweet dough topping that bakes to perfection, it transforms rhubarb into a comforting treat without the hassle of rolling out that tricky dough.
Why choose a crustless rhubarb pie?
Opting for a crustless rhubarb pie has all sorts of benefits. For busy professionals like you, it means less prep time and less mess. Rather than fumbling with flour and rolling pins, you can simply focus on mixing together the few simple ingredients. Plus, with the crust eliminated, you can actually savor the vibrant taste of rhubarb, spotlighting its unique tartness.
Moreover, this recipe is surprisingly versatile! You can enjoy it warm or cold, with a scoop of ice cream on top or a drizzle of half and half. Whether you're hosting a gathering or enjoying a cozy night in, this pie will impress your guests and leave them asking for seconds. Ready to give it a try? Let’s dive into the full recipe!
Ingredients for No Crust Rhubarb Pie
Creating a delicious no crust rhubarb pie starts with gathering the right ingredients. Here's what you'll need to whip up this scrumptious dessert that delivers all the flavor without the fuss of a traditional pie crust.
List of Ingredients
- 4 cups rhubarb, washed and diced: The star of the show—fresh rhubarb adds vibrant tartness.
- 1 ¾ cups sugar (divided): You'll use some to sweeten the rhubarb and some in the dough topping.
- 2 tablespoons margarine, melted (or butter): Adds richness and depth to the pie.
- 1 cup flour: This helps to create a lovely, thick topping.
- 2 eggs: These bind everything together, giving your pie a delightful texture.
- 1 teaspoon vanilla extract: A touch of warmth to enhance the flavors.
- ½ teaspoon lemon extract: Optional, but it brightens the taste wonderfully.
- 1 tablespoon lemon juice: A splash of acidity that complements the rhubarb's tartness beautifully.
These simple ingredients are perfect for a cozy dessert that's sure to impress! Looking for more ways to utilize rhubarb? Check out this guide to cooking with rhubarb for fresh ideas!
Step-by-step Preparation of No Crust Rhubarb Pie
When you're craving the tangy sweetness of rhubarb pie but want to skip the fuss of a crust, this No Crust Rhubarb Pie is your perfect solution. With easy steps and simple ingredients, you’ll be enjoying a slice of this delightful dessert in no time. Let's dive into the preparation!
Preheat the oven and prepare the pie plate
First things first: preheat your oven to 325°F (160°C). A warm oven ensures your pie bakes uniformly, giving you that beautiful golden top you desire. While the oven is warming, grab a 9-inch pie plate and grease it generously with butter or cooking spray. After that, dust it lightly with flour to prevent sticking. This step makes for easy serving later on!
Prepare the rhubarb filling
Time to get to the main star: the rhubarb! You will need about 4 cups of washed and diced rhubarb. Toss the rhubarb into the prepared pie plate, ensuring even spread. Next, sprinkle ¾ cup of sugar over the rhubarb. This will help extract the tart juices and balance the flavors beautifully. for more tips on fruit preparation, you can check this guide from the USDA on safe food handling.
Make the sticky dough topping
Now, let’s create the sticky dough topping that will crown your rhubarb. In a mixing bowl, combine 1 cup of flour, 1 cup of sugar, and 2 tablespoons of melted butter. Stir until well mixed, then add in 2 eggs, 1 teaspoon vanilla extract, ½ teaspoon lemon extract, and 1 tablespoon of lemon juice. Mix until you have a thick, sticky dough. This will provide a delightful contrast to the tender rhubarb below.
Combine and layer the ingredients
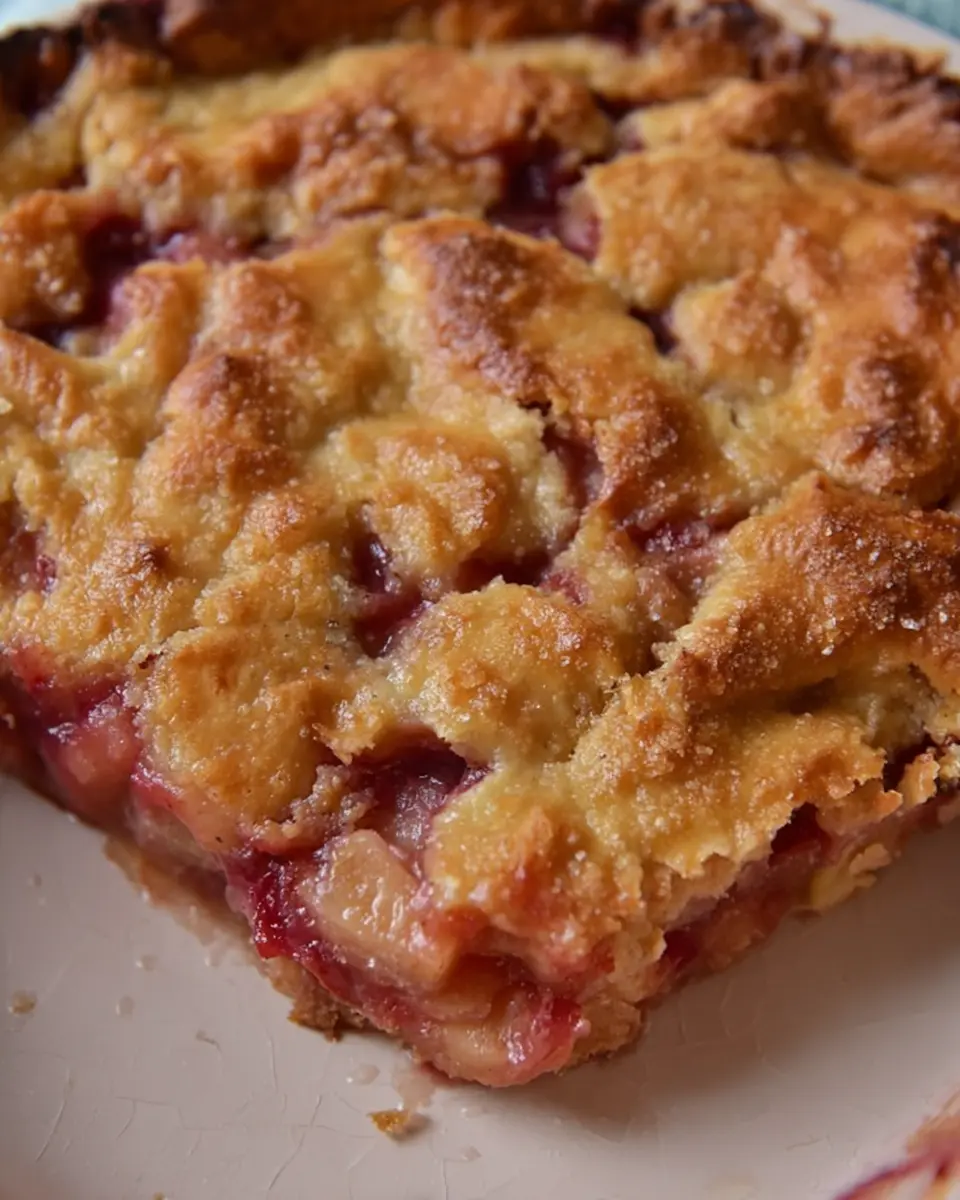
With your rhubarb filling and dough ready, it's time to bring everything together. First, spread the sticky dough evenly over the rhubarb layer in your pie plate. The dough will rise and become wonderfully fluffy as it bakes. Make sure the top is as smooth as possible for an appealing finish. If you’d like an extra citrusy kick, feel free to drizzle some additional lemon juice over the top before baking.
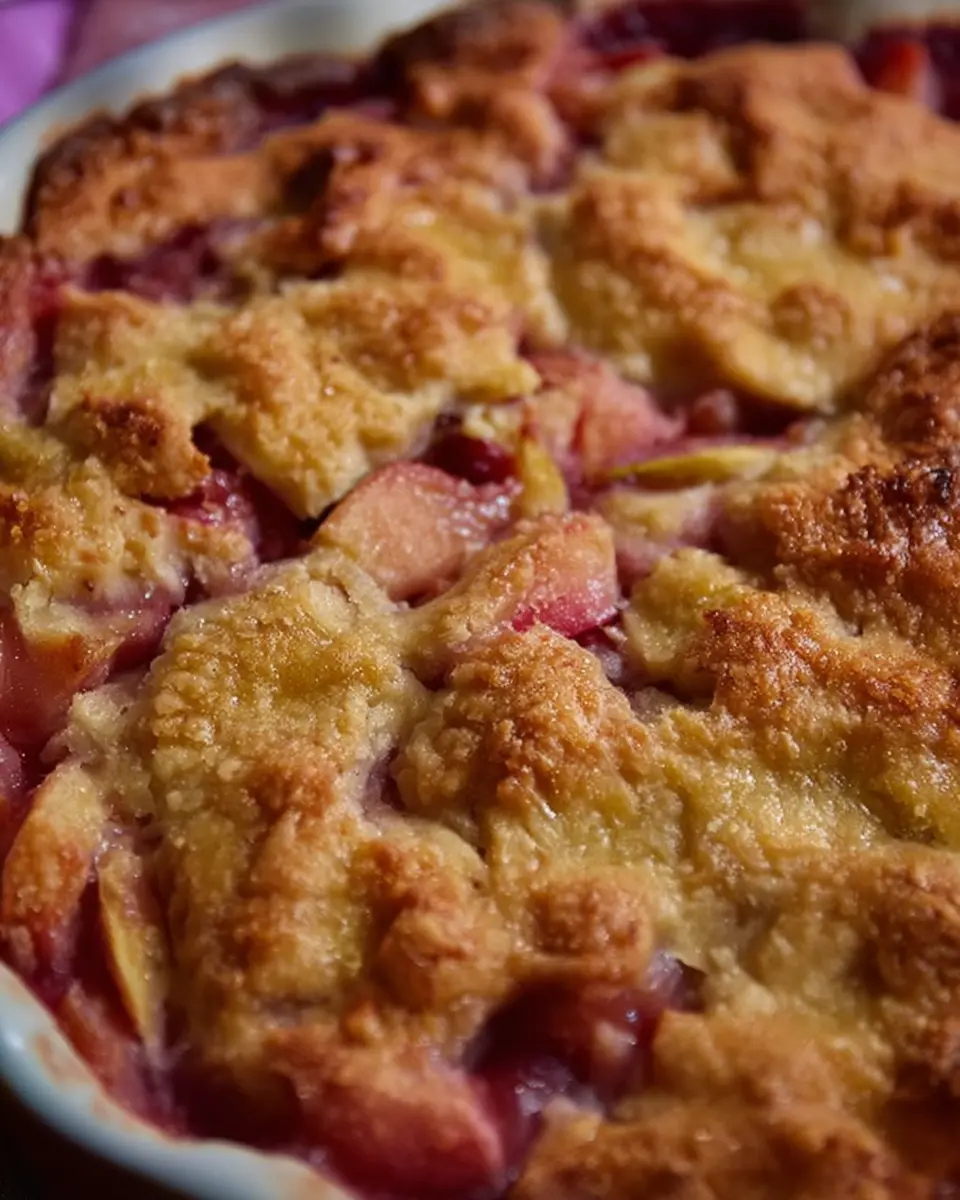
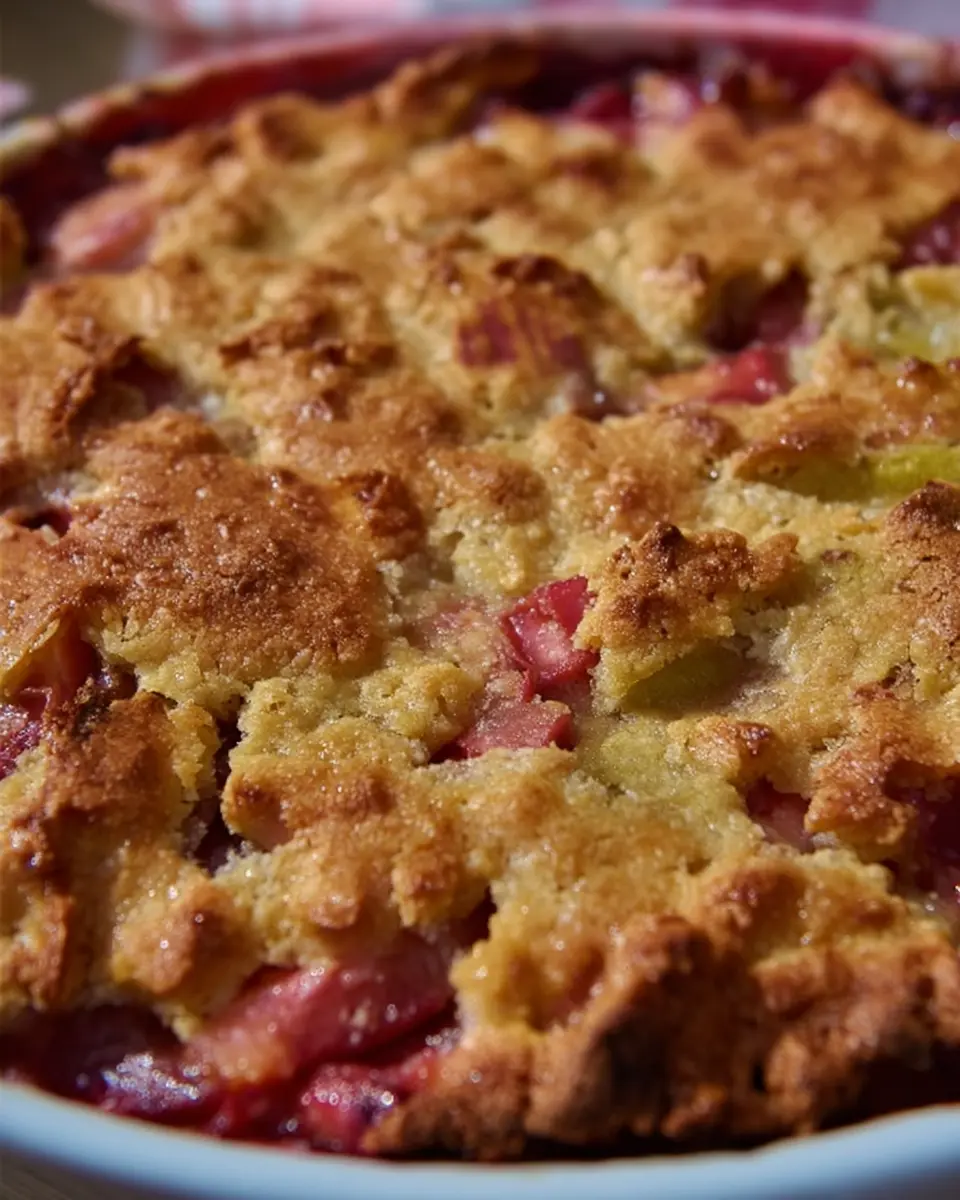
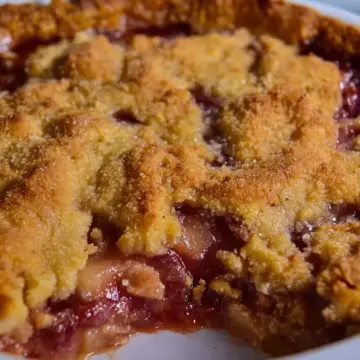
Bake to perfection
Slide your pie into the oven and let it transform for 50 to 60 minutes. Keep an eye on the color; you want it to be lightly golden brown. The sweet aromas will fill your kitchen, tantalizing your taste buds. Once baked, allow the pie to cool for a bit before serving—this helps it firm up nicely. You can serve it as is or top it off with vanilla ice cream or a dollop of half and half for that extra touch of indulgence.
Now that you have mastered the art of making No Crust Rhubarb Pie, grab your forks and enjoy this deliciously simple dessert!
Variations of No Crust Rhubarb Pie
Add Different Fruits for Flavor
Elevate your no crust rhubarb pie by incorporating a variety of fruits. Consider mixing in strawberries for a delightful tart-sweet combination, or blueberries for an extra burst of flavor. Peaches or apples can also add a unique twist, ensuring every bite is a delightful surprise. Don’t be shy—experiment with seasonal fruits to create a pie that speaks to summertime or fall!
Experiment with Spices and Extracts
Adding spices and extracts can give your crustless rhubarb pie a new dimension. Warm spices like cinnamon or ginger can complement the tartness of the rhubarb beautifully. Additionally, a splash of almond extract can bring a lovely nutty note. These subtle adjustments not only enhance the taste but also create a mouthwatering fragrance that will have everyone asking for your secret!
For more inspiration on fruit combinations, check out resources at Food Network and Serious Eats.
Cooking Tips and Notes for No Crust Rhubarb Pie
Tips for Selecting Fresh Rhubarb
When shopping for rhubarb to make your no crust rhubarb pie, look for firm, vibrant stalks. The colors can range from deep red to pale green — both are delicious! Avoid any stalks that are wilted or have blemishes. A quick tip: the leaves are toxic, so just stick to the stalks. If you're unsure about ripeness, ask your local farmer’s market vendor for some guidance.
Storage Suggestions for Leftovers
If you're lucky enough to have leftovers from your scrumptious no crust rhubarb pie, store them in an airtight container in the fridge. It’ll keep well for up to three days. You can also freeze portions for later; just make sure you wrap it tightly! When you're ready to enjoy it again, let it thaw in the fridge overnight. It's a delightful treat that tastes just as good even days after baking.
For more insights on proper storage techniques, check out resources from Eat Right.
Serving Suggestions for No Crust Rhubarb Pie
Best pairings to enhance flavors
If you're looking to elevate your no crust rhubarb pie, consider pairing it with complementary flavors. A scoop of vanilla ice cream adds a creamy touch that balances the tartness of rhubarb. For a bit of richness, drizzle with half-and-half or a dollop of whipped cream. Fresh mint leaves can also brighten the dish, providing a refreshing twist!
Creative serving ideas
Presentation matters! Try serving your crustless rhubarb pie in elegant individual ramekins for a charming touch. You could also serve it warm, topped with toasted almonds or granola for that crunch factor. For an unexpected twist, warm up leftover slices and pair them with yogurt or even spread some almond butter on the side. The possibilities are endless, so get creative and make it your own!
For more rhubarb inspiration, check out Rhubarb Recipes for ideas that celebrate this delightful fruit.
Time Breakdown for No Crust Rhubarb Pie
Planning to whip up a delightful no crust rhubarb pie? Here’s a quick breakdown to help you manage your time effectively and ensure a seamless baking experience.
Preparation Time
Getting your ingredients together and prepping the dish takes around 10 minutes. It’s a breeze—just wash, dice, and mix!
Cooking Time
Baking this delicious pie will take approximately 50 minutes. You’ll want to keep an eye on it as it turns golden brown and fills your kitchen with a mouthwatering aroma.
Total Time
In total, you're looking at about 1 hour from start to finish. It’s a delightful way to treat yourself and your loved ones with minimal fuss!
Now that you're all set with the time, are you ready to dive into the recipe? Don’t forget to check out more variations like Rhubarb Shortbread Bars for another twist on this tart yet sweet fruit! Happy baking!
Nutritional Facts for No Crust Rhubarb Pie
Calories per serving
This delightful no crust rhubarb pie packs about 281 calories per serving, making it a moderately indulgent dessert option for your next gathering or family dinner.
Key nutritional components
When you dig into this treat, here’s what you get:
- Carbohydrates: 59g – primarily from the rhubarb and sugar, providing quick energy.
- Protein: 4g – a small boost, thanks to the eggs.
- Fat: 4g – mainly from the margarine or butter used in the dough.
- Fiber: 2g – good for digestion, thanks to the rhubarb's natural composition.
- Sugar: 45g – sweetness comes from both the rhubarb's natural sugars and added sugar.
With an impressive amount of Vitamin A and a modest amount of calcium, this pie not only satisfies cravings but also provides some nutritional benefits. Remember, moderation is key! For more in-depth information about the benefits of rhubarb, check out sources like Healthline and WebMD.
This recipe maintains a healthy balance while allowing you to indulge in the classic flavors of a traditional pie—minus the crust! If you’re curious about more dessert options that are both delicious and nutritious, exploring recipes featuring seasonal fruits can be a great adventure!
FAQs about No Crust Rhubarb Pie
Can I use frozen rhubarb for this pie?
Absolutely! Using frozen rhubarb is an excellent option if fresh rhubarb isn’t available. Just be sure to thaw and drain any excess moisture before adding it to your pie. This prevents the filling from becoming too watery, ensuring your no crust rhubarb pie turns out perfectly.
How can I make the pie less sweet?
If you prefer a less sweet dessert, reducing the sugar is simple. You can decrease the sugar for the rhubarb layer and the topping by about ¼ to ½ cup based on your taste preferences. Additionally, consider experimenting with a tart fruit, like blackberries or raspberries, to balance the sweetness.
What are some good toppings for a pie like this?
Topping your no crust rhubarb pie can elevate its flavor profile. Consider serving it with:
- A scoop of vanilla or strawberry ice cream
- Whipped cream or a dollop of half and half
- Sliced almonds or crushed graham crackers for added texture
These toppings not only complement the tartness of the rhubarb but also make your dessert feel more indulgent!
Conclusion on No Crust Rhubarb Pie
In summary, no crust rhubarb pie is a delightful way to enjoy the tartness of rhubarb without the fuss of a traditional pie crust. This easy recipe is perfect for gatherings or a cozy night in. Serve it warm with vanilla ice cream for a satisfying treat!
No Crust Rhubarb Pie – Crustless Rhubarb Pie Recipe
Equipment
- 9-inch pie plate
Ingredients
Rhubarb Filling
- 4 cups rhubarb, washed and diced
- ¾ cups sugar for rhubarb bottom
Dough Topping
- 1 ¾ cups sugar divided
- 2 Tablespoons margarine, melted or butter
- 1 cup flour
- 2 units eggs
- 1 teaspoon vanilla extract
- ½ teaspoon lemon extract optional but recommended
- 1 Tablespoon lemon juice for topping
Instructions
Preparation Instructions
- Preheat oven to 325 degrees F. Grease and flour a 9-inch pie plate.
- Spoon rhubarb into prepared pie plate. Sprinkle with sugar.
- Mix melted margarine, flour and 1 cup sugar. Add eggs, vanilla and lemon extract to make a sticky dough.
- Spread over rhubarb in dish.
- Sprinkle top with fresh lemon juice.
- Bake for 50 to 60 minutes or until lightly golden brown.
- Let cool a bit before serving to let it set up. Serve alone, with ice cream or top with half and half.
Leave a Reply