
Perfect Soft Sandwich Bread: Introduction
Making your own bread might feel daunting, but trust me—it’s a total game changer for young professionals. Picture this: you’re coming home after a long day, but instead of reaching for store-bought bread laden with preservatives, you whip up a batch of perfect soft sandwich bread in just three hours. Not only does this homemade delight taste infinitely better, but it also offers you peace of mind knowing exactly what’s going into your food.
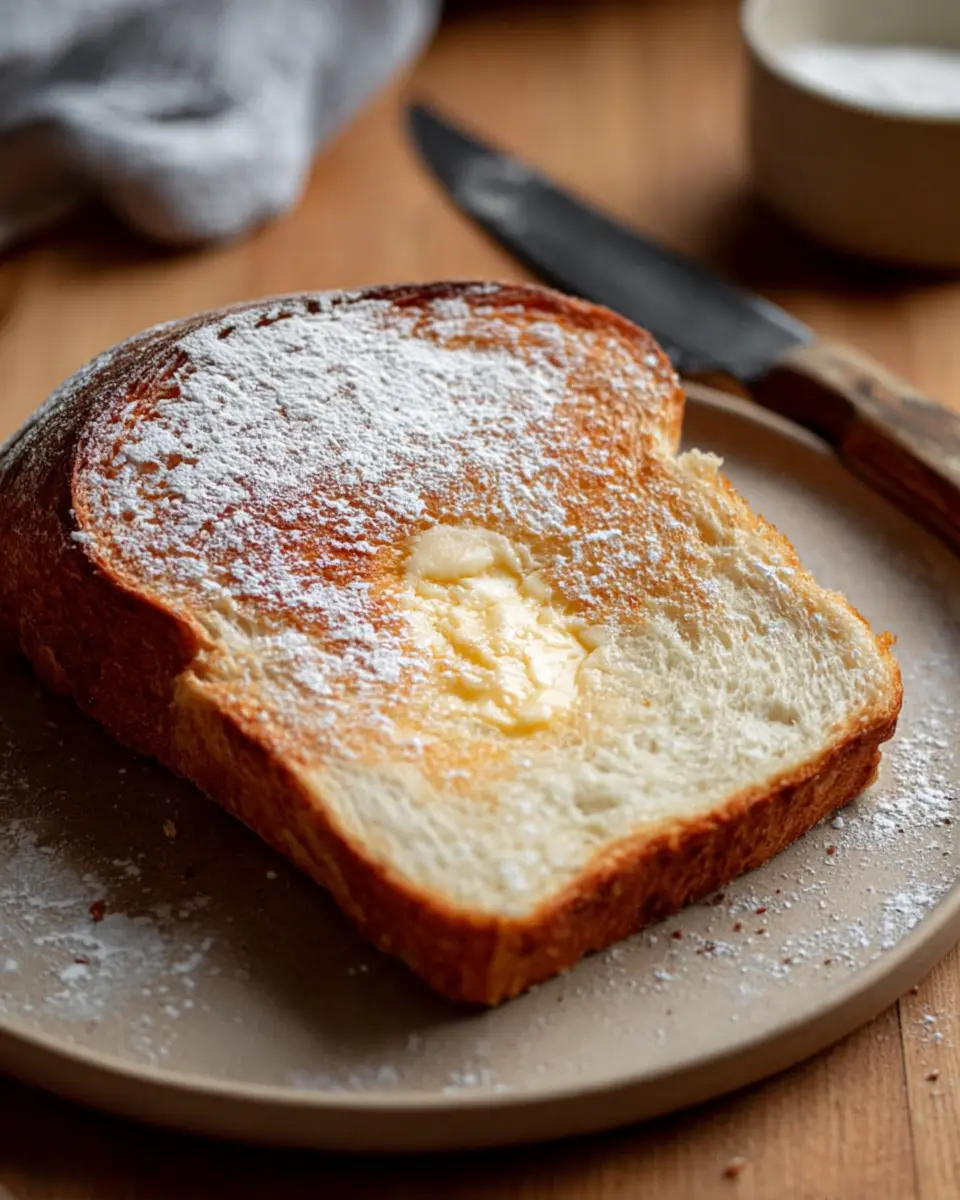
Why settle for a loaf that dries out in a day when you can enjoy freshly baked bread that’s fluffy and soft, perfect for layering with turkey bacon or chicken ham? Plus, it’s remarkably satisfying to slice into a loaf you’ve nurtured from scratch. With just a handful of simple ingredients—like warm water, flour, and sugar—you can create mouthwatering sandwiches that elevate your lunch game.
Curious about the health aspects? According to the USDA, homemade bread can be free from the chemicals and additives often found in commercial options. So, why not give it a shot? Embrace the rewarding experience of baking your own bread and enjoy a flavorful staple tailored just for you!

Ingredients for Perfect Soft Sandwich Bread
Essential ingredients for the perfect loaf
Creating the perfect soft sandwich bread begins with a few essential ingredients. These are:
- Warm Water: Activates the yeast and creates a moist environment for gluten development.
- Granulated Sugar: Feeds the yeast, aiding in fermentation while also enhancing the bread's sweetness.
- Dry Active Yeast: The star ingredient that causes the dough to rise by releasing carbon dioxide.
- Unsalted Butter: Adds flavor and moisture, contributing to the bread’s soft texture.
- Kosher Salt: Enhances flavor and controls yeast activity, preventing over-proofing.
- Unbleached All-Purpose Flour: Provides the structure and gluten needed for a soft, airy loaf.
Importance of each ingredient in the bread-making process
Each ingredient plays a vital role in achieving that soft, dreamy bread texture you crave. For instance, the warm water must be just right—too hot and it might kill the yeast, too cool and it won't activate properly. Sugar not only sweetens the bread but also speeds up fermentation, leading to quicker rising times.
Butter brings a delightful richness, while salt is essential for flavor. Lastly, using unbleached all-purpose flour helps create that tender crumb without compromising structure. For more baking tips, check out King Arthur Baking or Breadtopia.
Step-by-step Preparation of Perfect Soft Sandwich Bread
Making perfect soft sandwich bread isn’t just about following a recipe; it’s about creating an experience in your kitchen. Let’s walk through each step together, ensuring you achieve that soft, fluffy texture that makes every sandwich a delight.
Activate the yeast
To kick off your bread-making journey, begin by activating the yeast. In the bowl of your stand mixer, combine 2 cups of warm water (85-90° F), 1½ tablespoons of dry active yeast, and ½ cup of granulated sugar. This sugary concoction is like a warm hug for the yeast, encouraging it to bloom. Stir gently with a whisk, then let it rest for about 3-5 minutes. You’re waiting for some bubbly action here – that’s the sign your yeast is alive and ready to work its magic!
Combine wet ingredients
Next, add ¼ cup of melted unsalted butter and 1 tablespoon of kosher salt to the yeast mixture. The butter will add richness and moisture, which is key to achieving that soft texture we all love. Whisk these ingredients together until they’re well combined – feel free to channel your inner chef and have fun with it!
Gradually incorporate flour
Now it’s time to give your mixture some structure. Gradually add in 6 cups of unbleached all-purpose flour, one cup at a time. Allow the mixer to do the kneading for about 3-4 minutes, until the dough begins to come together but is still slightly shaggy. This gradual incorporation helps ensure you get the perfect consistency.
Knead the dough
When the mixer has done its job, pour the dough out onto a clean surface. It’s kneading time! Use your hands to knead the dough for an additional 1-2 minutes until it’s smooth and elastic. This is a crucial step, as kneading develops the gluten structure for that soft, airy bread.
First rise: Let it do its magic
Place the kneaded dough in a lightly oiled bowl. Cover it with a shower cap or plastic wrap, and let it rise at room temperature for about 1 hour, or until it’s doubled in size. Patience is key here – this is when the dough transforms into something magical!
Shape the loaves
Once your dough has risen, it’s time to shape the loaves. Preheat your oven to 375°F and get your two 9x5 loaf pans ready by lightly greasing them. Divide the dough in half, press it into a rectangle about 9 inches wide, roll it into a log, and place it seam-side down in the prepared pans.
Second rise: The waiting game
Cover the formed loaves loosely with a kitchen towel, and let them rise again for about 45-60 minutes. You’ll know they’re ready when they’re puffed up and about half an inch above the rim of the pan. Don’t rush this stage; it’s essential for achieving that perfect fluff.
Bake to golden perfection
Finally, the moment has come! Bake the loaves for 25-30 minutes, rotating the pans after 15 to ensure even browning. When they’re tall and golden brown on top, they’re ready. Let them cool for a few minutes before tipping them out of the pans and allowing them to cool fully on a wire rack. Slice, relish, and enjoy the simple pleasure of homemade soft sandwich bread.
Now that you know the steps, why not invite a friend over for a sandwich-making party? Use this perfect soft sandwich bread as the base for your favorite fillings, from turkey bacon to chicken ham. Happy baking!

Variations of Perfect Soft Sandwich Bread
Exploring the world of perfect soft sandwich bread can lead to delightful variations that cater to diverse tastes and preferences. Here are two delicious alternatives to consider for your next bake.
Whole Wheat Soft Sandwich Bread
Health-conscious eaters will enjoy this twist! By substituting half or all of the all-purpose flour with whole wheat flour, you'll create a denser yet still soft loaf that's rich in fiber and nutrients. The nutty flavor complements your favorite spreads and fillings beautifully. Plus, it pairs well with fresh veggies and protein like turkey bacon or chicken ham. Looking for more recipes? Check out this guide on whole grain baking.
Herb-Infused Sandwich Bread
For a fragrant and flavorful twist, try adding fresh or dried herbs to your perfect soft sandwich bread dough. Herbs like rosemary, thyme, or basil not only impart a lovely aroma but also elevate simple sandwiches to gourmet status. Imagine a chicken ham sandwich with herb-infused bread—delicious! Don't be afraid to experiment with your favorite spices, too. For some herb inspirations, visit this herb pairing resource.
Whichever variation you choose, your homemade bread journey is sure to be rewarding!
Cooking Tips and Notes for Perfect Soft Sandwich Bread
Common Pitfalls and How to Avoid Them
Making perfect soft sandwich bread can come with its challenges. One common pitfall is using water that's too hot. Yeast thrives between 85-90°F; temperatures over 130°F can kill it. Always check the temperature of your water! Additionally, don’t skip the proofing time. A well-risen dough enhances texture. Finally, ensure you avoid over-kneading; this can lead to a tough loaf instead of that desirable softness.
Best Practices for Storing Homemade Bread
To keep your delicious bread fresh longer, store it in a cool, dry place in a sealed plastic bag or container to retain moisture. For optimal freshness, slice only what you need and store the rest whole. If you have extra loaves, consider freezing them after they’ve cooled completely—this preserves their quality. When you're ready to enjoy, simply thaw or toast slices directly from the freezer for a warm treat anytime!
For more tips on bread storage, check out this guide on King Arthur Baking’s website.
Serving Suggestions for Perfect Soft Sandwich Bread
Classic sandwiches to try
When you bake your perfect soft sandwich bread, the possibilities are endless! Start with classic combinations like:
- Turkey Bacon Club: Layer your bread with crispy turkey bacon, fresh lettuce, and juicy tomatoes for a satisfying meal.
- Chicken Ham & Cheese: Create a simple yet delicious sandwich with chicken ham and your favorite cheese, toasted to golden perfection.
- Veggie Delight: Spread hummus on your bread and add crunchy cucumbers, bell peppers, and arugula for a fresh twist.
Creative breakfast ideas with soft sandwich bread
Not just for lunch, your perfect soft sandwich bread can elevate breakfast!
- French Toast: Dip slices in an egg mixture and pan-fry for a soft and fluffy morning treat.
- Avocado Toast: Smash avocado on toasted slices, sprinkle with salt and pepper, and top with a sunny-side-up egg.
- Breakfast Sandwich: Fill your bread with scrambled eggs, turkey bacon, and a slice of cheese for an energizing start to your day.
These ideas will surely make your baking project worthwhile! For more recipes, check out Food Network for inspiration. Enjoy your bread adventures!
Time Breakdown for Perfect Soft Sandwich Bread
Preparation Time
Getting started is a breeze! You’ll need about 10 minutes to gather your ingredients and mix them together.
Proofing Time
Patience is key when making the perfect soft sandwich bread. Allow the dough to rise for 2 hours—this step is crucial for developing that soft, pillowy texture.
Baking Time
The final touch! Bake your bread for approximately 30 minutes at 375°F until golden brown.
Total Time
From start to finish, you can expect the entire process to take around 3 hours. Trust us, the delicious reward is worth every minute!
For more tips and detailed baking techniques, check out the King Arthur Baking Company for insights on home bread-making.
Nutritional Facts for Perfect Soft Sandwich Bread
Calories per slice
Homemade perfect soft sandwich bread is both delicious and satisfying, with about 120 calories per slice. This makes it an excellent choice for your daily sandwiches without packing in too many calories.
Nutritional highlights
This bread is not just fluffy; it's also nutritious! Each slice provides:
- Carbohydrates: A great source of energy for your busy days.
- Protein: Contributing to muscle repair and overall health.
- Calcium: Important for bone health, especially when paired with fortified spreads.
For more insights on nutritional values, you can check NutritionData to truly understand what goes into your homemade bread!
FAQs about Perfect Soft Sandwich Bread
Why is my bread dense?
A dense loaf can be frustrating! Common culprits include insufficient kneading or not allowing the dough to rise fully. Make sure your yeast is active and blooming properly. For more tips on troubleshooting bread, check out this bread baking guide.
Can I freeze the bread?
Absolutely! This perfect soft sandwich bread freezes beautifully. Slice the loaves before freezing, and place them in an airtight bag or container. When you're ready to enjoy, just toast the slices directly from the freezer, or let them thaw at room temperature.
What can I make with leftover sandwich bread?
Don’t let extra bread go to waste! Transform it into delicious dishes such as:
- Bread pudding: A classic use for leftover bread soaked in a sweet custard mixture.
- French toast: Perfect for a weekend breakfast—just dip slices in an egg mixture, then pan-fry.
- Croutons: Toss cubes of bread with olive oil and seasonings, then bake for a crispy salad topping.
Let your creativity shine while reducing food waste!
Conclusion on Perfect Soft Sandwich Bread
Embracing the homemade bread journey
Baking perfect soft sandwich bread at home is a rewarding journey that brings warmth and comfort to any kitchen. The joy of slicing into a fresh loaf, the aroma filling your home, and the satisfaction of knowing exactly what goes into it is unparalleled. Invite friends over, showcase your baking skills, and enjoy it together!

Perfect Soft Sandwich Bread
Equipment
- Stand Mixer
- loaf pans
- kitchen towel
Ingredients
- 2 cups warm water 85-90° F
- ½ cup granulated sugar
- 1½ tablespoons dry active yeast
- ¼ cup unsalted butter, melted
- 1 tablespoon kosher salt
- 6 cups unbleached all purpose flour
Instructions
- In the bowl of a stand mixer fitted with the dough hook attachment, combine the warm water, dry active yeast, and granulated sugar. Whisk to combine, and let rest for 3-5 minutes to allow the yeast to bloom.
- Add the melted butter and the kosher salt to the bowl of the stand mixer. Whisk to combine.
- Slowly add the all purpose flour to the bowl, 1 cup at a time. Allow the mixer to knead the dough for 3-4 minutes. The dough will still be slightly shaggy.
- Pour the dough out onto a clean work surface, and knead the dough for another 1-2 minutes until it is smooth. Place the dough in a lightly oiled bowl, cover with a clean shower cap or plastic wrap, and let rise at room temperature for 1 hour or until doubled in size.
- Preheat the oven to 375°F. Lightly spray 2 9x4 pans with nonstick cooking spray, or brush lightly with avocado oil. Pour the dough out onto a lightly floured work surface, and divide the dough into 2 equal pieces. Press the dough out into an even flat rectangle that is the width of the loaf pan, 9 inches. Roll the dough up into a log, and place the dough, seam side down, into the prepared loaf pan. Repeat with the second piece of dough.
- Cover the loaves loosely with a clean kitchen towel, and let rise for another 45-60 minutes at room temperature. The bread is ready to bake when the top of the dough is about ½-inch above the rim of the loaf pan.
- Bake the bread for 25-30 minutes, rotating the pans after 15 minutes to ensure even browning. The loaves should be tall and golden brown on top. Let the loaves cool slightly for 5 minutes, and then tip them out of the loaf pan, and allow to cool completely on a wire rack. Slice and enjoy!


Leave a Reply