
Introduction to Creamy High Protein Banana Pudding
Why opt for homemade banana pudding?
So why make homemade banana pudding when you can easily pick up a pre-packaged version? For starters, homemade means control over ingredients. You can tailor the flavor and nutrition to your needs, making it family-friendly and personalized. Plus, there's something genuinely rewarding about crafting your own desserts — you not only enjoy a fresh treat but also get the satisfaction of mastering a classic recipe.
The benefits of using high-protein ingredients
Now, let’s talk about the star of our recipe — high-protein ingredients! By incorporating protein powder and Greek yogurt, you're transforming a traditional dessert into a powerhouse of nutrition. Not only does protein support muscle repair and satiety, but it also helps balance your overall macronutrient intake (1). This Creamy High Protein Banana Pudding will not leave you feeling guilty; instead, you'll relish the creamy texture, delightful taste, and nutritional benefits.
Plus, it’s perfect for quick breakfasts or a satisfying post-workout snack.
If you’re looking to elevate your dessert game while keeping it healthy, this recipe is for you. Indulge in a comforting bowl of banana pudding without compromising your fitness goals!
Learn more about the importance of protein in your diet here for additional insights on why protein matters.
Ingredients for Creamy High Protein Banana Pudding
Creating a delicious creamy high protein banana pudding starts with selecting the right components. Let’s break it down:
Pudding base components
For the heart of your pudding, you’ll need:
- ⅔ cup protein powder (opt for a brand like Optimum Nutrition Gold Standard vanilla for best results)
- 1.1 boxes instant pudding mix (I recommend Jell-O sugar-free vanilla)
- 1.5 cups milk
- A pinch of salt to enhance the flavors
These ingredients come together to form a silky, sweet base that’s packed with protein.
Whipped cream mixture essentials
This is where your pudding turns heavenly! Grab the following:
- 1.5 cups cream (make sure it’s chilled to around 38°F for optimal whipping)
- ⅓ cup yogurt (Fage 0% Greek yogurt is my go-to for extra creaminess)
This whipped cream blend adds luxurious texture and richness to our pudding.
Assembly ingredients
Finally, you’ll need a few finishing touches:
- 3 bananas (be sure to slice them into ¼-inch rounds just before assembly)
- 27 Nilla wafers
- 4 Nilla wafers (crushed, for a decorative garnish)
With these ingredients, you’re all set to assemble your creamy high protein banana pudding. Ready to dig in? Let’s get started!
Step-by-step Preparation for Creamy High Protein Banana Pudding
Creating your own Creamy High Protein Banana Pudding is not only a rewarding experience, but it also yields a delicious dessert that you can enjoy guilt-free. Let’s break it down step-by-step to ensure you ace this recipe!
Prepare the pudding base
Start by gathering your ingredients and a medium-sized bowl. In the bowl, combine:
- ⅔ cup protein powder (like Optimum Nutrition Gold Standard vanilla)
- 1.1 boxes instant pudding mix (I recommend Jell-O sugar-free vanilla)
- 1.5 cups milk
- A pinch of salt
Stir everything together, breaking up any lumps until smooth. The consistency will be a bit thin at first, but don’t worry—this is perfectly normal! Once mixed, cover the bowl and pop it into the refrigerator for about 40 minutes. This resting time is crucial as it allows the pudding to thicken and the flavors to meld beautifully.
Whip the cream mixture
While you’re waiting on the pudding, it’s time to whip up the cream mixture. Take a separate bowl and add:
- 1.5 cups chilled cream (ideally around 38°F for optimal whipping)
- ⅓ cup Greek yogurt (I prefer Fage 0% for its thickness)
Using an electric mixer, whip the cream until you reach soft peaks—this is when the cream holds its shape but still appears fluffy. Gently fold in the Greek yogurt; this adds richness without deflating your whipped cream. Reserve about half a cup of this lovely mixture for later when you're ready to serve.
Assemble the pudding layers
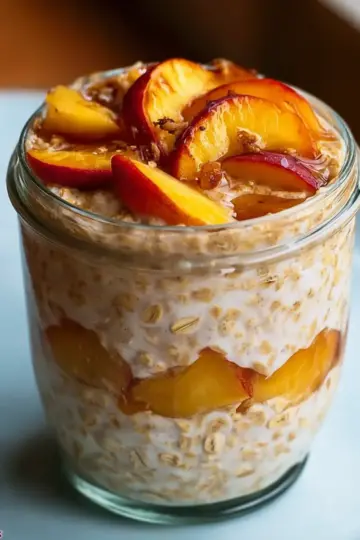
Before assembling, slice your bananas into ¼-inch rounds. Doing this right before you layer prevents them from browning. You’re looking for that perfect texture, so keep your slices substantial enough to hold up during assembly!
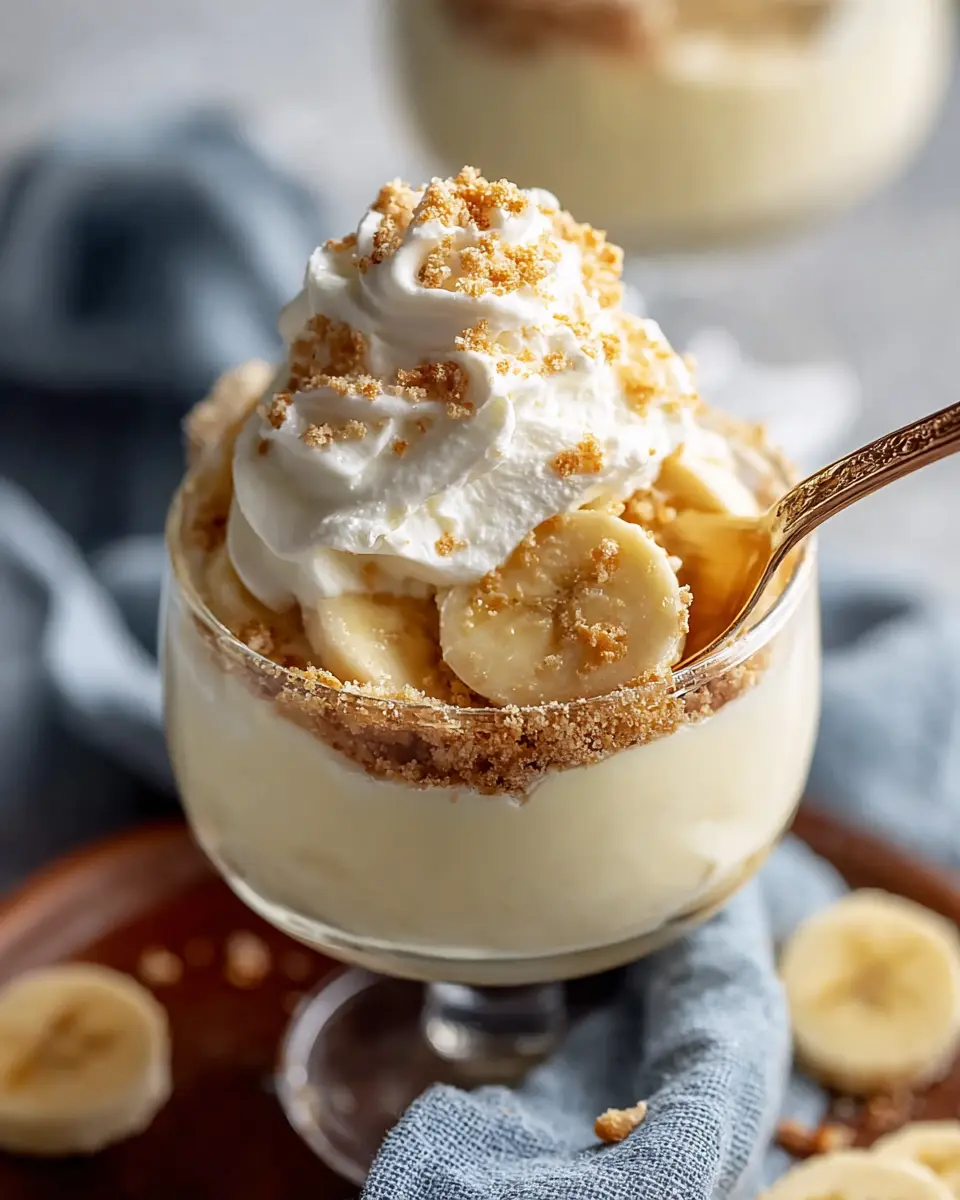
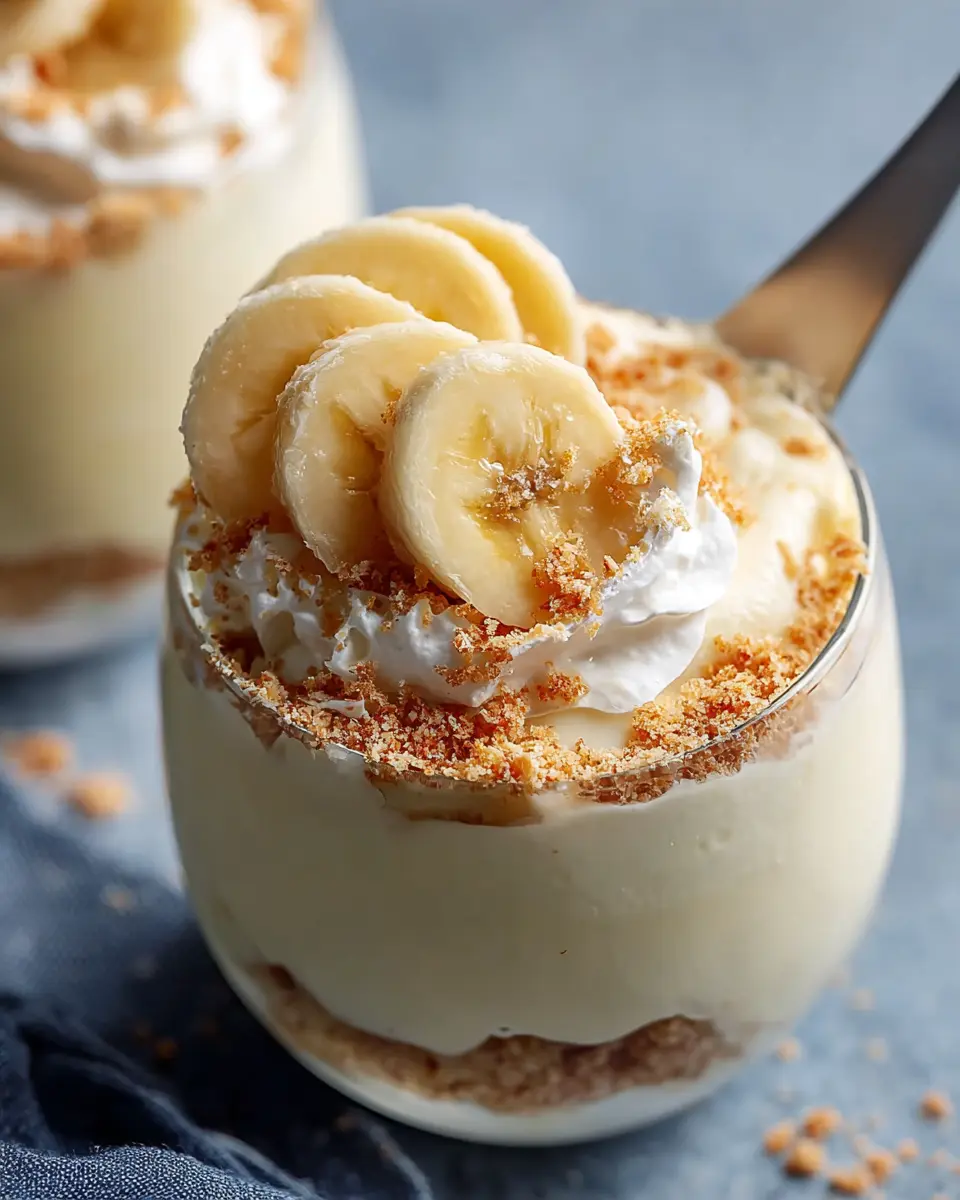
Gather your 27 nilla wafers, and prepare your serving glasses. Begin layering by scooping the creamy pudding into each glass, then adding a layer of banana slices followed by crushed nilla wafers. Repeat until your glass is nearly full—this layering creates a delightful contrast in both flavor and texture.
Chill and prepare for serving
Once you’ve assembled your layers, it’s time to chill your pudding for at least another hour. This will not only enhance the flavors but also allow the layers to set beautifully. It’s the perfect opportunity to unwind while you anticipate your sweet reward!
Final touches and garnishing
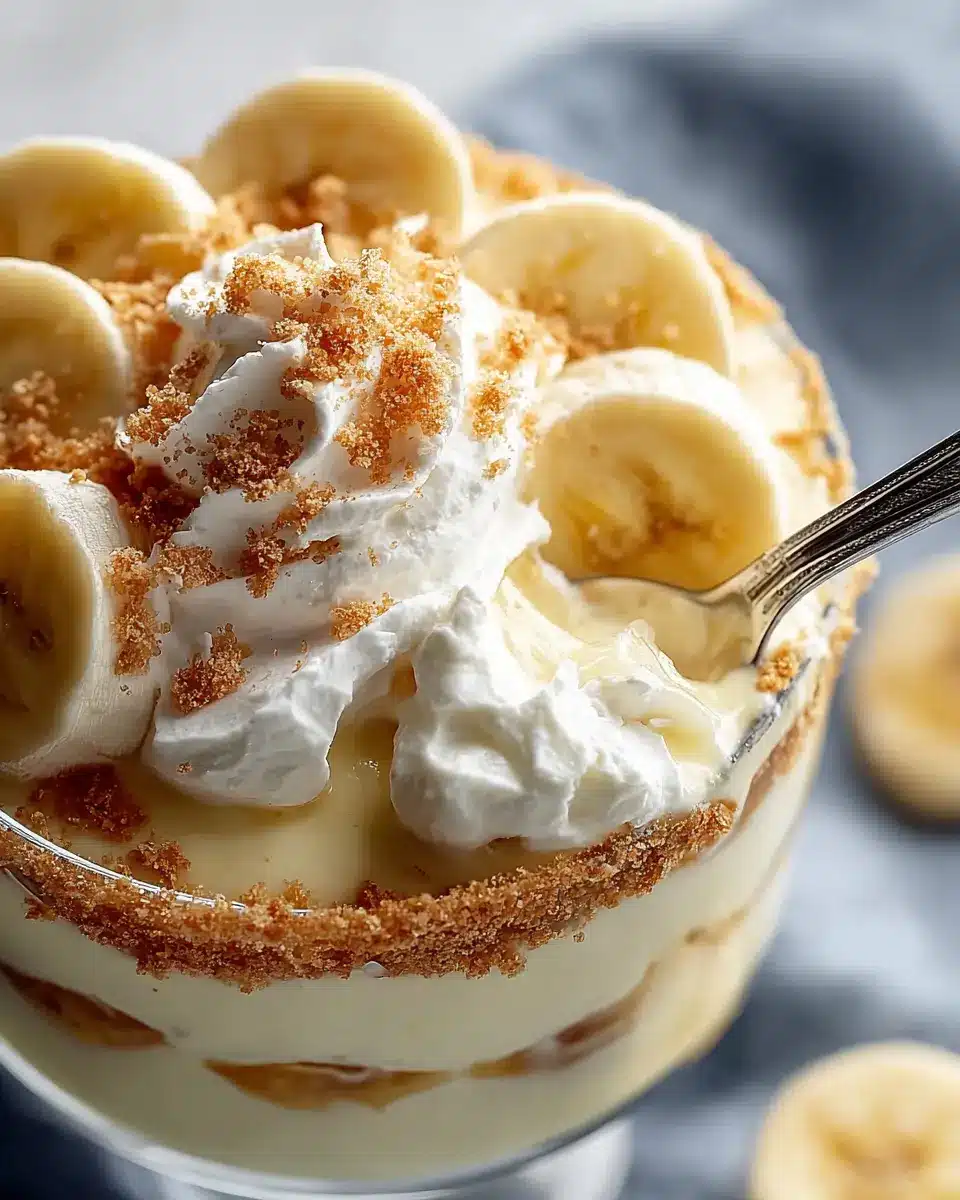
When you’re ready to serve, retrieve your glasses from the fridge and grab the reserved whipped cream mixture. Pipe or spoon a dollop on top of each serving and finish with a whole nilla wafer and a few fresh banana slices for that Instagram-worthy look. Don’t forget—sprinkling some crushed wafers on top gives an extra crunch that takes your creamy high protein banana pudding to another level.
And there you have it—a deliciously healthy dessert that's sure to impress your friends (or just yourself) with its creaminess and rich flavor. Enjoy every spoonful!
Variations on Creamy High Protein Banana Pudding
Chocolate Banana Pudding Variation
For a delightful twist, try a chocolate variation of creamy high protein banana pudding! Simply substitute ⅓ cup of your favorite chocolate protein powder for part of the vanilla protein powder in the base and use chocolate pudding mix instead of vanilla. This satisfying chocolatey goodness pairs wonderfully with banana slices and Nilla wafers, making it a hit with chocolate lovers.
Vegan Protein Banana Pudding
If you're looking for a vegan option, it’s easier than you think! Replace the dairy milk with almond or coconut milk and swap the cream for whipped coconut cream. For the protein boost, consider using a plant-based protein powder and a non-dairy yogurt, like coconut or almond yogurt. This vegan version retains the creamy texture and delicious flavor without any animal products, perfect for plant-based diets!
Feel free to experiment with these variations and make the delicious creamy high protein banana pudding your own!
Cooking Tips and Notes for Creamy High Protein Banana Pudding
Ensuring the Perfect Pudding Consistency
To achieve that decadently creamy texture in your creamy high protein banana pudding, patience is key! Make sure to refrigerate the pudding base for the full 40 minutes as it allows for thickening. If you find your pudding too runny, you can mix in a bit more protein powder, but do so gradually to maintain the right consistency.
Whipping Cream Tips for Best Results
For the fluffiest whipped cream, start with chilled equipment—your bowl and beaters will make a noticeable difference! Opt for heavy cream at around 38°F; the colder it is, the better it will whip. When adding Greek yogurt, fold gently to preserve the airiness in your whipped cream. This adds richness while keeping it light and airy, perfect for that smooth pudding experience.
Serving Suggestions for Creamy High Protein Banana Pudding
Perfect Glassware for Layer Presentation
To showcase your creamy high protein banana pudding, choose clear glass or small trifle bowls. This not only highlights your beautiful layers but also adds an elegant touch to your dessert. Opt for wide mouths to make layering easier, allowing guests to see the vibrant bananas and nilla wafers. You might even use mason jars for a fun, rustic feel—perfect for casual gatherings!
Creative Garnishing Options
The right garnish can elevate your pudding. Consider adding:
- Fresh banana slices for a touch of color and freshness
- A sprinkle of crushed nilla wafers for added texture
- Drizzles of honey or chocolate sauce for sweetness
These little details make your dish inviting and delicious. For more serving ideas, check out this source to explore unique dessert presentations! With these tips, your creamy high protein banana pudding will truly shine at any occasion.
Time Breakdown for Creamy High Protein Banana Pudding
Preparation Time
Get your kitchen ready with just 20 minutes of prep! This includes gathering your ingredients, mixing the pudding base, and whipping the cream. It’s a quick start to a delicious dessert!
Chill Time
Patience pays off! Let your creamy high protein banana pudding chill for 40 minutes. This period is key for thickening and allowing those flavors to meld beautifully.
Total Time
In just under an hour, you'll have a delectable dessert ready to impress—57 minutes in total. Perfect for a gathering or a satisfying snack after a long day!
For more on prepping your pudding, be sure to check out helpful tips on Food Network or Serious Eats. Happy cooking!
Nutritional Facts for Creamy High Protein Banana Pudding
When you're craving a dessert that fuels your body, look no further than this creamy high protein banana pudding. Here are some key nutritional highlights:
Calories per serving
Each serving contains approximately 202 calories, making it a fulfilling yet guilt-free treat.
Protein content
Packed with about 20 grams of protein per serving, this pudding is an excellent source for muscle recovery and overall vitality.
Key nutrients
Enjoy beneficial nutrients like calcium from the milk and yogurt and potassium from bananas, making this dessert not just tasty but nutritious.
For more on the health benefits of protein, consider checking out sources like Healthline for in-depth information!
FAQs about Creamy High Protein Banana Pudding
Can I use other flavors of protein powder?
Absolutely! While the recipe calls for vanilla protein powder, feel free to get creative. Chocolate or banana-flavored powder can add an interesting twist to your creamy high protein banana pudding. Just keep in mind that the flavor may slightly alter the overall taste, so match it with your preferred pudding mix.
How long does the banana pudding last in the fridge?
This delicious pudding can last for about 3-4 days in the refrigerator. To keep your dessert fresh, store it in an airtight container. Just a quick tip: separate the bananas if you plan to keep it longer; they can brown over time, affecting the pudding's appearance and taste.
What can I substitute for nilla wafers?
If Nilla wafers aren’t your thing or you’re looking for a healthier alternative, consider using granola, crushed graham crackers, or even almond flour cookies! Each option can offer a unique flavor and texture to your creamy high protein banana pudding, catering to your dietary needs or personal tastes.
For more FAQs and tips, check out reputable resources like the American Diabetes Association or Healthline for other healthy dessert ideas!
Conclusion on Creamy High Protein Banana Pudding
In summary, this Creamy High Protein Banana Pudding is not just a delicious treat; it’s a nutritious option packed with protein. Perfect for satisfying your sweet tooth while keeping your health goals in check, it’s ideal for meal prep or a crowd-pleasing dessert. Why not whip up a batch today?

Creamy High Protein Banana Pudding
Equipment
- medium bowl
- electric mixer
- spatula
- Serving glasses
Ingredients
Pudding Base
- ⅔ cup protein powder Optimum Nutrition Gold Standard vanilla preferred
- 1.1 boxes instant pudding mix Jell-O sugar-free vanilla preferred
- 1.5 cups milk
- 1 pinch salt
Whipped Cream Mixture
- 1.5 cups cream chilled to roughly 38°F for better whipping
- ⅓ cup yogurt Fage 0% Greek yogurt preferred for extra thickness
Assembly
- 3 bananas sliced into ¼-inch rounds
- 27 nilla wafers
- 4 nilla wafers crushed for a decorative garnish
Instructions
Preparation
- Combine the protein powder and instant pudding mix in a medium bowl, stirring together thoroughly to break up any lumps. Add the milk and a pinch of salt, then stir vigorously for about 1 minute until the mixture is smooth and well combined. The pudding will be relatively thin at this stage. Cover and refrigerate for 40 minutes.
- While the pudding chills, pour the chilled cream into a separate bowl and whip it with an electric mixer or by hand until soft peaks form. Gently fold in the Greek yogurt for 30-60 seconds until just combined. Reserve ½ cup of this cream mixture in a separate bowl for topping, then fold the remaining cream mixture into the thickened pudding using a spatula.
- Slice the bananas into ¼-inch rounds just before assembly. Gather your serving glasses or bowls.
- Divide the creamy pudding mixture among your serving glasses. Create alternating layers by adding banana slices, then crushed nilla wafers, then more pudding, repeating until the glass is nearly full. Top each serving with reserved whipped cream mixture and a whole nilla wafer.

Leave a Reply