
Introduction to Ridiculously Easy Lemon Curd Tarts
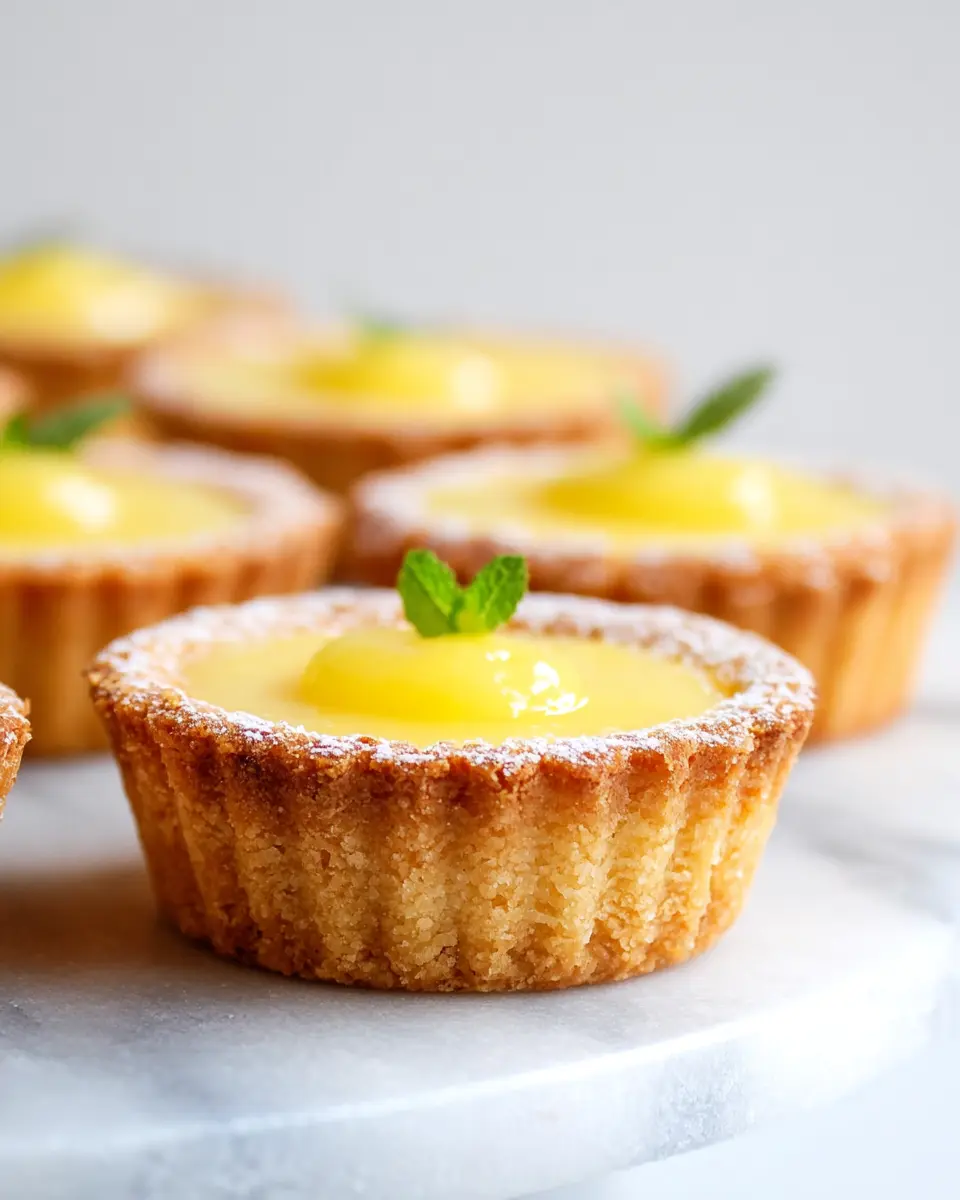
Imagine hosting a gathering, and everyone raves about your desserts—this can be a reality with ridiculously easy lemon curd tarts. These delightful mini tarts combine a buttery shortbread crust with a zingy lemon curd filling, perfect for impressing friends and colleagues without spending hours in the kitchen.
Why Lemon Curd Tarts Are a Must-Try for Young Professionals
For young professionals juggling work and social lives, simple yet impressive recipes are a game changer. Lemon curd tarts offer a unique twist on traditional desserts, elevating your dessert game with minimal effort. Here’s why they should be on your baking list:
- Quick & Easy: With a prep time of just 20 minutes, you can whip these up before a weekend brunch or spontaneous gathering.
- Fresh & Flavorful: The bright, citrusy flavor of lemon curd is refreshing and sure to please any palate, making these tarts a crowd favorite.
- Versatile Treat: Whether it’s a work function, casual dinner, or summer BBQ, these mini tarts fit right in.
Ready to learn more about crafting these delicious treats? Let’s dive into the recipe that will surely make you the star of your next event! For additional inspiration, check out this guide on quick desserts or cooking tips for busy professionals.

Ingredients for Ridiculously Easy Lemon Curd Tarts
Essential ingredients you need for the tarts
To create your ridiculously easy lemon curd tarts, gather the following essential ingredients:
- Butter: 8 ounces of very soft, salted butter for that rich flavor.
- Powdered Sugar: 1 cup, to sweeten things up nicely.
- Vanilla Extract: 2 teaspoons, adding a hint of warmth.
- Corn Starch: ¼ cup, for a nice, tender texture.
- All-Purpose Flour: 1 ¾ cups, the backbone of your tart crust.
- Salt: ¼ teaspoon to enhance the flavors.
- Lemon Curd: ½-1 cup of ridiculously easy microwave lemon curd, your star filling!
Optional garnishes and variations
Feel free to get creative with your tarts by adding optional garnishes:
- Mint Sprigs: To elevate the presentation with a fresh touch.
- Edible Flowers: Sprinkling a few can add a pop of color.
- Powdered Sugar: A light dusting for sweetness and visual appeal.
You can also experiment with different filling variations, like using lime curd or a fruit compote, to make each batch unique!
For more fun tips, check out this link for inspiration on additional toppings and flavors.
Step-by-step Preparation of Ridiculously Easy Lemon Curd Tarts
Crafting delicious Ridiculously Easy Lemon Curd Tarts is a delightful way to impress friends at gatherings or simply treat yourself to something sweet yet refreshing. Follow these straightforward steps to create the perfect tart!
Preheat the Oven and Prepare Muffin Pans
To begin, preheat your oven to 350°F (175°C). It’s essential to have your oven ready before you start mixing your ingredients. While the oven is warming up, grab two 12-cup mini muffin pans (or one larger 24-cup). Make sure to spray them well with baking spray—don’t forget to rub a paper towel on the tops to avoid any sticky scenarios later on!
Cream the Butter and Mix in the Sugar
Next, in a medium-sized mixing bowl, add 8 ounces of very soft butter along with 1 cup of powdered sugar. Use a hand mixer or a whisk to blend these until smooth and creamy. Once you’ve achieved that luscious consistency, stir in 2 teaspoons of vanilla extract for a delightful aroma.
Combine Dry Ingredients with the Butter Mixture
Now, sprinkle in ¼ cup of corn starch and mix until smooth. Incorporate 1¾ cups of all-purpose flour and ¼ teaspoon of salt into this buttery blend. Mixing carefully, you’ll notice the dough might seem a bit shaggy at first; it's normal! After a minute of mixing, it will begin to come together nicely, forming a cohesive dough ready for the next step.
Form the Tart Shells and Shape the Wells
Divide the dough into 24 equal portions—about 25-26 grams each is ideal. Roll each portion into a ball and place it in the mini muffin cups. Gently flatten them with your fingers, then use a ½ teaspoon measuring spoon to create a well in the center. This is where the magic happens, as you’ll soon fill these wells with the zesty lemon curd!
Bake and Reinforce the Tart Shells
Once your tarts are shaped, pop them in the oven! Bake for 18-24 minutes until they’re a lovely medium golden brown. Don’t fret if the wells puff up; it's all part of the process. After baking, remove them and immediately press the centers down again with the measuring spoon for that perfect well shape.
Cool and Fill the Tart Shells with Lemon Curd
Let the tart shells cool in the pan for about 10 minutes. Then, use a knife to gently lift them out and cool completely on a rack. Once cooled, it’s time for the fun part! Fill each well with 1 to 1½ teaspoons of your Ridiculously Easy Microwave Lemon Curd. If you want a polished look, consider piping the curd in for a professional touch. To finish, feel free to garnish with a mint sprig or a dusting of powdered sugar for a touch of elegance.
Now, sit back and enjoy your Ridiculously Easy Lemon Curd Tarts! These bite-sized treats are a guaranteed crowd-pleaser, perfect for any occasion. Ready to impress your friends? Happy baking!

Variations on Ridiculously Easy Lemon Curd Tarts
Berry Lemon Curd Tarts
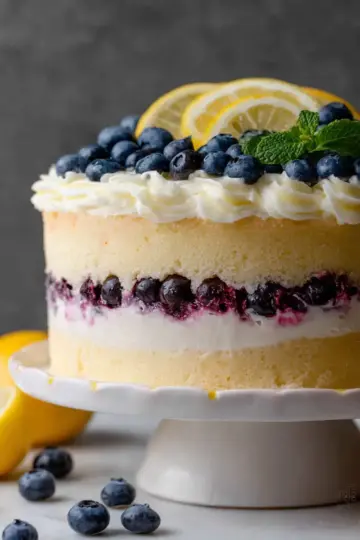
Elevate your ridiculously easy lemon curd tarts with a delightful berry twist! Layer fresh berries—like blueberries, raspberries, or strawberries—into your tart shells before adding the lemon curd. This not only enhances the flavor but also creates a stunning visual appeal. You can even blend berries into a quick sauce for drizzling on top for an extra touch of elegance. Fresh fruits pair wonderfully with the zesty lemon flavor, making these tarts a berry delicious treat for any occasion!
Chocolate Lemon Curd Tarts
For the chocolate lovers out there, consider creating chocolate lemon curd tarts. Simply melt some chocolate and mix it into half of your yogurt or a light cream cheese before layering it with lemon curd in the tart shell. The combination of the rich chocolate and tangy lemon is simply out of this world. Garnish with chocolate shavings or a dollop of whipped cream for a dessert that will impress your guests and satisfy your sweet tooth! With these variations, your lemon curd tarts will be a hit!
For a splendid visual guide, check out this berry tart tutorial to inspire your next baking adventure!
Cooking Tips and Notes for Ridiculously Easy Lemon Curd Tarts
Common Mistakes to Avoid
When making ridiculously easy lemon curd tarts, there are a few pitfalls to watch out for:
- Overbaking the tart shells: Keep a close eye on them; they should be golden, not dark brown.
- Filling too soon: Let the tart shells cool completely before adding the lemon curd to prevent it from melting into the crust.
- Ignoring measurements: Use a kitchen scale for more accurate portioning of the dough—it makes a big difference in consistency!
Storage Solutions for Leftovers
If you find yourself with leftover tarts (a rarity!), store them in an airtight container. They’re best enjoyed within 2-3 days. For longer storage, you can keep the tart shells and lemon curd separate; freeze the shells and thaw before filling for a quick treat later! For more tips, try checking out this helpful food storage guide.
Serving Suggestions for Ridiculously Easy Lemon Curd Tarts
Perfect Pairings for a Delightful Dessert Plate
Elevate your ridiculously easy lemon curd tarts by pairing them with fresh fruits like berries or sliced citrus. Serve them alongside a dollop of whipped cream or a scoop of velvety vanilla ice cream for an extra indulgent treat. For a touch of crunch, consider sprinkling some toasted nuts or granola on the plate as well! These colorful additions can balance out the tartness of the lemon curd while adding dimension to your dessert experience.
Presentation Tips to Impress Your Guests
To truly wow your guests, arrange the lemon curd tarts on a beautiful serving platter, perhaps garnished with a sprinkle of powdered sugar or a mint leaf for that pop of color. Use a fine-mesh sieve to create a delicate shower of sugar over the tarts right before serving. Additionally, consider adding a small jar of extra lemon curd for those who want a more intense citrus kick. Remember, presentation is key, so don’t hesitate to take a few extra minutes making it visually appealing!
Time Breakdown for Ridiculously Easy Lemon Curd Tarts
Preparation Time
Get started on these ridiculously easy lemon curd tarts with just 20 minutes of prep! This includes gathering your ingredients, mixing the buttery dough, and shaping those cute tart shells.
Baking Time
Once your tarts are ready, pop them in the oven for 20 minutes. During this time, they’ll transform into golden bites of deliciousness!
Total Time
From start to finish, you’re looking at a total of 40 minutes. Just imagine how quickly these delightful desserts can make their way to your table for sharing (or not)!
Ready to whip up these lemony delights? If you’re interested in more quick dessert ideas, check out this guide to 30-min desserts for inspiration!
Nutritional Facts for Ridiculously Easy Lemon Curd Tarts
Calories per tart
Each ridiculously easy lemon curd tart packs approximately 142 calories. This makes them a perfectly portioned treat for those who want a little sweetness without overindulging.
Macronutrient breakdown
- Carbohydrates: 16g
- Protein: 1g
- Fat: 8g (Saturated Fat: 5g)
These delicious tarts offer a sweet balance, making them an enjoyable option for any dessert lover looking to satisfy a craving while keeping their nutritional goals in mind. For more detailed nutritional insights, you can check out resources like the USDA National Nutrient Database.
FAQ about Ridiculously Easy Lemon Curd Tarts
Can I make the lemon curd ahead of time?
Absolutely! The ridiculously easy lemon curd can be made in advance and stored in the fridge for up to a week. Just ensure it's in a sealed container to maintain freshness. Trust me, preparing the curd ahead of time not only saves you precious moments but also intensifies those delightful lemon flavors.
What’s the best way to store these tarts?
To preserve their freshness, store the tarts in an airtight container at room temperature for up to two days. If you need to keep them longer, consider refrigerating them. Just note that the crust may lose some of its crispness, so it’s best to fill them right before serving to keep that delightful crunch.
Can I substitute the butter for a dairy-free version?
Yes, you can! For a dairy-free alternative, opt for a suitable plant-based butter. Many brands offer excellent options that mimic the creamy texture and flavor of traditional butter. This way, everyone can enjoy your ridiculously easy lemon curd tarts, regardless of dietary restrictions!
Conclusion on Ridiculously Easy Lemon Curd Tarts
In conclusion, these ridiculously easy lemon curd tarts are not just simple to make; they are utterly delightful! Perfect for any gathering, they bring a zesty brightness to your dessert table. Try them out, and watch as your friends and family devour every last bite. Happy baking!

Ridiculously Easy Lemon Curd Tarts
Equipment
- oven
- mixing bowl
- measuring spoons
- Mini muffin pans
- Cooling Rack
- knife
Ingredients
Shortbread Base
- 8 ounces very soft butter I use salted butter
- 1 cup powdered sugar
- 2 teaspoons vanilla extract
- ¼ cup corn starch
- 1 ¾ cups all purpose flour
- ¼ teaspoon salt
- ½-1 cup Ridiculously Easy Microwave Lemon Curd
Instructions
Preparation
- Preheat the oven to 350˚F. Spray two 12-cup mini muffin pans (or one 24-cup mini muffin pan) with baking spray. Rub each cup with a piece of paper toweling to make sure they’re thoroughly coated, including the top edges.
- Place the soft butter and powdered sugar in a medium-size bowl and stir until smooth and creamy. Add the vanilla and stir to combine. Sprinkle in the corn starch and stir until nice and smooth.
- Add the flour and salt and stir, turning the bowl with and stirring from the bottom up. Keep stirring until all of the flour is incorporated and the dough comes together.
- Divide the dough into 24 equal portions. Roll each portion into round balls and place each ball into the prepared mini muffin cups, flattening each one gently.
- Make an indention in the center of each flattened ball using a ½ teaspoon measuring spoon.
- Place the pan(s) in the preheated oven and bake for 18-24 minutes or until the outer edges of each tart are a medium golden brown.
- Remove the pan(s) from the oven and reinforce the center wells by gently pushing in again with the ½ teaspoon measuring spoon.
- Allow the tart shells to cool in the pan for 10 minutes then remove by inserting a small sharp knife into the center of each shell and pulling upward. Cool completely on a cooling rack before filling.
- Using a spoon fill each well with 1-1 ½ teaspoons of lemon curd. Optionally, garnish with a mint sprig or a small edible flower.
Leave a Reply