
Introduction to Chocolate Covered Cherry Brownie Bombs
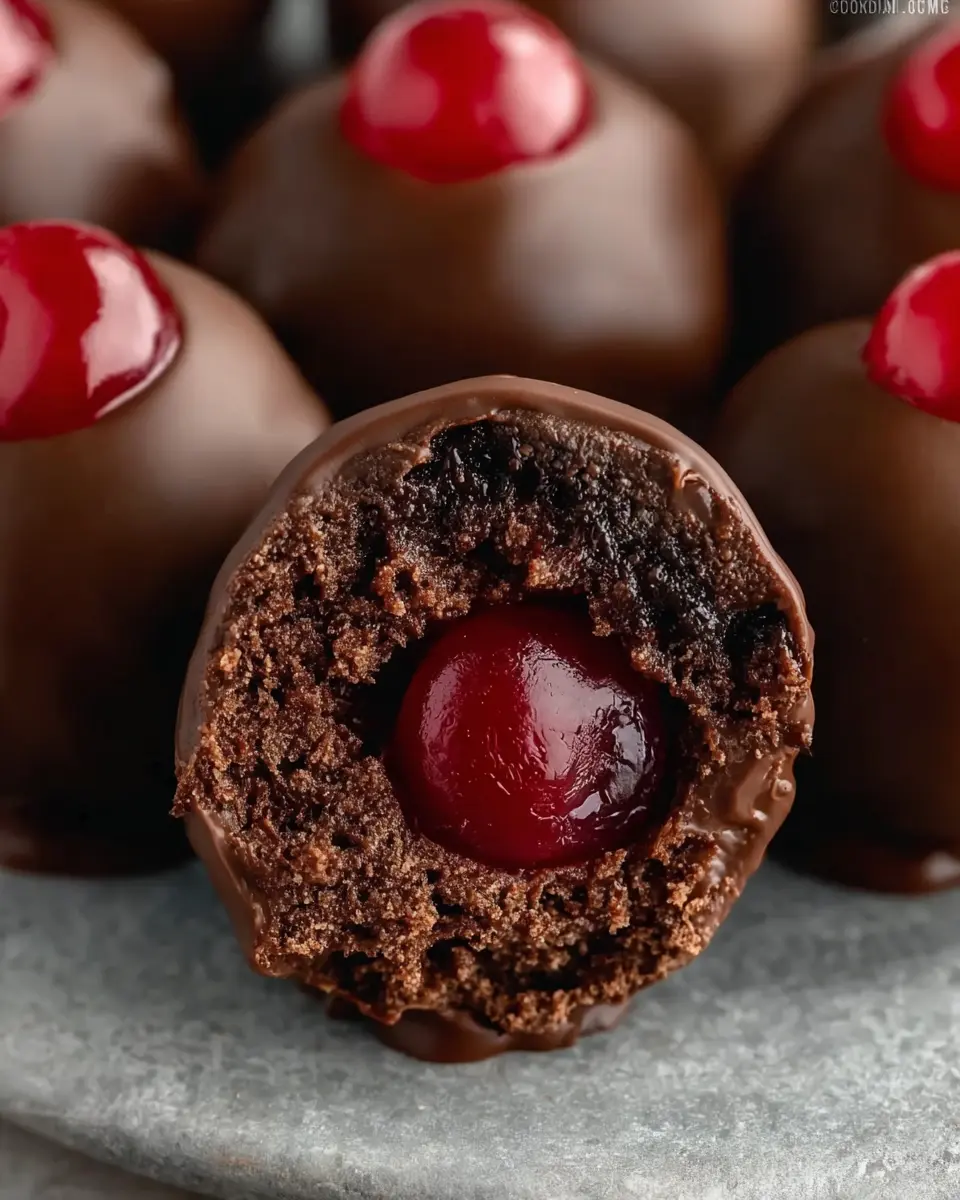
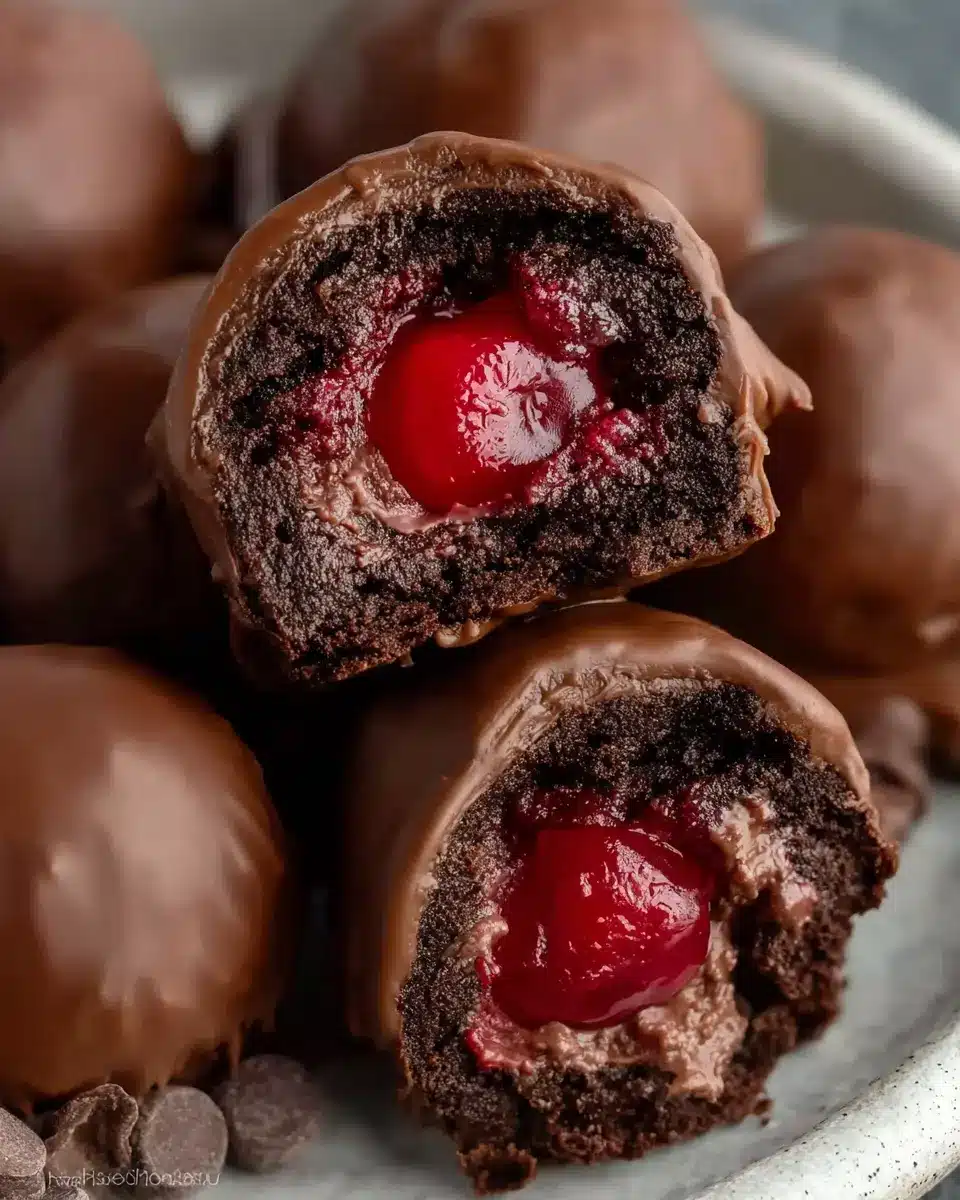
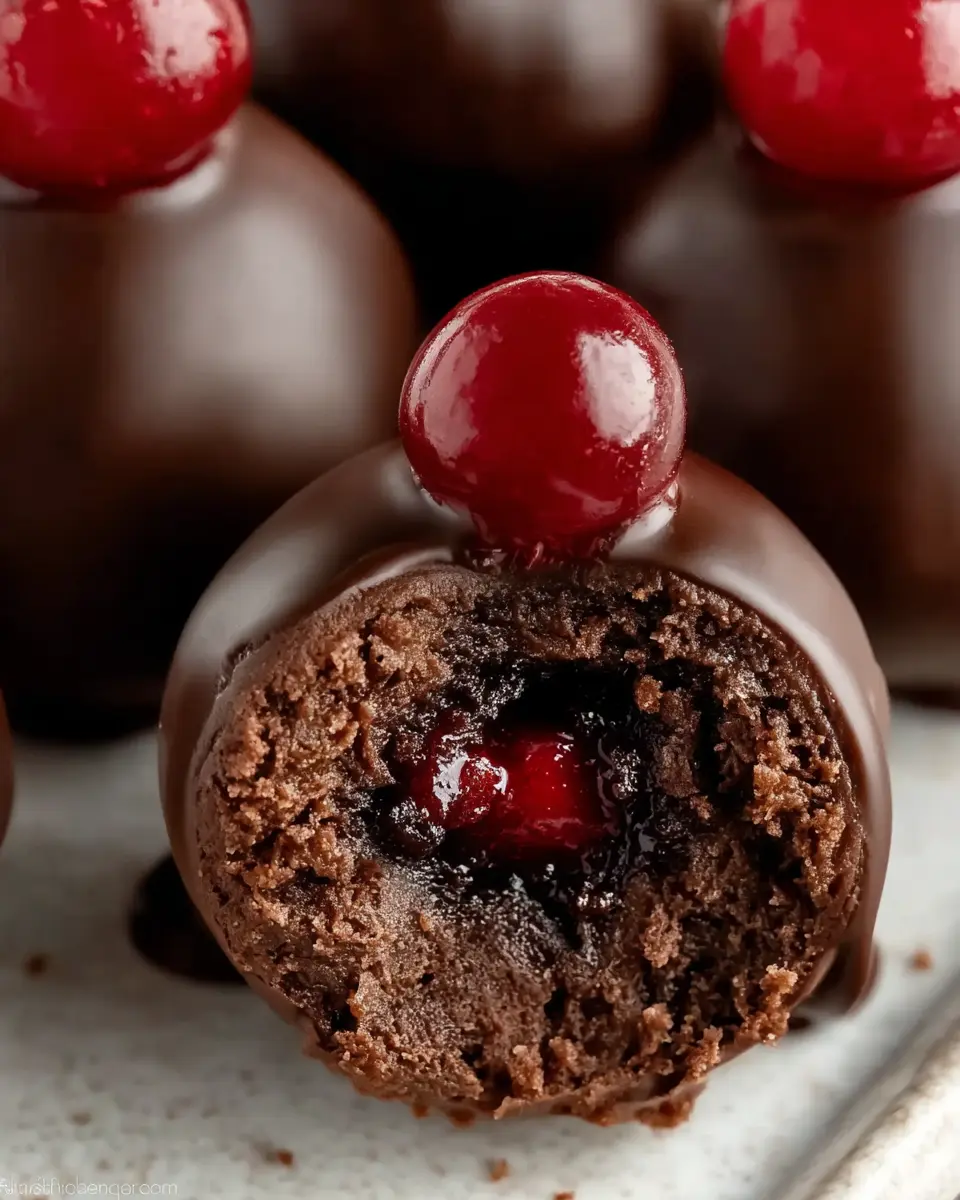
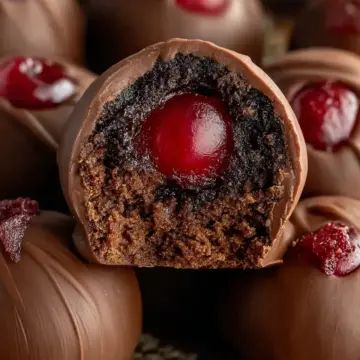
When you're in the mood for something sweet, you might think to grab a quick snack from your favorite fast-food joint. However, these chocolate covered cherry brownie bombs are a delightful home-baked alternative that can satisfy your cravings without ever leaving the house. Just imagine sinking your teeth into a rich, fudgy brownie enveloping a juicy cherry, all wrapped in a luscious chocolate coating.
Making these treats is not only an exciting way to spend your time in the kitchen but also a creative outlet. You might find that preparing them becomes a fun weekend project! If you’re curious about how desserts can bridge the gap between indulgence and joy, check out the National Confectioners Association for inspiration and stats about sweet treats and emotional well-being.
Perfect for parties or cozy nights in, these brownie bombs are easy to make and even easier to share. Plus, they pack a surprising flavor punch that will leave your friends and family begging for the recipe. So, why settle for a fast-food dessert when you can whip up these chocolate covered cherry brownie bombs in the comfort of your kitchen? Let’s dive right into this delightful recipe!
Ingredients for Chocolate Covered Cherry Brownie Bombs
Essential ingredients for brownie bombs
Creating these delectable chocolate covered cherry brownie bombs starts with the perfect base. Here’s what you’ll need:
- 1 box of brownie mix: Use your favorite brand and the ingredients listed on the box (typically eggs, oil, and water).
- ¾ cup chocolate frosting: This adds that creamy texture that binds everything together.
- 15 oz almond bark: Melted, this magical coating gives a delightful crunch. Just follow the package instructions for the perfect melt.
- 1 can of cherry pie filling or maraschino cherries: Cherries are the heart of this recipe, offering a juicy surprise inside every bite!
Optional ingredients for customization
While the basic recipe is fantastic as is, don’t hesitate to get creative! Consider adding:
- Nuts: Chopped walnuts or pecans can add a lovely crunch and flavor.
- Flavored chocolate: Opt for colored candy melts or flavored chocolates for a fun twist.
- Sprinkles: They’re an easy way to dress up your brownie bombs for special occasions.
Explore variations to make these appealing to your own taste! After all, who doesn’t love a little customization in their dessert? For more topping ideas, check out this guide on baking basics.
Step-by-step preparation for Chocolate Covered Cherry Brownie Bombs
Creating Chocolate Covered Cherry Brownie Bombs is a fun and indulgent way to impress friends and family. This guide will walk you through each step to ensure success in every bite.
Bake the brownies
Start by following the instructions on your brownie mix box, using the required ingredients like eggs, oil, and water. Ensure that you don’t overcook them; the goal is a soft, fudgy texture that will easily crumble later. Once baked, allow the brownies to cool completely—this is essential as warm brownies can become too mushy. For perfect baking tips, you might want to check out this resource from King Arthur Baking.
Crumble and mix with frosting
Once the brownies are cool, it’s time to crumble them. Use your hands or a fork to break them into small bits, then transfer to a large mixing bowl. Add about ¾ cup of chocolate frosting. If you've made cake pops before, you'll want a similar consistency—something that holds together well without being overly sticky. If it feels too dry, you can always add a touch more frosting. Trust me, getting this texture right is key for your chocolate covered cherry brownie bombs to hold their shape.
Form brownie bombs with cherries
Now comes the fun part! Take about 1½ tablespoons of the brownie-frosting mixture (a cookie scoop is your best friend here). Shape it into a ball and create a small indentation in the center. This is where the magic happens—place a cherry (from your canned cherry pie filling or maraschino cherries) into the hole. Carefully fold the brownie mixture around the cherry to encase it completely. Make sure it’s sealed tight to avoid any leaks during the chocolate coating process.
Freeze the brownie bombs
Once all your brownie bombs are formed, it’s time to chill them in the freezer for about 20 minutes. This step is crucial as it allows the brownie bombs to firm up, making them easier to dip later. While you wait, it's a great time to reflect on how delicious these Chocolate Covered Cherry Brownie Bombs will be!
Dip in melted almond bark
Now for the grand finale! Melt the almond bark as per the package instructions, ensuring it’s smooth and glossy. Working with one brownie bomb at a time, immerse it in the melted bark, then gently pull it out and tap to remove any excess chocolate. Place each bomb on a wax paper-lined tray and let them set completely. Feel free to get creative—consider adding colorful sprinkles or drizzling more melted chocolate on top for an extra touch of flair!
By following these steps, you’ll create delightful bites everyone will love. So what are you waiting for? Grab your ingredients and let’s turn those brownies into Chocolate Covered Cherry Brownie Bombs!
Variations on Chocolate Covered Cherry Brownie Bombs
Brownie Bombs with Different Fruits
Why stop at cherries? You can easily swap in other fruits for a fun twist on these chocolate covered cherry brownie bombs. Consider using raspberries, strawberries, or even diced peaches for a fresh alternative. Each fruit brings its own unique flavor profile that can elevate your treats. Imagine the burst of tartness from raspberries or the sweetness of strawberries! Just make sure to adjust the level of sweetness in your brownie mixture accordingly.
Gluten-Free Brownie Bomb Options
For those following a gluten-free diet, it’s easier than you might think to enjoy these chocolate covered cherry brownie bombs. Simply choose a gluten-free brownie mix, available at most grocery stores. You can also create your own from scratch using gluten-free flour blends. This way, everyone can indulge in these delectable bites without sacrificing taste or texture. Want to learn more about gluten-free baking? Check out resources from the Gluten Intolerance Group.
Experimenting with these variations can make your brownie bombs a hit at any gathering!
Cooking tips and notes for Chocolate Covered Cherry Brownie Bombs
Tips for achieving the perfect texture
When making chocolate covered cherry brownie bombs, aim for a moist yet firm brownie mixture. Start by crumbling cooled brownies finely, adding just enough chocolate frosting until the mixture holds together without being overly sticky. If you’ve rolled cake pops before, you want a similar consistency! Want a little secret? Keep your hands slightly damp while rolling; it makes shaping easier and prevents sticking.
Storing and freezing tips for brownie bombs
To keep your brownie bombs fresh, store them in an airtight container in the refrigerator for up to a week. If you’re looking to get ahead, flash freeze them on a tray for an hour. Once firm, transfer them to a resealable bag with parchment paper between layers for longer storage. They should last a month in the freezer! For more tips on freezing baked goods, check out this guide from the USDA.
Serving Suggestions for Chocolate Covered Cherry Brownie Bombs
Creative Presentation Ideas
When serving your chocolate covered cherry brownie bombs, presentation matters! Try placing them in a colorful cupcake liner and arranging them on a decorative plate. You could also drizzle some extra melted chocolate on top for a gourmet touch. Consider garnishing with a sprig of mint or a dusting of powdered sugar to elevate the visual appeal. Using a tiered dessert stand not only adds height but also makes for a stunning centerpiece at your next gathering!
Pairing Suggestions for Brownie Bombs
Enhance your experience by pairing these chocolate covered cherry brownie bombs with delicious accompaniments. A scoop of vanilla ice cream brings a delightful creaminess to balance the rich chocolate. For a zesty contrast, serve them with fresh fruit like raspberries or strawberries. Alternatively, a steaming cup of coffee or herbal tea makes for a cozy pairing. Want a twist? Try them with a glass of sparkling water flavored with lemon or lime for a refreshing burst!
For more creative dessert ideas, check out resources like Epicurious or Bon Appétit to diversify your dessert repertoire!
Time Breakdown for Chocolate Covered Cherry Brownie Bombs
When whipping up these delectable chocolate covered cherry brownie bombs, it's always helpful to know how much time you'll need to set aside. Here's a quick time breakdown to keep your baking experience smooth and enjoyable!
Preparation Time
Get ready to roll! The preparation time for these chocolatey delights is about 30 minutes. This includes baking the brownies, cooling them, and mixing them with the frosting.
Freezing Time
You'll want to let your chocolate covered cherry brownie bombs chill for 20 minutes in the freezer. This step is essential for helping the bombs hold their shape before the chocolate coating.
Total Time
In total, you're looking at around 50 minutes from start to finish. Perfect for an afternoon baking session that results in 24 heavenly brownie bombs!
If you're interested in exploring more about chocolate desserts, check out Saveur's guide to chocolate desserts for inspiration.
Embrace the sweetness and create a delight your friends and family will adore!
Nutritional Facts for Chocolate Covered Cherry Brownie Bombs
When indulging in Chocolate Covered Cherry Brownie Bombs, it's good to know what you’re treating yourself to. Here's a quick breakdown of their nutritional value:
Calories
Each delicious brownie bomb packs in approximately 150 calories. It's a delightful treat that feels indulgent without completely derailing your day!
Sugar Content
These sweet bites contain around 12 grams of sugar each. While they satisfy your sweet tooth, it's wise to enjoy them as an occasional treat rather than daily indulgence.
Protein
You’ll find about 2 grams of protein per brownie bomb. Pairing them with a balanced meal can help create a more rounded intake of nutrients throughout your day.
For more insights on nutritional choices, check out the USDA Dietary Guidelines or visit ChooseMyPlate.gov for helpful tips! It's always essential to understand what fuels your body, especially when you’re enjoying something delicious like our Chocolate Covered Cherry Brownie Bombs.
FAQs about Chocolate Covered Cherry Brownie Bombs
Can I use fresh cherries instead of pie filling?
Absolutely! While cherry pie filling is delicious and saves time, using fresh cherries can add a delightful twist. Just be mindful that fresh cherries can release more juice, which might affect the consistency of your chocolate covered cherry brownie bombs. If you opt for fresh, consider patting them dry before wrapping them in brownie mix.
What's the best way to store brownie bombs?
To keep your brownie bombs fresh and tasty, store them in an airtight container in the refrigerator. Place parchment paper between layers to prevent them from sticking. They really shine when chilled, as the chocolate coating sets beautifully!
How long do brownie bombs last?
When properly stored in the refrigerator, your chocolate covered cherry brownie bombs can last for about a week. They might be safe to eat after that, but the flavors could diminish. If you're looking to keep them for longer, consider freezing them following the flash-freezing method mentioned earlier. Enjoy these indulgent treats while they’re fresh for the best experience!
Conclusion on Chocolate Covered Cherry Brownie Bombs
In summary, Chocolate Covered Cherry Brownie Bombs are a delightful treat that combines the rich flavor of brownies with the sweetness of cherries. Perfect for gatherings or a special dessert, these treats are simple to make and unforgettable in taste. Treat yourself or impress friends—either way, you’ll be glad you did!
For more tasty ideas, explore this dessert collection or check out tips on baking.
Chocolate Covered Cherry Brownie Bombs
Equipment
- cookie scoop
- baking sheet
- mixing bowl
- Microwave-safe Bowl
Ingredients
- 1 box brownie mix with ingredients to make them
- ¾ cup chocolate frosting
- 15 oz almond bark melted according to package instructions
- 1 can cherry pie filling or maraschino cherries
Instructions
- Bake the brownies as directed and let cool completely. Do not overcook the brownies.
- Crumble the made brownies and mix in about ¾ a cup of chocolate frosting.
- Form a ball with about 1 ½ tablespoon of brownie frosting mixture and make a hole in the middle for the cherry.
- Fold the brownie ball over the cherry or top with more brownie/frosting mixture.
- Freeze the brownie bombs for about 20 minutes.
- Melt the almond bark while the bombs are freezing.
- Coat each bomb in melted almond bark and tap off excess chocolate.
- Place on wax paper and let dry completely.


Leave a Reply