
Introduction to Black Velvet Cake with Black Buttercream
What is Black Velvet Cake and Why is it Special?
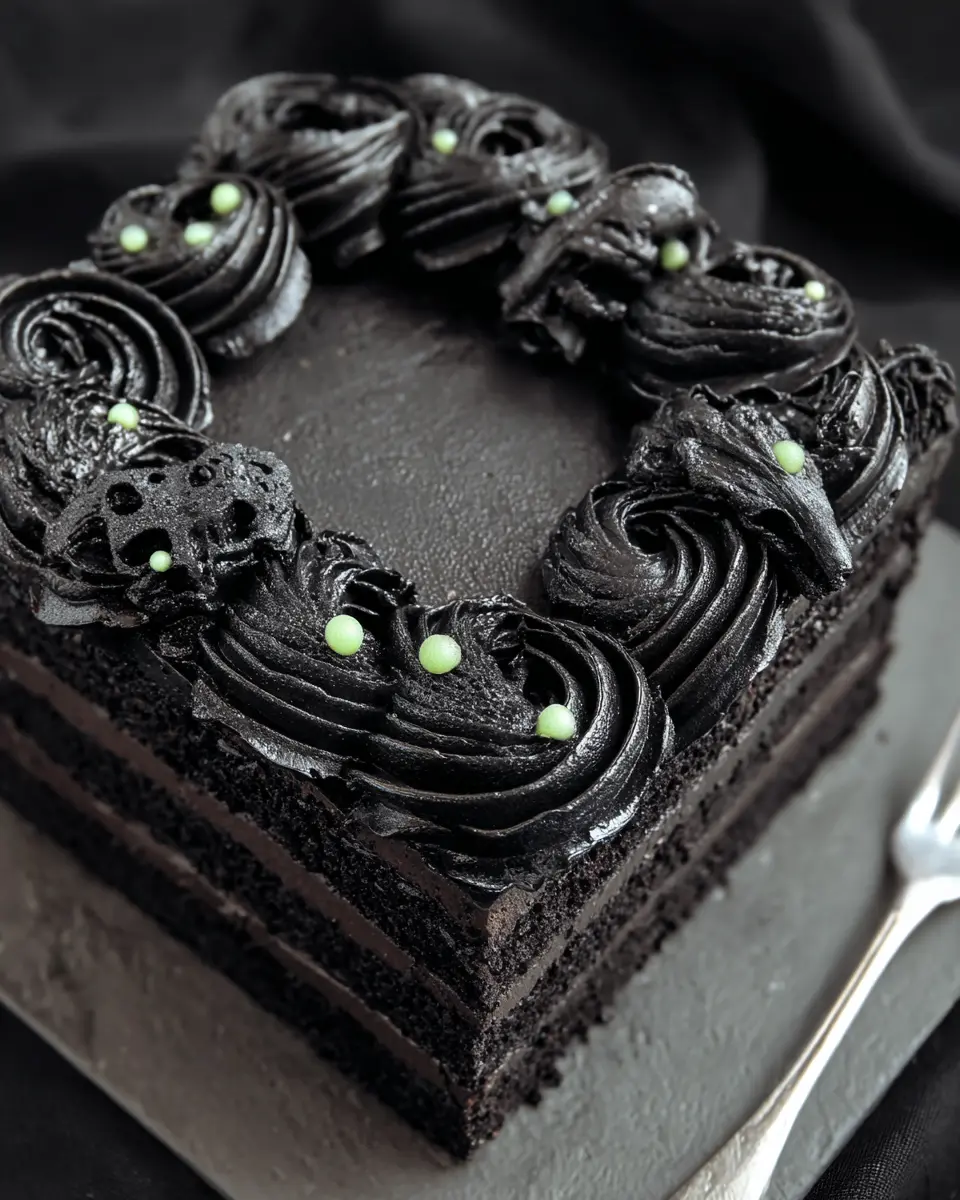
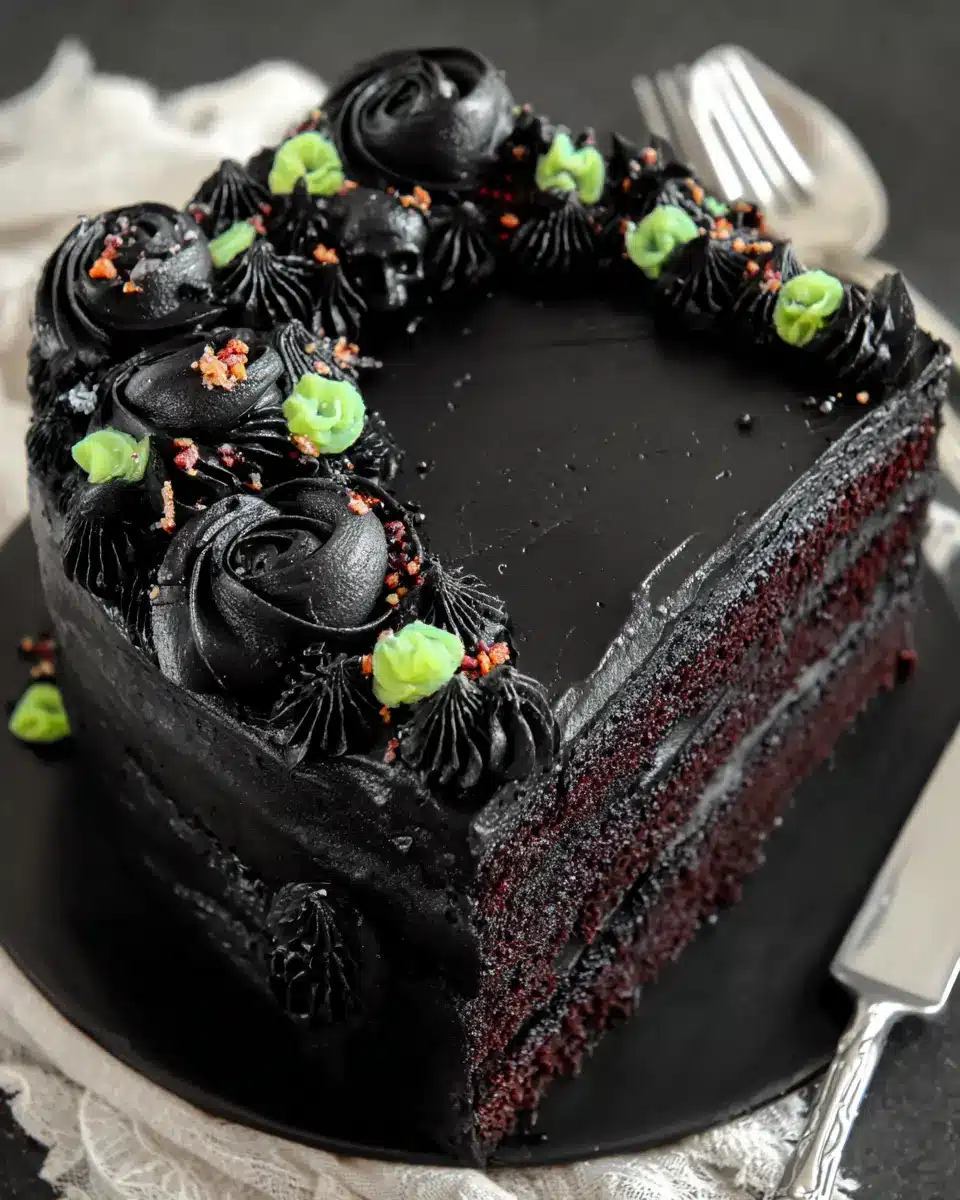
Have you ever heard of a cake that pairs elegance with a hint of mystery? Enter black velvet cake with black buttercream! This delicious creation is a twist on the traditional velvet cake, featuring a rich and dark color that captures attention and excites the palate. With a unique blend of black cocoa powder and a moist texture, this cake offers a delightful contrast between its dark appearance and sweet, creamy flavor.
This cake isn't just about looks; it delivers on taste as well. The combination of buttermilk and a touch of instant coffee in the batter adds depth, while the velvety black buttercream frosting elevates it to show-stopping status. Perfect for Halloween or any spirited celebration, this cake transforms any gathering into a special event.
If you’re looking for cake inspiration, the richness of black velvet cake will surely impress your guests. It’s an exceptional dessert that invites conversation—after all, who wouldn’t want to know the secret behind its striking hue? So, are you ready to bake and create your own captivating masterpiece? Let's dive into the recipe!
Ingredients for Black Velvet Cake with Black Buttercream
Creating the perfect black velvet cake with black buttercream is all about using quality ingredients that come together beautifully. Here's a breakdown of what you will need for each component.
Ingredients for the Cake Batter
- 265 grams all-purpose flour
- 180 grams caster sugar
- 120 grams light brown sugar
- 80 grams black cocoa powder
- 1 teaspoon baking soda
- 1 ½ teaspoons baking powder
- ½ teaspoon salt
- 120 ml vegetable oil
- 2 teaspoons vanilla extract
- 240 ml buttermilk
- 240 ml hot water
- 1 tablespoon instant coffee
- 2 large eggs
Ingredients for the Black Chocolate Buttercream
- 300 grams unsalted butter
- 400 grams icing sugar
- 75 grams black cocoa powder
- ½ teaspoon milk (for adjusting consistency)
- 1 ½ teaspoons vanilla extract
- A pinch of salt
Optional Decorating Ingredients
- Fondant
- Edible tints (I like using apple green and matte black)
- Halloween-themed sprinkles
Feel free to personalize your cake with these optional decorations! They’re not just fun, but they also add that extra touch to make your black velvet cake with black buttercream stand out during spooky celebrations. Plus, the taste? Absolutely delightful!
Step-by-step Preparation of Black Velvet Cake
Creating a showstopping black velvet cake with black buttercream is surprisingly simple, and I’m here to guide you through every step of the process. With just a little patience and excitement for the final payoff, you’ll have a stunning cake that is perfect for any spooky celebration. Let’s dive in!
Prepare the Cake Batter
First things first, you want to ensure that your oven is preheated to 160℃ Fan / 325℉. While that's warming up, line two 7-inch square baking pans with parchment paper. This will help your cake layers slide out easily once baked.
Next, in a jug, combine instant coffee with hot water and stir until dissolved. Add in your black cocoa powder and set this aside to cool. In a stand mixer, sift together the all-purpose flour, baking soda, baking powder, and salt. Add in the caster sugar and light brown sugar, mixing for about 30 seconds on medium-low speed.
Create a well in the center and add your eggs, vegetable oil, vanilla extract, and buttermilk. Mix until you have a smooth batter, and then slowly stir in the cooled cocoa-coffee mixture. Your batter should be silky and runny—perfect for an indulgent cake!
Bake the Cake
Once your batter is ready, distribute it evenly between the two prepared pans, aiming for about 650 grams each. Pop those into your preheated oven and let them bake for 34 – 36 minutes, or until a skewer inserted into the center comes out clean. After baking, let them cool in the pans for 10 to 15 minutes before transferring them to a wire rack to cool completely.
Prepare the Buttercream Frosting
While your cake cools, it's time to whip up the black chocolate buttercream frosting. Start by mixing the salt and icing sugar in a bowl and setting it aside. In a separate mixing bowl, beat the unsalted butter until it's fluffy. Gradually incorporate the icing sugar and black cocoa powder, beating until light and pale.
Don’t forget to mix in a bit of vanilla extract for that extra flavor! Adjust the consistency with a touch of milk if needed. Once ready, cover it and set it aside until your cake layers are cool.
Crumb Coat the Cake
Place a non-slip mat on your turntable, top it with a cake board, and frost a bit in the center to secure the cake. Level the first layer by trimming any dome with a serrated knife. Add some frosting to the top of this layer and place the second layer upside down on top. Repeat the frosting process and use a dough scraper to create sharp edges. Pop it in the fridge for about an hour to set.
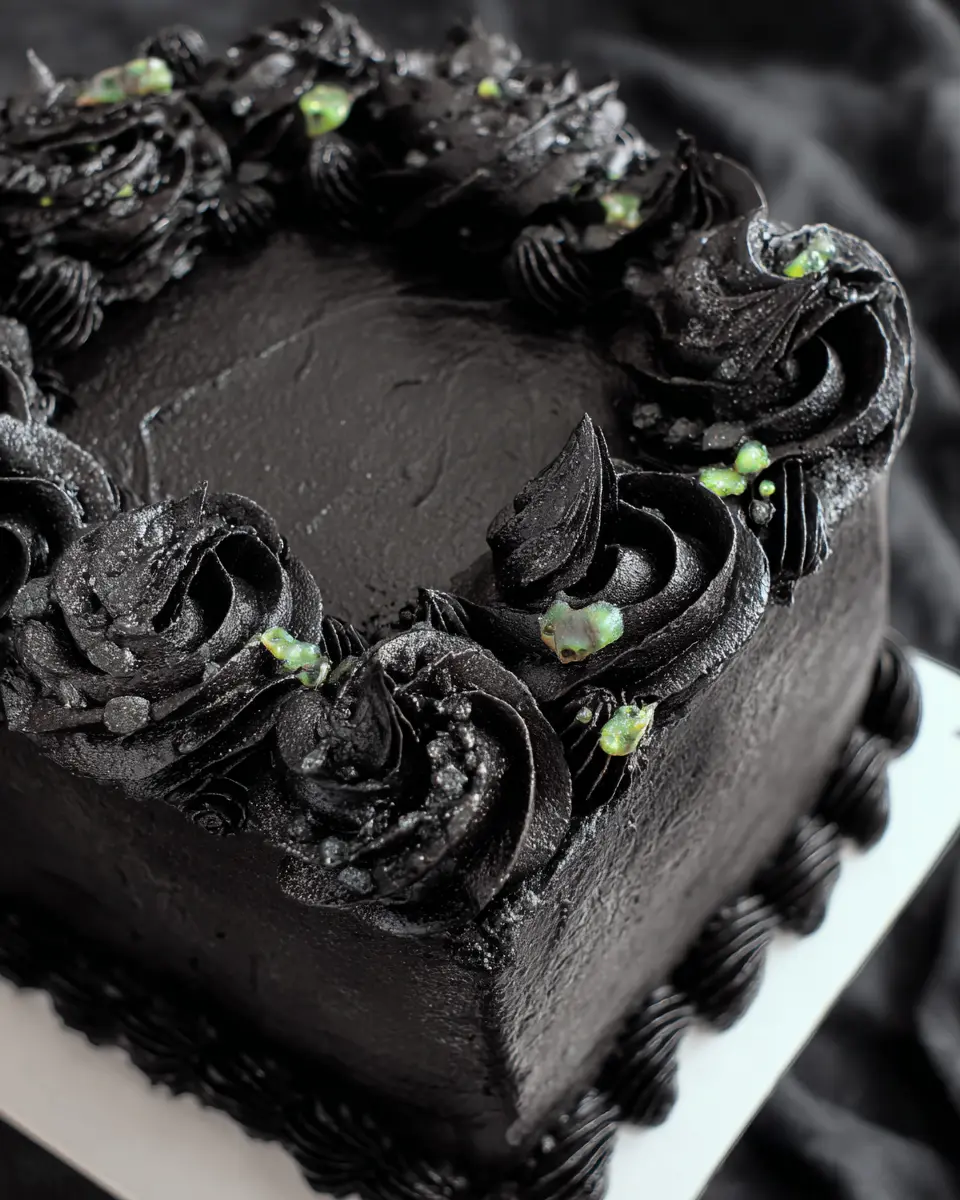
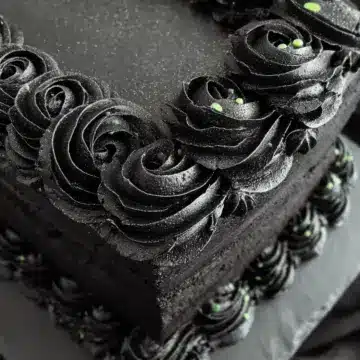
Final Coat and Smooth the Cake
After chilling, load the remaining frosting into a piping bag and apply a medium layer on top of your cake, smoothing it out. For the sides, use a dough scraper held at a 45-degree angle to achieve a smooth finish. Once finished, give the top one last gentle smoothing with your offset spatula, and chill again for about 60 minutes to firm everything up.
And there you have it—each step is designed to keep your black velvet cake with black buttercream deliciously indulgent and visually stunning! Enjoy the accolades when you serve this beauty at your next event!
Variations on Black Velvet Cake
Alternative Flavors for the Cake
If you’re looking to mix it up, why not experiment with your black velvet cake with black buttercream? Here are some fun alternatives:
- Chocolate Espresso: Elevate your cake with rich espresso powder for a coffee-flavored twist that's perfect for any caffeine lover.
- Zesty Orange: Add a touch of orange zest to your batter for a refreshing citrus note that complements the chocolate beautifully.
- Mint Chocolate: Incorporate peppermint extract for a minty chocolate delight. Trust me, your friends will rave about it!
Creative Decorating Ideas
When it comes to decorating, let your imagination run wild. Consider these playful touches:
- Fondant Accents: Use fondant to create spooky figures or Halloween shapes that stand out against the dark frosting.
- Sprinkles & Edible Glitter: A sprinkle of edible glitter can turn your cake into a glittery masterpiece—perfect for celebrations!
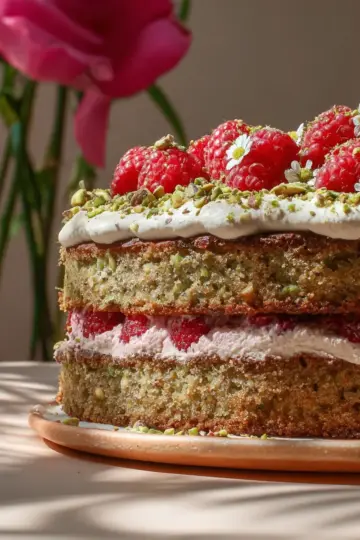
- Garnish Options: Consider garnishing with fresh fruits or even some whipped cream to add a delightful contrast to the dark elegance.
Feel free to customize your black velvet cake adventure and make it truly yours! What flavor or decor would you try first?
Cooking Tips and Notes for Black Velvet Cake
Ingredient Tips
When making black velvet cake with black buttercream, the quality of your ingredients will shine through. Opt for high-quality black cocoa powder for that rich, deep flavor. Using buttermilk instead of regular milk adds moisture and tang, which balances the sweetness of the cake. Don’t forget to bring your eggs and buttermilk to room temperature for better mixing.
Mixing and Baking Tips
Mixing should be done gently to maintain the cake's elevation. Avoid overmixing, as it can lead to a dense cake. Ensure your oven is preheated for even baking; an oven thermometer can help confirm the temperature. Finally, allow the cakes to cool completely before frosting to prevent melting your black buttercream. Happy baking!
Serving Suggestions for Black Velvet Cake
Pairing Ideas
When you indulge in black velvet cake with black buttercream, consider pairing it with contrasting flavors to enhance its richness. A scoop of creamy vanilla ice cream or a dollop of tangy raspberry coulis works beautifully. For a non-sweet, savory twist, serve it alongside a robust cup of coffee or a spiced chai latte. If you're looking for a unique twist, try complementing it with slices of fresh citrus—think orange or grapefruit—to balance the sweetness.
Presentation Tips
To showcase your black velvet cake, opt for a simple yet elegant display. A white cake stand makes the black layers pop beautifully, while edible decorations like vibrant Halloween sprinkles or fondant accents add a playful touch. Using seasonal accessories, such as mini pumpkin figurines or dark, moody florals, can elevate the overall look. Don't forget to neatly slice each piece, revealing the stunning contrast between the cake and frosting for a delightful serving experience!
Time Breakdown for Black Velvet Cake
Preparation Time
Getting everything ready for the black velvet cake with black buttercream takes about 40 minutes. This includes measuring out ingredients and prepping your pans.
Cooking Time
The baking part will take around 35 minutes. Ensure your oven is preheated and ready for that rich, decadent flavor to develop.
Total Time
From start to enjoyment, expect about 2 hours and 45 minutes. It’s a little commitment for a cake that promises to steal the show at any gathering!
For more details on creating this stunning cake, check out this cooking guide!
Nutritional Facts for Black Velvet Cake
When it comes to celebrating Halloween with a delicious twist, the Black Velvet Cake with Black Buttercream doesn’t just look stunning—it’s also packed with flavor. Here's a quick glance at the nutritional facts:
- Calories: Approximately 425 kcal per serving
- Sugar Content: 33 grams, making it a sweet treat perfect for indulging
- Protein: 5 grams to help balance out this delightful dessert
For more detailed insights into the ingredients and their health implications, check out this resource from Healthline. It’s always fun to enjoy our favorite desserts while staying informed about nutritional content!
FAQ about Black Velvet Cake
What is the difference between black velvet cake and red velvet cake?
Black velvet cake and red velvet cake both feature a stunning color contrast, but they differ in flavor and ingredients. While red velvet is traditionally made with buttermilk and cocoa powder, giving it a mild chocolate flavor and a crimson hue, black velvet relies on rich black cocoa powder for its deeper chocolate flavor and dark appearance. The texture is also notably different; black velvet cakes tend to be denser and richer, making them perfect for decadent desserts!
Can I use regular cocoa powder instead of black cocoa?
Absolutely! If you don't have black cocoa powder on hand, you can substitute with regular cocoa powder. However, your cake won't achieve that deep, dark color that defines black velvet cake. To mimic some richness, consider using a combination of regular cocoa and a touch of more processed dark cocoa.
How do I store black velvet cake?
To keep your black velvet cake with black buttercream fresh, store it in an airtight container at room temperature for up to three days. If you want to extend its shelf life, refrigerate it, but be aware that refrigeration may slightly alter the texture. When ready to enjoy, let it sit at room temperature for 30 minutes before serving to reclaim its decadent softness.
Conclusion on Black Velvet Cake with Black Buttercream
The black velvet cake with black buttercream is not just a dessert; it's a captivating centerpiece for any gathering. With its rich flavors and stunning appearance, this cake promises to enchant your guests long after the last slice is served. Embrace the spirit of creativity and enjoy every delicious moment!
Black Velvet Cake with Black Buttercream
Equipment
- Stand Mixer
- baking pans
- offset spatula
- Dough scraper
- Turntable
- Piping Bags
Ingredients
Cake Batter
- 265 grams all purpose flour
- 180 grams caster sugar
- 120 grams light brown sugar
- 80 grams black cocoa powder See link for details
- 1 teaspoon baking soda
- 1.5 teaspoons baking powder
- 0.5 teaspoon salt
- 120 ml vegetable oil
- 2 teaspoons vanilla extract See link for details
- 240 ml buttermilk
- 240 ml hot water
- 1 tablespoon instant coffee
- 2 large eggs
Black chocolate buttercream frosting
- 300 grams unsalted butter
- 400 grams icing sugar
- 75 grams black cocoa powder See link for details
- 0.5 teaspoon milk Depends on consistency
- 1.5 teaspoons vanilla extract See link for details
- A pinch salt
Decoration (optional)
- Fondant
- Edible tints (apple green and matt black)
- Halloween sprinkles
Instructions
Prepare the Cake Batter
- Line two 7-inch square baking pans with parchment paper. Preheat the oven to 160℃ Fan / 325℉.
- Combine instant coffee and hot water in a jug and stir until dissolved. Add in black cocoa powder and mix well. Set aside to cool.
- Sift in all purpose flour, baking soda and baking powder in the mixing bowl of a stand mixer. Remove the sieve, add in caster sugar, light brown sugar and salt.
- Mix for 30 seconds on medium low speed with the paddle attachment of a stand mixer.
- Roughly make a well in the centre of the mixed dry ingredients with a silicone spatula, add in eggs, vegetable oil, vanilla extract and buttermilk.
- Mix well on medium speed until it turns a smooth batter. Scrape the mixing bowl, if needed.
- Lower the speed to low, slowly add in the cooled black cocoa powder-coffee mixture. Continue to beat until everything is fully incorporated. The batter should be silky and runny.
- Evenly distribute the batter into two prepared pans. Each pan with approximately 650 grams of batter.
- Bake in the preheated oven for about 34 – 36 minutes or until an inserted skewer comes out clean.
- Remove the pans from the oven and let the cakes sit in the pans for 10 to 15 minutes. Carefully un-mould the cakes and cool them completely on a wire rack.
Prepare the Buttercream Frosting
- Mix the salt and icing sugar and set aside.
- Beat the unsalted butter in a mixing bowl with a paddle attachment on medium speed until fluffy.
- Gradually add in the icing sugar in a few additions to prevent the ingredients from flying everywhere.
- Continue to beat until light and pale.
- Add in the black cocoa powder in a few additions, you can roughly mix it in with a silicone spatula before turning the mixer on, to prevent it from flying.
- Once all the black cocoa powder is added, add in vanilla extract and mix well.
- Continue to beat the buttercream until everything is well mixed. Add milk to adjust to a spreadable consistency. Cover with a lid and set aside until needed.
Crumb Coat the Cake
- Place a non-slip mat on a turntable with a cake board on top. Spread a little amount of frosting in the centre of the cake board to keep the cake in place. Place a serrated knife on the side of the cake and cut while turning the turntable to trim off any dome to level it off. Once done, repeat the same process for the second layer.
- Spread a small amount of frosting in the centre of the cake board to stick the cake if needed. Add the frosting to the top of the first layer using an ice cream scoop to control the portion size. Use an offset spatula to spread the frosting across the cake as evenly as possible.
- Place the second layered cake upside down on top of the frosted layer. Scoop the same amount of frosting on top. Use the offset spatula to spread it across the cake, as evenly as possible. Gradually push/spread the excess frosting to the sides to fill any gaps or holes.
- Use a dough scraper to sweep along one side with a light touch. Slightly pull the frosting away from the side to create the sharp edge. Scrape off the frosting from the dough scraper every time before sweeping the side. Repeat the same process until the remaining sides are done.
- Once done, place the cake in the refrigerator to chill for about an hour to set.
Final Coat
- Load the remaining frosting into a piping bag. Twist the end and secure with an icing bag tie.
- Once the frosting is set, place the chilled frosted cake on the turntable with a non-slip mat underneath.
- Cut a medium hole on the piping bag. Pipe a layer of frosting on top of the chilled cake. Gradually spread it into an even layer using an offset spatula. Push any excess toward the sides and smooth out the frosting.
- Take a dough scraper and hold it at a 45-degree angle to the side of the cake, with very light contact. Allow it to lightly brush the side of the cake. Then rotate the turntable 90 degrees and repeat the same process. If there are any holes or imperfections, spread a little more and smooth again with the dough scraper.
- To smooth out the top, take the offset spatula and glide over the top of the cake, starting from the edge and moving toward the centre.
- Once done, chill the cake for around 60 minutes to set.
Decorate the Cake
- Knead the fondant for about 1 minute to soften it.
- Dust a small amount of icing sugar into the mould. Press firmly the fondant into the cavity of the skull mould. Trim off the excess with a spatula. Gently roll over the top to create a neat edge. Create as many fondant edible skulls as you want.
- Bend the mould slightly to remove the fondant skulls from the mould. Place them on a surface lightly dusted with icing sugar to prevent sticking.
- Dust the edible skulls with edible tints to make the skulls look more realistic and terrifying!
- For the cake borders, pipe as desired using two different piping nozzles. To easily switch between them without making a mess, place a piping nozzle in a separate piping bag.
- Add some Halloween sprinkles on top to elevate the presentation. Finally, position the fondant edible skulls as you desire.
- Enjoy a slice — absolutely delicious! Happy Halloween!
Leave a Reply