
Introduction to Rosemary and Roasted Garlic Artisan Bread
Baking your own bread can be a game-changer, especially for young professionals juggling busy schedules. Picture this: after a long day at work, you come home to the welcoming aroma of rosemary and roasted garlic artisan bread baking in your oven. Not only does it elevate your dinner table, but it also transforms your cooking experience into a more rewarding and fulfilling endeavor. The satisfaction of pulling a warm bread loaf out of the oven is unparalleled, and it's even more delightful knowing you made it from scratch.
Making homemade bread doesn’t always have to be time-consuming. This no-knead artisan bread recipe proves just that! With its effortless method and the chance to infuse mouthwatering flavors like garlic and herbs, it’s perfect for your midweek meals or weekend gatherings. Not to mention, baking your bread saves you money in the long run and allows for healthier options compared to store-bought varieties. If you’re curious about the health benefits of whole grains and homemade fare, sources like Healthline clarify how they can improve your diet.
So, why not take a step into the world of bread-making? Let’s dive into the details of crafting your very own rosemary and roasted garlic artisan bread!
Ingredients for Rosemary and Roasted Garlic Artisan Bread
When it comes to crafting the perfect Rosemary and Roasted Garlic Artisan Bread, having the right ingredients is key. Here’s a closer look at what you’ll need to create this deliciously fragrant loaf.
Essential ingredients for the dough
To create the base of your artisan bread, gather the following:
- Water: 1½ cups of room temperature water (ideal around 70°F/21°C) is crucial for activating the yeast.
- Active dry yeast: Just 1 teaspoon will help the dough rise beautifully.
- Flour: You’ll need 3 cups of bread or all-purpose flour for a chewy texture.
- Seasonings: Adding ½ teaspoon of dried oregano and 1 teaspoon of kosher or fine sea salt enhances flavor.
- Fresh herbs: Use 2 teaspoons of finely chopped rosemary for that signature taste.
- Roasted garlic: You’ll need one whole head of roasted garlic, which contributes a sweet, caramelized essence.
- Olive oil: 1 tablespoon of extra-virgin olive oil adds moisture and richness.
Roasted garlic preparation
Roasting garlic is super simple and transforms its sharp flavor into something delightful. Here’s how to do it:
- Preheat your oven to 400ºF (204ºC).
- Slice a head of garlic in half, drizzle the exposed cloves with extra-virgin olive oil, and season with coarse sea salt and freshly ground black pepper.
- Wrap this in foil and roast on a baking sheet for about 40 minutes. Once it cools, scoop out the cloves, and you’re ready to incorporate that lovely roasted garlic into your dough!
For more tips on roasting garlic, you can check out this guide.
By bringing together these essential ingredients, you're setting yourself up for a delightful baking experience filled with comforting aromas and mouthwatering flavors. Happy baking!
Step-by-step Preparation for Rosemary and Roasted Garlic Artisan Bread
Making rosemary and roasted garlic artisan bread might seem daunting at first, but with a little patience and some simple steps, you’ll be able to impress your friends and family with your baking skills. Let’s get started!
Roast the garlic to perfection
Roasting garlic is essential for creating that rich, sweet flavor that elevates your bread. To do this, simply slice a head of garlic in half horizontally. Drizzle the exposed cloves with extra-virgin olive oil and sprinkle with coarse sea salt and freshly ground black pepper. Wrap it in foil and roast it at 400°F (204°C) for about 40 minutes. You’ll know it’s ready when the cloves are soft and fragrant. Once cooled, squeeze the roasted cloves out of their skins and set them aside.
Prepare the dough with a no-knead method
The beauty of this artisan bread recipe lies in its no-knead method. In a bowl, combine 1½ cups of room temperature water with a teaspoon of active dry yeast, letting it sit for about 10-15 minutes until bubbly. Then, in a larger bowl, whisk together 3 cups of flour, ½ teaspoon of dried oregano, 1 teaspoon of salt, and 2 teaspoons of finely chopped rosemary. Pour in the yeast mixture along with your smashed roasted garlic and a tablespoon of olive oil. Use a rubber spatula to mix until just combined. The dough will look sticky and that’s perfectly normal!
The first rise—what to look for
Cover the bowl with a clean dish towel and place it in a warm space. This is where the magic happens! You’re aiming for the dough to double in size, which usually takes about 8-10 hours. Stay patient and try not to disturb it too much. If you’re curious, check out this guide on the baking process to understand why the first rise is so crucial.
Cold-proofing the dough for enhanced flavor
After the first rise, it’s time for a little cold-proofing. This step not only develops the flavor but also makes the dough easier to handle. Gently turn the dough out onto a floured surface, folding it in on itself a few times until it forms a ball. Place it seam-side up in a floured bowl, dust with flour, and cover it with plastic wrap. Pop it in the refrigerator overnight or up to 48 hours. Trust me, the wait is worth it!
Shaping and scoring the loaf
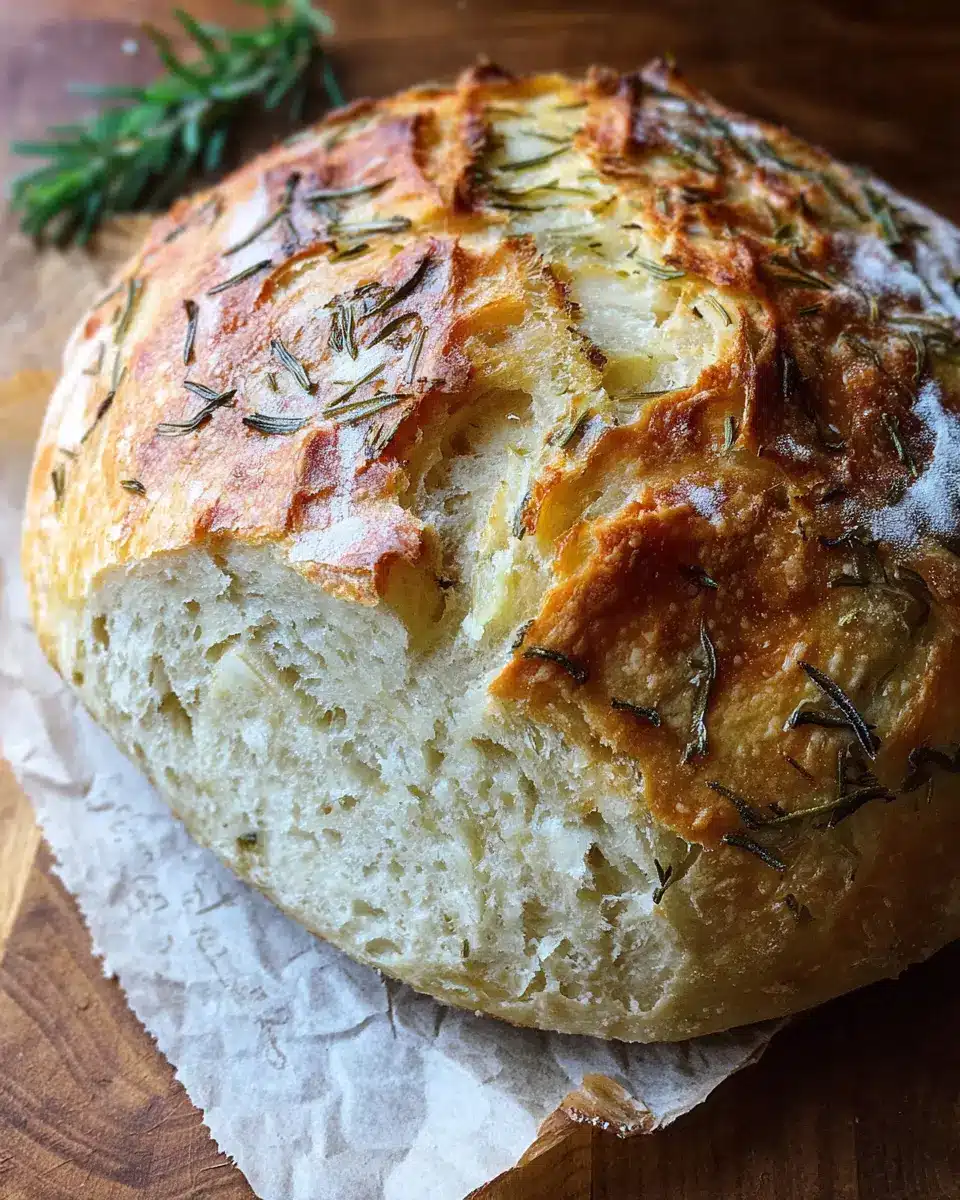
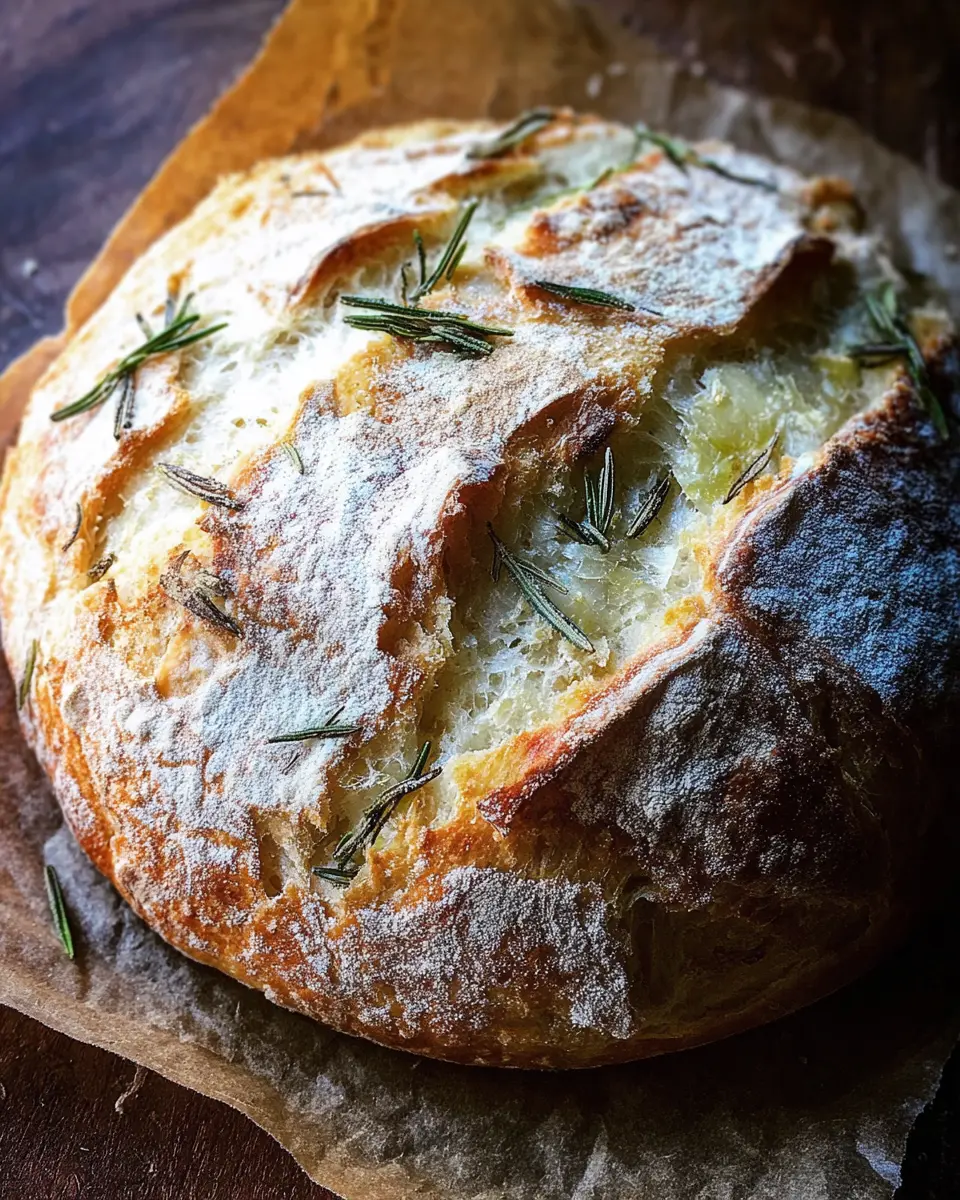
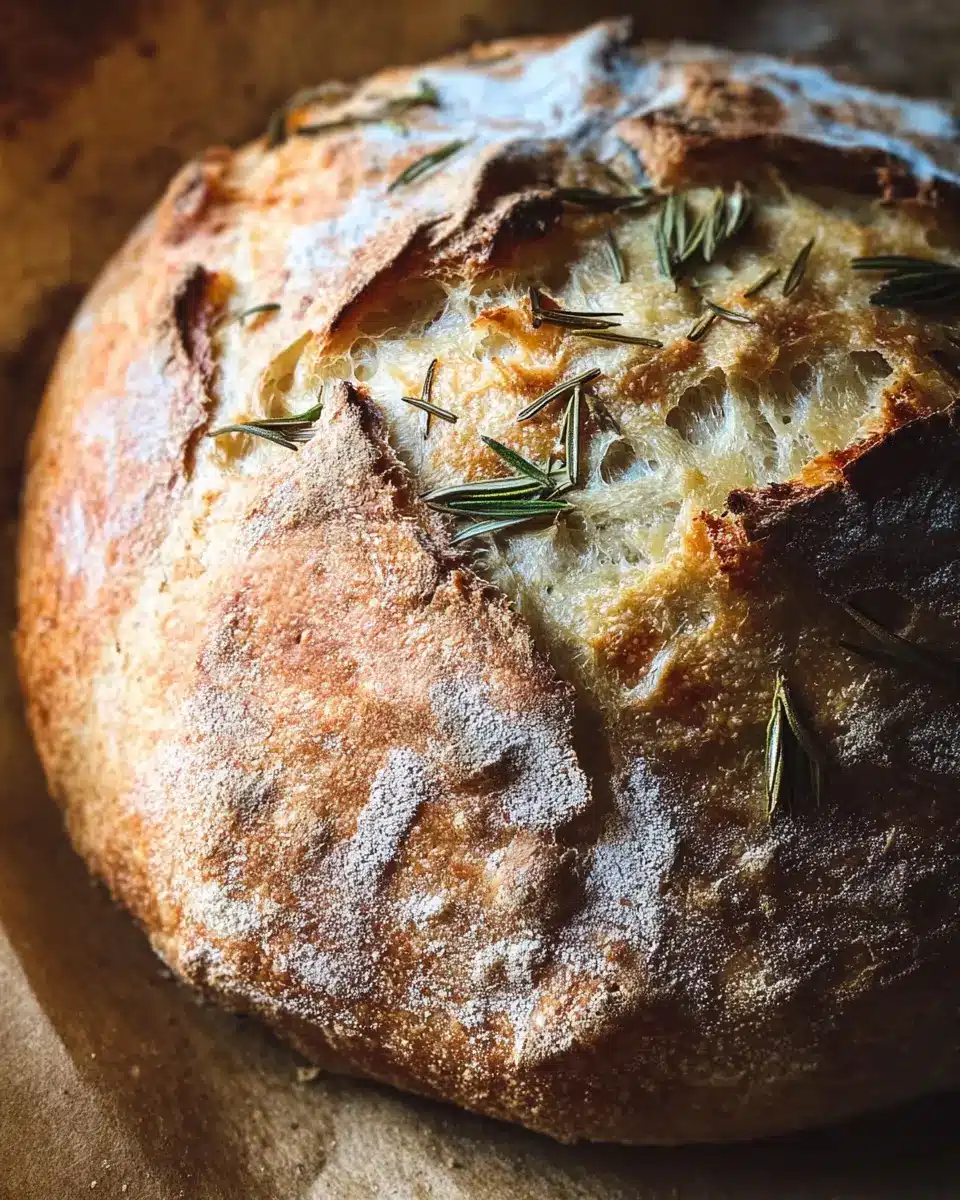
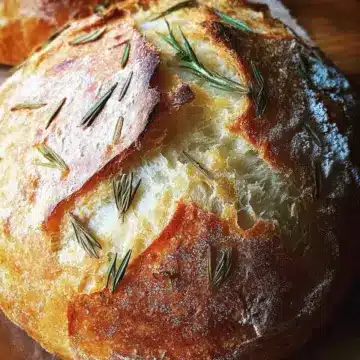
When you’re ready to bake, preheat your oven to 450°F (232°C) with your Dutch oven inside. Carefully take the dough out and turn it onto a lightly floured surface seam-side down. Shape it gently into a loaf, then score the top with a razor blade or sharp knife to create a pretty design. This scoring not only looks great but also helps the bread expand while baking.
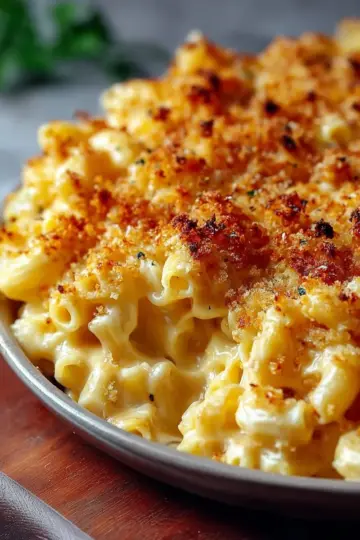
Baking in the Dutch oven for crusty goodness
Your Dutch oven is the secret to achieving that golden, crusty exterior. Carefully transfer the dough on parchment into the hot Dutch oven, cover, and bake for 30 minutes. Then, remove the lid and continue baking for another 15 minutes. You’ll know it’s done when it’s beautifully browned and sounds hollow when tapped on top.
Let your bread cool on a wire rack for up to an hour before slicing. Enjoy the amazing aroma filling your kitchen! Have you ever tried pairing your fresh bread with a homemade herb-infused oil? It’s a game-changer!
By following these steps, you’ll create a loaf of rosemary and roasted garlic artisan bread that’s sure to impress anyone. Happy baking!
Variations on Rosemary and Roasted Garlic Artisan Bread
Adding herbs and spices for a twist
While rosemary and roasted garlic artisan bread is a fragrant classic, experimenting with different herbs can elevate your loaf to new heights! Try adding fresh thyme for a subtle earthiness, or a pinch of dried chili flakes for a hint of heat. You could even incorporate spices like smoked paprika or za’atar, which will add unique flavor profiles and aromas that are both inviting and delightful. The versatility of the base recipe means that the only limit is your creativity. So go ahead, play around and find your perfect blend of flavors!
Cheese options to enhance the flavor
Adding cheese can take your artisan bread to the next level. Consider mixing in grated Parmesan or sharp cheddar for a savory twist. Alternatively, fold in crumbled feta or goat cheese for a tangy surprise. For a more decadent loaf, layer slices of your favorite cheese between the dough during the folding process, allowing it to melt beautifully as the bread bakes. Each cheese brings its own character, enhancing the overall flavor of your rosemary and roasted garlic artisan bread. The next time you bake, don’t shy away from these cheesy additions!
Cooking Tips and Notes for Rosemary and Roasted Garlic Artisan Bread
Common pitfalls and how to avoid them
When baking rosemary and roasted garlic artisan bread, many home bakers struggle with achieving the perfect rise. If your dough isn't doubling in size, check your yeast's expiration date and ensure your water is at the right temperature—too hot or cold can inhibit yeast activity. Also, be cautious about not over-flouring the dough during the shaping process; a sticky dough is easier to work with and yields a lighter loaf. Lastly, don’t skip the cold proofing; it enhances the flavor significantly!
Customizing the texture and taste
Feel free to personalize your artisan bread! Experiment by adding your favorite herbs or different types of roasted vegetables for added depth of flavor. If you prefer a crustier loaf, increase the baking time by a few minutes or try using a baking stone. Adjusting the hydration level by varying water amounts can also alter texture—more water equals an airier crumb. Just remember to keep the rosemary and roasted garlic as the stars of the show for that delightful aromatic punch!
For more tips on artisan baking, consider reading articles from King Arthur Baking or The Kitchn.
Serving Suggestions for Rosemary and Roasted Garlic Artisan Bread
Perfect Pairings for Your Artisan Bread
When it comes to enjoying your rosemary and roasted garlic artisan bread, the possibilities are endless! This fragrant loaf pairs beautifully with:
- Olive Oil and Balsamic Vinegar: A simple dip brings out the flavors, making it ideal for a starter at dinner.
- Turkey Bacon or Chicken Ham: Layer slices for a delightful sandwich that elevates lunches.
- Cheese: Try it with sharp cheddar or creamy goat cheese for a decadent afternoon snack.
- Soups and Stews: Serve alongside robust vegetable or bean soups to soak up those rich flavors.
Creative Ways to Enjoy Leftovers
Don’t let any leftover bread go to waste! Here are some fun ideas to repurpose your rosemary and roasted garlic artisan bread:
- Croutons: Cube and toast for a crunchy topping on salads or soups.
- Bread Pudding: Transform stale bread into a comforting dessert by soaking it in a mixture of eggs, milk, and spices.
- Garlic Toast: Slice, brush with olive oil, and crisp in the oven for a delectable side for pasta dishes.
Discovering new ways to enjoy this artisan bread is part of the fun! Whether it’s with a simple meal or a creative twist, savor every slice! For more serving ideas, check out this resource for further inspiration.
Time Breakdown for Rosemary and Roasted Garlic Artisan Bread
Understanding the timing involved in making your rosemary and roasted garlic artisan bread can set you up for success! Here’s a quick overview of what to expect:
Preparation Time
Plan for about 30 minutes to gather ingredients, roast your garlic, and mix the dough.
Rising Time
You’ll need around 8-10 hours for the dough to rise, giving it ample time to develop flavor and texture.
Baking Time
The baking itself will take roughly 45 minutes, including both covered and uncovered phases for a perfect crust.
Total Time
In total, you're looking at about 18 hours and 40 minutes from start to finish, most of which is passive waiting time!
With a little patience, this bread transforms from simple ingredients to a fragrant artisan loaf that’s perfect for sharing. Whether you’re honing your baking skills for a dinner party or simply treating yourself, following this timeline will help you achieve perfectly crafted bread. If you're curious about the science behind bread-making or want to read more about different types of bread, check out this guide on bread textures.
Now that you're familiar with the time breakdown, you'll feel more prepared to take on this delightful culinary adventure!
Nutritional Facts for Rosemary and Roasted Garlic Artisan Bread
Calories per slice
Each slice of this delicious rosemary and roasted garlic artisan bread contains approximately 120 calories. It's a hearty choice for any meal, offering a balanced source of energy to keep you fueled throughout the day.
Protein content
You can expect about 4 grams of protein in every slice. While not a powerhouse of protein, this addition makes your bread a nice complement to protein-rich toppings like turkey bacon or chicken ham.
Sodium levels
With around 200 mg of sodium per slice, this bread maintains a reasonable salt content. It's always wise to manage sodium intake, especially if you're watching your heart health. Enjoy it in moderation alongside fresh herbs and spreads for added flavor.
For more nutritional insights, check out resources such as the USDA Nutrition Database or the Mayo Clinic’s nutrition guidelines. Integrating artisan bread into a balanced diet means you can enjoy its unique flavors without compromising health!
FAQs about Rosemary and Roasted Garlic Artisan Bread
How do I make bread crustier?
To achieve that perfect crust on your rosemary and roasted garlic artisan bread, consider these tips:
- Preheat your Dutch oven: Placing the pot in a hot oven helps create steam when the dough is added, crucial for a crispy crust.
- Use steam: If you’re not using a Dutch oven, try placing a pan in the oven with water during baking to generate steam.
- Don’t skip the cold proof: Allowing your dough to rest in the refrigerator overnight not only enhances flavor but can also contribute to a crustier exterior.
Can I use regular garlic instead of roasted?
While using regular garlic could technically work, it wouldn’t deliver the same rich, mellow flavor that roasted garlic provides. Roasting caramelizes the natural sugars in garlic, creating a sweet, savory taste that complements the earthiness of rosemary beautifully.
Is it possible to make this bread without a Dutch oven?
Absolutely! If you don’t have a Dutch oven, you can bake the bread on a baking sheet. Just use a pan for steam (like a shallow dish with water) to help create that elusive crust. Your bread will still be delicious, though it may lack that distinctive shape and crust you’d get with a Dutch oven.
Conclusion on Rosemary and Roasted Garlic Artisan Bread
Indulging in homemade rosemary and roasted garlic artisan bread is a sensory experience you won’t want to miss. Its crusty exterior and soft, fragrant interior bring comfort and joy to any meal. Give this recipe a try, and elevate your bread-baking skills today! Savor each slice with your favorite soups or as a standalone treat!
Rosemary and Roasted Garlic Artisan Bread
Equipment
- Digital scale
- spatula
- Dough scraper
- 4 Qt mixing bowl
- parchment paper
- 3 Qt Dutch oven
Ingredients
Roasted Garlic
- 1 head garlic
- extra-virgin olive oil
- coarse sea salt
- freshly ground black pepper
Bread
- 1.5 cups water, room temperature (at or near 70°F/21°C)
- 1 teaspoon active dry yeast
- 3 cups bread or all-purpose flour plus more for dusting
- 0.5 teaspoon dried oregano
- 1 teaspoon kosher or fine sea salt
- 2 teaspoons finely chopped rosemary plus more to sprinkle across the top
- 1 whole head roasted garlic smashed
- 1 tablespoon extra-virgin olive oil
Instructions
Roasted Garlic Preparation
- Slice the garlic head in half. Drizzle the exposed cloves with olive oil and season with salt and pepper. Wrap in foil and roast on a baking sheet at 400ºF (204ºC) for 40 minutes. Let cool, remove cloves from their skins and set aside.
Bread Preparation
- When you're ready to bake, sprinkle the yeast over the water and let it sit for 10-15 minutes. In a large bowl, stir together flour, oregano, salt and rosemary and set aside.
- Add yeast mixture, roasted garlic and olive oil to the bowl then use a rubber spatula to mix it together just until combined. The dough will look a little sticky and stringy and there should still be a little flour around the edges of the bowl.
- Cover and let rise somewhere warm until it has doubled in size, about 8-10 hours.
- Once the dough has doubled in volume, use your hands to pull the dough out onto a floured surface. With floured hands, gently fold the dough into itself several times until a soft, flour-covered ball is formed. Seam side up, lift and place it into a flour dusted bowl. Dust with flour, cover and refrigerate overnight.
- When you're ready to bake your bread, preheat oven to 450ºF (232ºC) with your Dutch oven inside the oven.
- Uncover then invert the bowl to turn the dough out onto a lightly floured surface seam side down. If needed, gently turn it with your hands and nudge it into the shape of a loaf. Place it on a sheet of parchment paper and score the top with a razor blade or the tip of a sharp knife with a design of your choosing.
- Once the oven is preheated, remove the Dutch oven from the oven and transfer the dough, still on the parchment, into the Dutch oven. Cover and bake for 30 minutes, then remove the cover and bake for 15 minutes more.
- Your bread will be done once the top is browned, and it sounds hollow when you tap the top. Using parchment edges, lift bread from Dutch oven and transfer it to a wire cooling rack to let cool for up to an hour before slicing.


Leave a Reply