
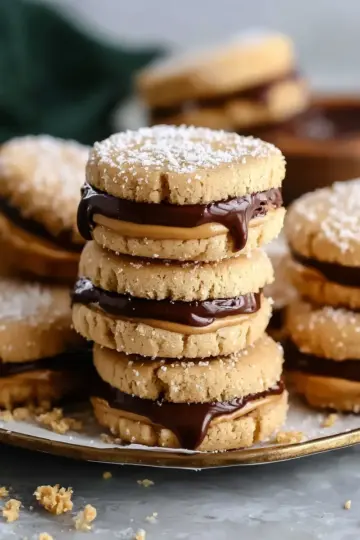
Introduction to Classic No-Bake Cookies
If you're a busy young professional, you know that life can get hectic, leaving little time for elaborate baking sessions. That’s where classic no-bake cookies come in! With just a few simple ingredients and minimal kitchen time, these delightful treats can satisfy your sweet tooth without the hassle of turning on the oven. Perfect for those evenings when you need a quick dessert or a snack to share with friends!
Why No-Bake Cookies are Perfect for Busy Young Professionals
Imagine coming home after a long day at work, craving something sweet but not wanting to spend hours in the kitchen. Classic no-bake cookies are your answer! They take only about 20 minutes of prep time and a few minutes of cooking time, making them an ideal choice for your busy lifestyle.
Moreover, no-bake cookies require minimal cleanup, so you can spend more time relaxing or catching up on your favorite shows. You can easily whip up a batch while multitasking, ensuring that you have a delicious treat ready to go for any occasion. Plus, the combination of oats, peanut butter, and chocolate provides a satisfying chew and flavor that will keep you coming back for more.
For tips on making quick and easy desserts, check out some helpful resources on Baking Basics and Meal Prep Strategies to help make your kitchen experiences even smoother!
Ingredients for Classic No-Bake Cookies
When you're craving something sweet but don’t want to fire up the oven, these Classic No-Bake Cookies come to your rescue with minimal fuss and maximum flavor! Let’s break down the ingredients you’ll need.
Essential ingredients you'll need
- Butter: ½ cup (115 grams) for that rich flavor.
- Granulated Sugar: 2 cups (400 grams) provide sweetness to balance the cocoa.
- Milk: ½ cup (120 ml), whole or alternative, acts as the liquid base in this delightful treat.
- Unsweetened Cocoa Powder: ¼ cup (20 grams) makes these cookies a chocolate lover’s dream.
- Creamy Peanut Butter: ½ cup (125 grams) adds that creamy texture and nutty flavor.
- Pure Vanilla Extract: 1 teaspoon enhances the overall taste experience.
- Quick-Cooking Oats: 3 cups (300 grams), key to that classic chewy texture.
Optional ingredients for customizing your cookies
Feel free to jazz up your classic no-bake cookies with some fun mix-ins! Consider adding:
- Chopped Nuts: Walnuts or almonds can add crunch.
- Chocolate Chips: For extra chocolatey goodness.
- Coconut Flakes: To bring a tropical twist.
- Dried Fruit: Raisins or cranberries can offer a delightful chew.
You can experiment with these optional ingredients to find your perfect flavor combination! Want more ideas? Check out this resource for some creative inspiration.
Step-by-Step Preparation of Classic No-Bake Cookies
Making classic no-bake cookies is not only a fun kitchen project but also a delicious way to satisfy your sweet tooth with minimal effort. Let’s dive into the preparation steps together!
Gather Your Ingredients and Prep Your Workspace
Before you start whipping up these delightful treats, take a moment to gather all your ingredients. You'll need butter, granulated sugar, milk, cocoa powder, creamy peanut butter, vanilla extract, and quick-cooking oats. Measure everything out, so you can work seamlessly without interruptions. To make your cookie-making experience even smoother, line two large baking sheets with parchment paper. This will prevent sticking and make cleanup super easy—trust me, your future self will thank you!
Combine Butter, Sugar, Milk, and Cocoa in a Saucepan
Now, grab a large saucepan and add your butter, sugar, milk, and cocoa powder. Place it over medium heat. Stir often to ensure the butter melts fully and everything combines nicely. This base mixture creates the rich chocolate flavor and sweetness we all love in classic no-bake cookies. Check out this chocolate melting guide for tips on how to melt chocolate if you're curious!
Bring the Mixture to a Rolling Boil
Once everything is melted and combined, it’s time to bring the mixture to a rolling boil. Keep stirring, and don’t walk away—this is crucial! Allow it to boil for exactly 60 seconds. Timing is everything here; it gives your cookies the right texture. After that minute is up, promptly remove the saucepan from the heat.
Stir in Peanut Butter and Vanilla Extract
Now for the magic touch! Stir in the creamy peanut butter and vanilla extract until well mixed. The peanut butter adds that undeniable creaminess and flavor that pairs so perfectly with chocolate. Feel free to indulge a little—sneaking a spoonful of this mixture is totally acceptable!
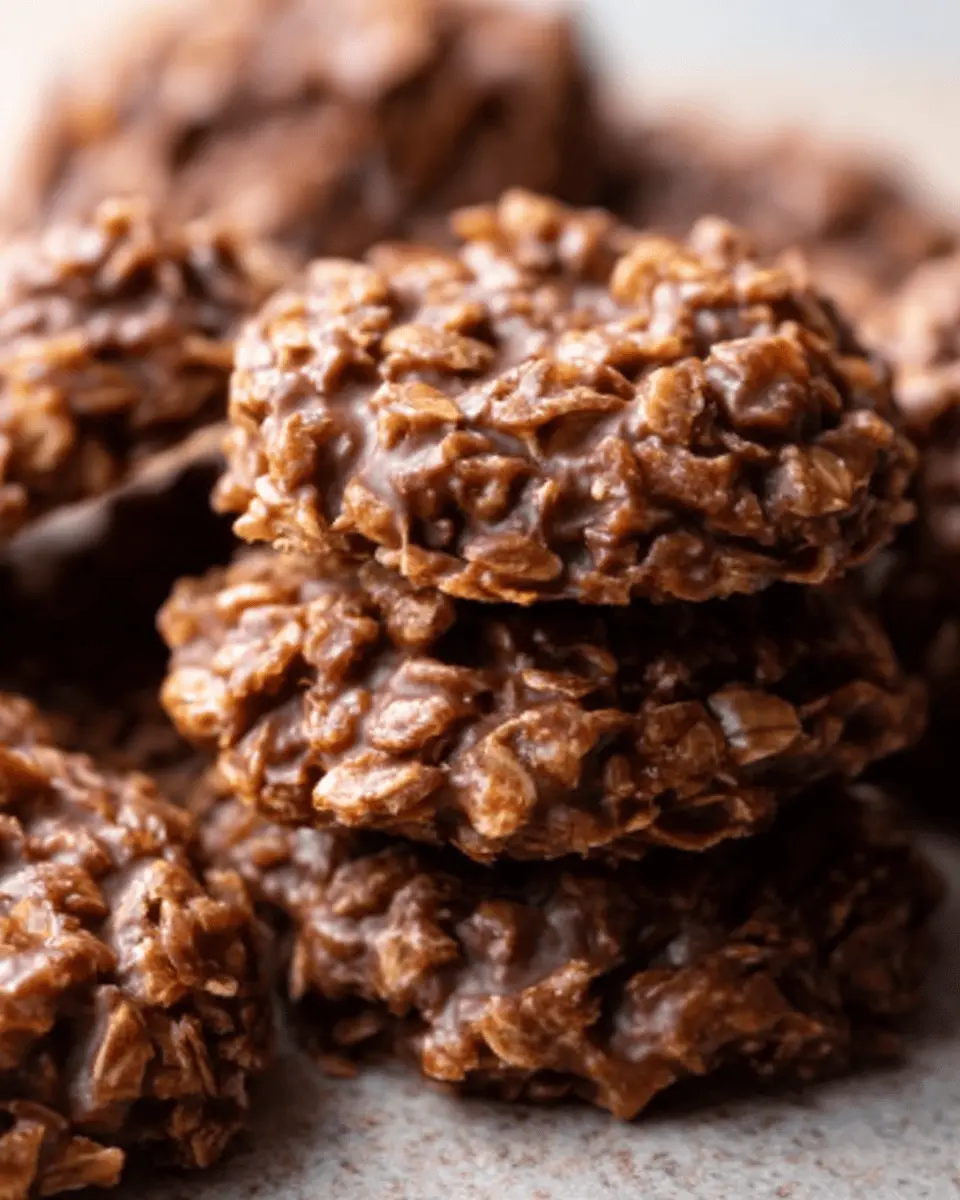
Fold in the Oats for That Perfect Cookie Texture
Next, it’s all about the oats. Carefully fold in your quick-cooking oats until they're thoroughly coated with the chocolate mixture. This step is where your cookies really start to take shape. The oats also give these classic no-bake cookies their hearty texture, making them a satisfying snack.
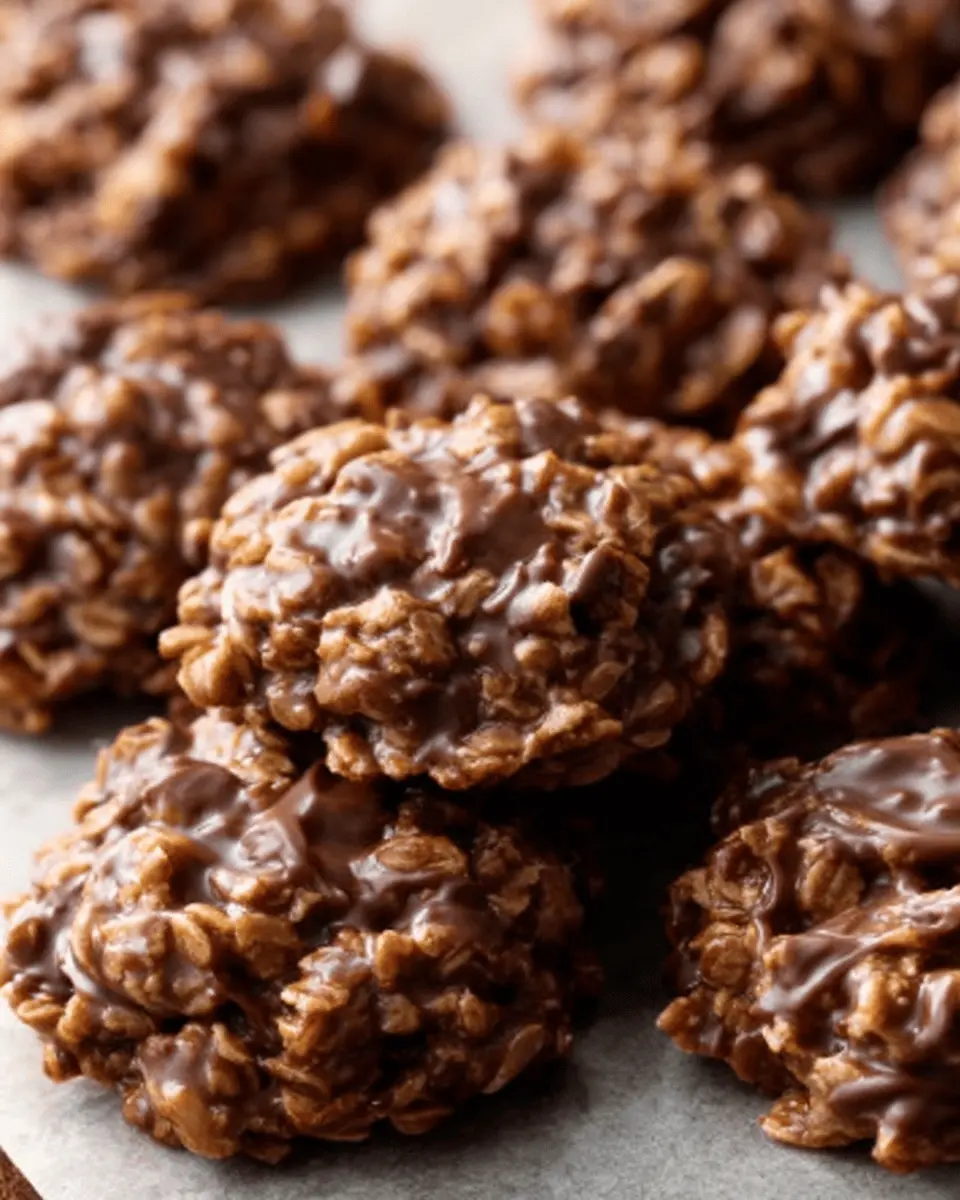
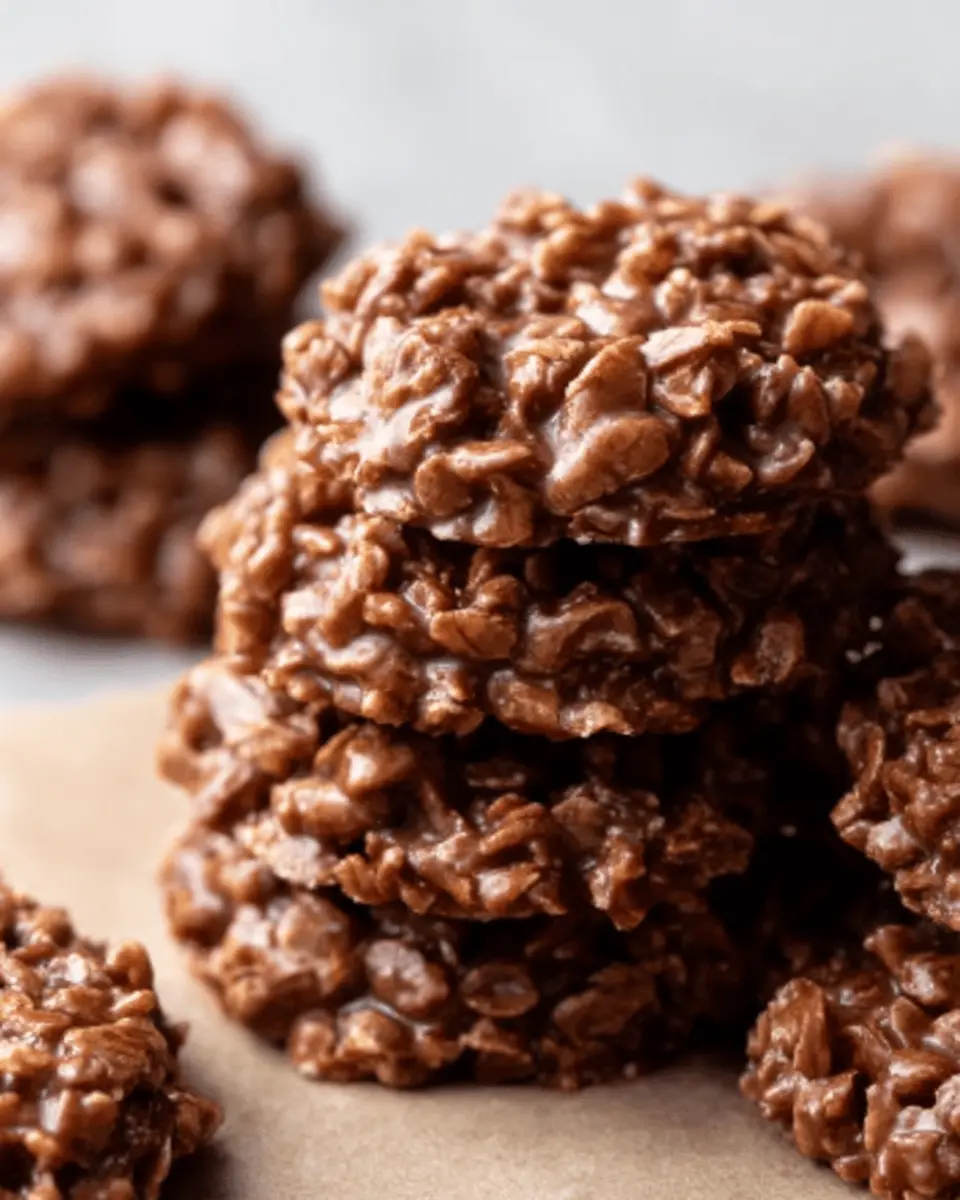
Drop Spoonfuls Onto Parchment Paper and Let Them Cool
Finally, use a cookie scoop or a tablespoon to drop spoonfuls of the mixture onto your prepped parchment paper. You can make them as big or small as you like, just remember to give them a bit of space to spread. Once done, let your cookies cool for 20 to 30 minutes so they can set properly. If you're like me, you'll find it hard to wait, but the wait is worth every delicious bite!
Enjoy your homemade classic no-bake cookies, and don’t forget to share them with friends or family—if you can resist the temptation of eating them all yourself!
Variations on Classic No-Bake Cookies
Peanut Butter and Chocolate Combo Variations
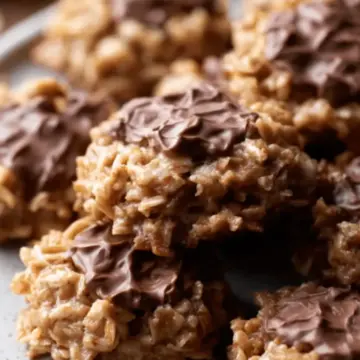
If you love the classic flavor of classic no-bake cookies, you can elevate them with fun twists. Try the decadent combination of dark chocolate and peanut butter for a rich flavor explosion. Drizzle melted white chocolate on top for a gorgeous, gourmet touch. Or for a tropical flair, mix in coconut flakes for added sweetness and chewiness—who knew no-bake cookies could transport you to a sunny beach?
Add-ins for Enhancing Flavors and Textures
Get creative with add-ins! Consider tossing in a handful of chopped nuts like almonds or walnuts to introduce a satisfying crunch. For a fruit-infused version, dried fruits such as raisins or cranberries can provide a burst of flavor and added nutrition. You might even experiment with a sprinkle of sea salt on top to balance the sweetness perfectly.
For more inspiration on cookie variations, check out Food Network’s No-Bake Desserts for delightful ideas!
Cooking Tips and Notes for Classic No-Bake Cookies
Common Mistakes to Avoid
When making classic no-bake cookies, timing is everything. Make sure to boil the mixture for a full 60 seconds; too short, and your cookies may not set properly. Also, be cautious with your oats—using quick-cooking oats leads to a better texture, while old-fashioned oats can make them too chewy. Always keep everything measured and ready before you start for the smoothest process!
Storage and Freezing Tips
To keep your no-bake cookies fresh, store them in an airtight container at room temperature for up to one week. If you want to enjoy them later, freeze them in a freezer bag or container for up to three months. Just remember to let them thaw to room temperature before serving for that perfect taste and texture!
Consider checking out this guide on food storage for more tips: USDA Food Storage Guidelines.
Serving Suggestions for Classic No-Bake Cookies
Pairing with Beverages
When enjoying classic no-bake cookies, consider a refreshing glass of cold milk, a classic choice that enhances the rich chocolate and peanut butter flavors. For a unique twist, try pairing them with matcha green tea or a warm cup of chai latte to contrast the sweetness. If you’re feeling adventurous, a rich coffee infusion can elevate your dessert experience—who doesn’t love coffee and chocolate together?
Creative Ways to Serve or Gift Cookies
Want to impress friends or family? Arrange your no-bake cookies on a decorative plate and sprinkle them with a touch of sea salt for an elegant touch. You can also package them in clear cookie bags tied with twine for a charming gift. Personalize the packaging by including a handwritten note with your favorite cookie memory—the perfect combination of nostalgia and sweetness!
For more delightful serving ideas, check out this Incredible Guide to Cookie Decorating.
Time Breakdown for Classic No-Bake Cookies
When you're ready to whip up a batch of classic no-bake cookies, knowing how long it will take is half the battle. Here's a quick guide to help you manage your time effectively!
Preparation Time
Prepare your ingredients and line your baking sheets in just 20 minutes. It's a great opportunity to get organized and enjoy the process!
Cooking Time
The actual cooking takes 5 minutes. Just heat, stir, and bring your ingredients to a rolling boil—easy peasy!
Cooling Time
Allow your cookies to set and cool for about 20 minutes. Grab a cup of coffee or tea and relax while they firm up.
Total Time
All in all, you're looking at a total cook time of 45 minutes. That’s not too bad for making about 30 delightful cookies! So, why not call a friend over for a cookie taste test once they’re ready?
For more tips on perfecting your baking skills, check out this guide on cooking times. Happy baking!
Nutritional Facts for Classic No-Bake Cookies
Calories per cookie
Each classic no-bake cookie contains approximately 100 calories, making them a delightful yet indulgent treat. With 30 cookies in a batch, it's easy to enjoy these sweet bites without overindulging.
Key nutritional breakdown
Here's a quick glimpse at the nutritional components of these cookies:
- Total Fat: 5g
- Saturated Fat: 2g
- Carbohydrates: 14g
- Fiber: 1g
- Sugar: 8g
- Protein: 2g
While they're a tasty dessert option, moderation is key! If you're looking for more insights about nutrition and healthy treats, check out Nutrition.gov for fantastic resources and tips on balanced eating. Remember, it’s all about enjoying those decadent moments!
FAQs about Classic No-Bake Cookies
Can I use alternatives to sugar?
Absolutely! If you're looking to cut down on refined sugar, consider using natural sweeteners like maple syrup or honey. Keep in mind that these alternatives can change the texture slightly, so experiment to find what works best for your taste. For a healthier option, stevia or erythritol can be used, but it's essential to read the conversion rates on the packaging for the right amounts.
How long do these cookies last?
These classic no-bake cookies can last up to one week when stored in an airtight container at room temperature. If you want to keep them for longer, consider freezing them! They can be stored in the freezer for up to three months. Just make sure to let them reach room temperature before digging in.
Are no-bake cookies safe to make for kids?
Yes! No-bake cookies are safe and fun for kids to help make. However, be sure to supervise during the stove activities, especially when the mixture is boiling, as it can get quite hot. This recipe is a great way to introduce kids to cooking without the need for an oven!
Conclusion on Classic No-Bake Cookies
Recap of Why These Cookies Are a Must-Try for Busy Young Professionals
These classic no-bake cookies are the perfect treat for busy young professionals balancing work and life. With only a handful of ingredients and a quick prep time, you can whip up a delicious dessert that satisfies your sweet tooth without the hassle. Whether you need a post-work snack or a crowd-pleasing dessert for a gathering, these cookies are incredibly forgiving and versatile. They can easily fit into any hectic schedule! So grab your ingredients, and let the easy baking begin!
Classic No-Bake Cookies
Equipment
- large saucepan
- cookie scoop
- baking sheets
- parchment paper
Ingredients
- ½ cup butter sliced into pieces
- 2 cups granulated sugar
- ½ cup milk preferably whole milk
- ¼ cup unsweetened cocoa powder
- ½ cup creamy peanut butter
- 1 teaspoon pure vanilla extract
- 3 cups quick-cooking oats old-fashioned rolled oats can also be used
Instructions
- Gather all of your ingredients and measure everything out. Line two large baking sheets with parchment paper and set aside.
- Combine the butter, sugar, milk, and unsweetened cocoa powder in a large saucepan and heat over medium heat, stirring often until the butter is melted and well combined. Bring to a rolling boil and allow to boil for 60 seconds, stirring occasionally.
- Remove from heat, and stir in the peanut butter and vanilla extract until fully combined. Stir in the oats and mix until all oats are coated with the mixture and well combined.
- Drop spoonfuls of the mixture onto the prepared baking sheets and allow to cool for 20 to 30 minutes before serving.
Leave a Reply