
Introduction to Banana Pudding Cheesecake
Why Banana Pudding Cheesecake is a Game-Changer for Dessert Lovers
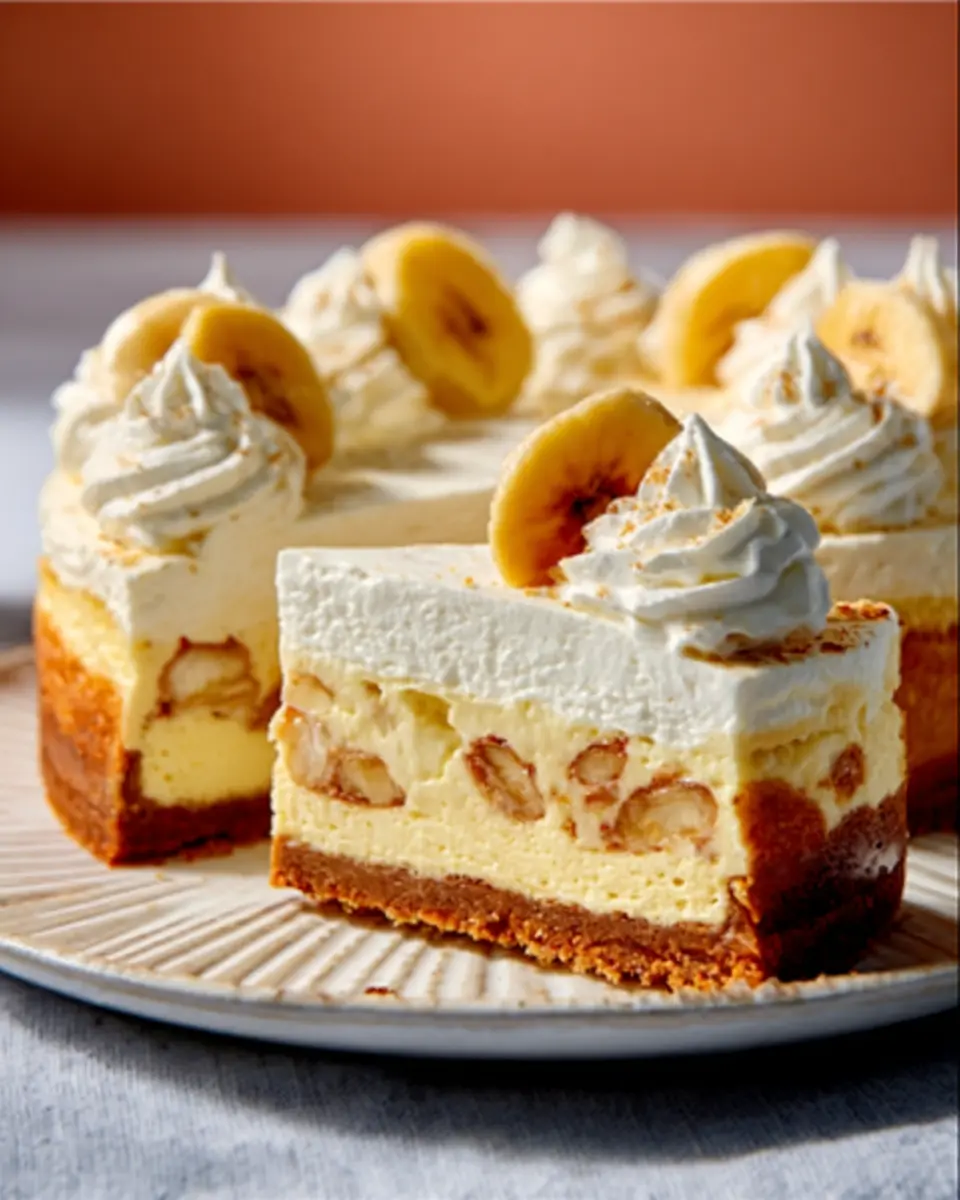
If you’re a dessert enthusiast looking for that perfect blend of comfort and indulgence, banana pudding cheesecake is your new go-to treat. This delightful dessert unites the creamy richness of cheesecake with the nostalgic flavor of banana pudding, creating a harmonious experience that's hard to resist. Imagine sinking your fork into layers of smooth cheesecake, interlaced with ripe bananas and topped with whipped cream—it’s a bit like a slice of happiness!
The brilliance of banana pudding cheesecake lies in its versatile appeal. Whether you’re hosting a dinner party, celebrating a birthday, or simply treating yourself after a long week, this cheesecake is sure to impress. Its combination of a buttery vanilla wafer crust, luscious banana filling, and fluffy whipped topping makes it a visual and flavor sensation that guests will rave about.
As you dive into the recipe, you'll discover that, while it looks impressive, the steps are simpler than they appear. Plus, there’s an undeniable joy in creating something homemade that tastes like it came from a gourmet bakery. So, roll up your sleeves, because it's time to turn your kitchen into a paradise of banana goodness! For more inspiration, check out this article from The Spruce Eats.
Ingredients for Banana Pudding Cheesecake
Creating a scrumptious banana pudding cheesecake starts with understanding its key components. You'll find that the balance between rich, creamy filling and a deliciously crumbly crust is what makes this dessert truly stand out.
Key components of a delicious cheesecake
To achieve that perfect cheesecake texture, you'll need a few essential ingredients that come together harmoniously:
- Cream Cheese: The heart of any cheesecake. Opt for full-fat cream cheese for the richest flavor.
- Sugar: Sweetness is vital! Sugar helps elevate the other flavors in the cheesecake.
- Sour Cream: This adds a delightful tang, enhancing the overall creaminess.
- Bananas: Fresh, ripe bananas bring that unmistakable flavor of banana pudding.
Essential items for the crust and filling
The crust and filling are where you can really let your creativity shine. Here are the staples you'll need:
-
For the Crust:
-
2 ¼ cups vanilla wafer crumbs
-
5 tablespoons sugar
-
10 tablespoons salted butter
-
For the Filling:
-
24 oz cream cheese
-
1 cup sugar
-
3 large eggs, plus some for mashing
-
3.4 oz instant banana cream pudding mix for that authentic banana flavor
With these ingredients in hand, you're well on your way to crafting a delectable banana pudding cheesecake that will impress family and friends alike! For more tips on dessert pairings, check out Taste of Home's article on flavor pairings.
Step-by-Step Preparation of Banana Pudding Cheesecake
Creating a banana pudding cheesecake at home is a delightful journey that combines the creamy richness of cheesecake with the nostalgic flavor of banana pudding. Follow these easy steps to ensure you achieve a dessert that will impress friends and family alike.
Prepare the crust
Start by preheating your oven to 325°F (163°C). Line a 9-inch springform pan with parchment paper on the bottom and grease the sides to prevent sticking. In a bowl, mix together 2 ¼ cups of vanilla wafer crumbs, 5 tablespoons of sugar, and 10 tablespoons of melted salted butter until it resembles wet sand. Press this mixture firmly into the bottom and slightly up the sides of the pan. Bake for about 8-10 minutes, then set aside to cool. Don’t forget to wrap the outside of the pan with aluminum foil to create a water bath barrier!
Mix the cheesecake filling
Once your crust has cooled, reduce the oven temperature to 300°F (148°C). In a large bowl, beat 24 ounces of room-temperature cream cheese, 1 cup of sugar, 3 tablespoons of flour, and the 3.4 ounces of instant banana cream pudding mix on low speed until smooth. This low-speed mixing helps to minimize air bubbles, which can create cracks in your cheesecake. After this, add in ¼ cup of sour cream and combine, then mix in 3 large eggs one at a time. Finish with 1 cup of mashed bananas and ½ teaspoon of vanilla extract, mixing until well combined.
Bake the cheesecake in a water bath
Pour the cheesecake filling into your cooled crust. Place the springform pan inside a larger pan and fill the outer pan with warm water, stopping halfway up the sides of the springform. Bake for 1 hour and 30-45 minutes until set but still jiggly in the center. Turn off the oven, and leave the door closed for 30 minutes before cracking it open for another 30 minutes to let the cake cool gradually.
Cool and refrigerate the cheesecake
Once cooled, remove the cheesecake from the oven and refrigerate for 5-6 hours or overnight. This step is crucial; the longer it sits, the more the flavors develop, giving you that rich banana pudding taste.
Prepare the whipped cream topping
When you’re ready to serve, remove the cheesecake from the springform pan. To make a delightful whipped cream topping, whip together 1 ¼ cups of cold heavy cream, 6 tablespoons of powdered sugar, and 1 teaspoon of vanilla extract until stiff peaks form.
Assemble the cheesecake
Add a layer of sliced bananas on top of the cheesecake, pipe your whipped cream over them, and finish with additional banana slices and whole vanilla wafer cookies. These fresh banana slices should be added just before serving for the best texture and flavor!
Enjoy your homemade banana pudding cheesecake, a perfect treat that balances creaminess with a burst of banana flavor! For more dessert inspiration, check out this article on innovative cheesecake recipes!
Variations on Banana Pudding Cheesecake
Chocolate Banana Pudding Cheesecake
For a delightful twist, consider adding rich chocolate flavor to your banana pudding cheesecake. Simply mix in 1 cup of melted chocolate or chocolate pudding into the filling. This luscious combination of banana and chocolate creates a dessert that’s both decadent and comforting, perfect for chocolate lovers.
Gluten-free Banana Pudding Cheesecake
No one should miss out on this indulgent treat, which is why a gluten-free version is a fantastic option! Swap out the regular vanilla wafer crumbs for a gluten-free alternative, and ensure all other ingredients are gluten-free certified. Your friends and family won’t even know it’s a healthier version—just delicious, creamy goodness!
Try these variations to keep your banana pudding cheesecake fresh and exciting for every occasion. Looking for more recipe ideas? Check out this gluten-free dessert guide.
Cooking Tips and Notes for Banana Pudding Cheesecake
Tips for Avoiding Cracks
To achieve a smooth and creamy banana pudding cheesecake, it’s crucial to mix your batter gently! Mixing on low speed helps prevent incorporating too much air, which can lead to cracks. Additionally, allowing your cheesecake to cool gradually in the oven helps maintain its integrity.
Best Practices for Cooling
Cooling techniques are essential for a perfect cheesecake. After baking, turn off the oven and leave the door closed for 30 minutes, then crack the door for another 30 minutes. This gradual cooling process minimizes the temperature shock that can cause cracks. Once cooled, refrigerate your cheesecake for at least 5-6 hours—or overnight if you can resist!
For further tips on baking cheesecake, check out resources from King Arthur Baking or America's Test Kitchen. Enjoy your delicious creation!
Serving Suggestions for Banana Pudding Cheesecake
Perfect pairings for this dessert
Indulging in a slice of banana pudding cheesecake is delightful on its own, but pairing it with complementary flavors can elevate the experience. Consider serving it alongside:
- A fresh fruit salad for a refreshing contrast.
- A rich scoop of vanilla ice cream, enhancing the creamy texture.
- A cup of hot coffee or herbal tea to balance the sweetness of the cheesecake—chai or a light green tea work wonderfully!
Serving size recommendations
When it comes to serving your banana pudding cheesecake, aim for generous slices, ideally about 1 to 1.5 inches thick. This allows your guests to savor every bite without overwhelming them. Given the rich flavors, you can comfortably serve 12-14 slices from this recipe, perfect for gatherings or special occasions! For more entertaining tips, check out Taste of Home's Guide.
Time Breakdown for Banana Pudding Cheesecake
Preparation Time
The prep time for this banana pudding cheesecake is about 1 hour. This includes the time needed to prepare the crust, filling, and toppings. It’s a great time investment for a show-stopping dessert!
Cooking Time
You'll need approximately 2 hours and 15 minutes for baking and cooling. The cheesecake requires slow baking to achieve that creamy, dreamy texture we all love.
Total Time Overview
In total, you’re looking at around 3 hours and 15 minutes from start to finish. This may seem lengthy, but much of this time is passive cooling. It’s totally worth it for that delicious flavor packed into each slice!
For more tips on baking cheesecakes, consider checking out resources like the American Test Kitchen for expert advice. Enjoy your baking journey!
Nutritional Facts for Banana Pudding Cheesecake
Calories per slice
Enjoying a slice of this delicious banana pudding cheesecake will set you back approximately 733 calories. While it’s a delightful treat, pairing it with fresh fruit or a light beverage can balance indulgence with nutrition.
Key nutrients
This cheesecake is packed with essential nutrients, including:
- Sugar: 30.3 g
- Sodium: 609.1 mg
- Fat: 57.6 g
- Carbohydrates: 46.1 g
- Protein: 11.5 g
- Cholesterol: 200.6 mg
With its rich ingredients, it’s almost like a meal in itself! If you're looking for ways to make it a tad healthier while enjoying every bite, consider substituting some ingredients or adding a protein shake for a delightful twist. For more insights on balanced desserts, check out this guide on healthier dessert options.
FAQs about Banana Pudding Cheesecake
Can I use ripe bananas for baking?
Absolutely! Using ripe bananas for your banana pudding cheesecake is ideal. Ripe bananas are sweeter and more flavorful, which enhances the overall taste of your cheesecake. They also mash more easily, blending perfectly into the batter. If they have brown spots, don’t worry—this is a sign they’re extra sweet!
How to store leftover cheesecake?
Leftover cheesecake can be stored in the refrigerator. Be sure to wrap it tightly with plastic wrap or place it in an airtight container to maintain freshness. It’s best enjoyed within 3-4 days, but it can stay safe for up to a week if stored properly. For tips on how to handle storage, you can visit FoodSafety.gov.
Can I make this cheesecake a day ahead?
Yes, you can! Making your banana pudding cheesecake a day in advance is a smart move. In fact, allowing it to chill overnight will enhance its flavor and texture, making it even more delicious when served the next day. Just ensure you cover it well to keep it fresh!
Conclusion on Banana Pudding Cheesecake
Final thoughts on making the perfect dessert
Creating a banana pudding cheesecake is a delightful journey that blends nostalgic flavors with a modern twist. When executed with care, this dessert not only impresses but also satisfies every sweet craving. Remember, allowing the cheesecake to chill properly enhances its flavors. Enjoy this delicious treat with family and friends!
Banana Pudding Cheesecake
Equipment
- 9-inch springform pan
- Mixing Bowls
- electric mixer
- large baking pan for water bath
Ingredients
CRUST
- 2 ¼ cups vanilla wafer crumbs
- 5 tablespoon sugar
- 10 tablespoon salted butter melted
CHEESECAKE FILLING
- 24 oz cream cheese room temperature
- 1 cup sugar
- 3 tablespoon all-purpose flour
- 3.4 oz instant banana cream pudding mix dry
- ¼ cup sour cream
- 3 large eggs room temperature
- ½ teaspoon vanilla extract
- 1 cup mashed ripe bananas (about 2-3 bananas)
TOPPING
- 1 ¼ cups heavy whipping cream cold
- 6 tablespoon powdered sugar
- 1 teaspoon vanilla extract
- 2-3 medium bananas sliced
- 11 whole vanilla wafer cookies
Instructions
CRUST
- Preheat oven to 325°F (163°C). Line a 9-inch (23cm) springform pan with parchment paper in the bottom and grease the sides.
- Combine the crust ingredients in a small bowl. Press the mixture into the bottom and up the sides of the springform pan.
- Bake the crust for 8-10 minutes, then set aside to cool.
- Cover the outsides of the pan with aluminum foil so that water from the water bath cannot get in. Set prepared pan aside.
CHEESECAKE FILLING
- Reduce oven temperature to 300°F (148°C).
- In a large bowl, beat the cream cheese, sugar, flour and pudding mix on low speed until well combined and smooth.
- Add the sour cream and mix on low speed until well combined.
- Add the eggs one at a time, mixing slowly to combine after each addition.
- Add the mashed banana and vanilla extract and mix on low speed until well combined.
- Pour the cheesecake batter into the crust.
- Place the springform pan inside another larger pan. Fill the outside pan with enough warm water to go about halfway up the sides of the springform pan.
- Bake for 1 hour 30-45 minutes. The center should be set, but still jiggly.
- Turn off the oven and leave the door closed for 30 minutes.
- Crack the door of the oven for 30 minutes to allow the cheesecake to continue to cool slowly.
- Remove the cheesecake from the oven and water bath wrapping and refrigerate until cool and firm, 5-6 hours or overnight.
TOPPING
- When cooled and ready to serve, remove the cheesecake from the springform pan and place on a serving plate.
- To make the whipped cream, add the heavy whipping cream, powdered sugar and vanilla extract to a large mixer bowl and whip on high speed until stiff peaks form.
- Place a layer of sliced bananas on top of the cheesecake, then pipe a layer of whipped cream swirls on top.
- Finish off the cheesecake with a few more banana slices and vanilla wafers.
- Cheesecake is best when stored well covered in the fridge for 3-4 days.


Leave a Reply