
Introduction to Preserving Apples
Why Preserve Apples?
Have you ever found yourself surrounded by a bounty of apples, wondering what to do with them all? Preserving apples is a fantastic way to both minimize waste and enjoy their delicious flavor long after harvest season. Whether you have a backyard tree brimming with fruit or you’ve picked up a great deal at the farmer's market, preserving gives you a chance to enjoy this versatile fruit in various forms.
Plus, with the rise of zero-waste movements, more people are seeking ways to utilize every part of their food. Apples are perfect for making jellies, sauces, and even homemade apple cider vinegar, allowing you to savor every juicy bite.
Benefits of Homemade Preservation
The benefits of homemade preservation extend far beyond simply saving food. It allows you to control the ingredients, ensuring no artificial additives or preservatives sneak into your pantry. According to experts, homemade apple products can also hold more nutrients and probiotics, promoting gut health and overall well-being.
Additionally, there’s something incredibly satisfying about creating your own pantry staples. Not only does it ignite creativity in the kitchen, but it also fosters a connection to your food. So why not dive into the art of preserving apples? You'll not only reduce waste but also add a personal touch to your culinary creations!
Ingredients for Homemade Apple Cider Vinegar
Essential ingredients list
Creating your own homemade apple cider vinegar is both an enjoyable and rewarding experience. Here’s what you’ll need to get started:
- Diced apple chunks or scraps: Use fresh apples or leftover skins and cores to fill half of your fermenting vessel.
- Filtered water: You'll need lukewarm water for the fermentation process — stick to using filtered for the best results.
- Sugar: For the ideal fermentation, add 1 tablespoon of sugar per cup of filtered water or 1 cup per gallon. This sugar feeds the beneficial bacteria that convert it into vinegar.
These simple ingredients set the stage for a tasty and tangy result!
Optional ingredients for enhanced flavor
While the essentials lay a solid foundation, consider these optional enhancements to create your perfect batch:
- Finished organic apple cider vinegar: A splash can help kickstart the fermentation.
- Spices or herbs: Experiment with cinnamon sticks, cloves, or thyme to add unique flavors.
Incorporating these little extras can elevate your preserving apples journey into an aromatic adventure! For more insights, check out this handy guide on benefits of homemade vinegar.
Step-by-Step Preparation for Homemade Apple Cider Vinegar
Making homemade apple cider vinegar is a rewarding journey, especially when you're preserving apples from your harvest or using up scraps. Follow these simple steps to create your own tangy vinegar, and enjoy the delightful flavor it adds to your dishes.
Gather and Prepare the Apples
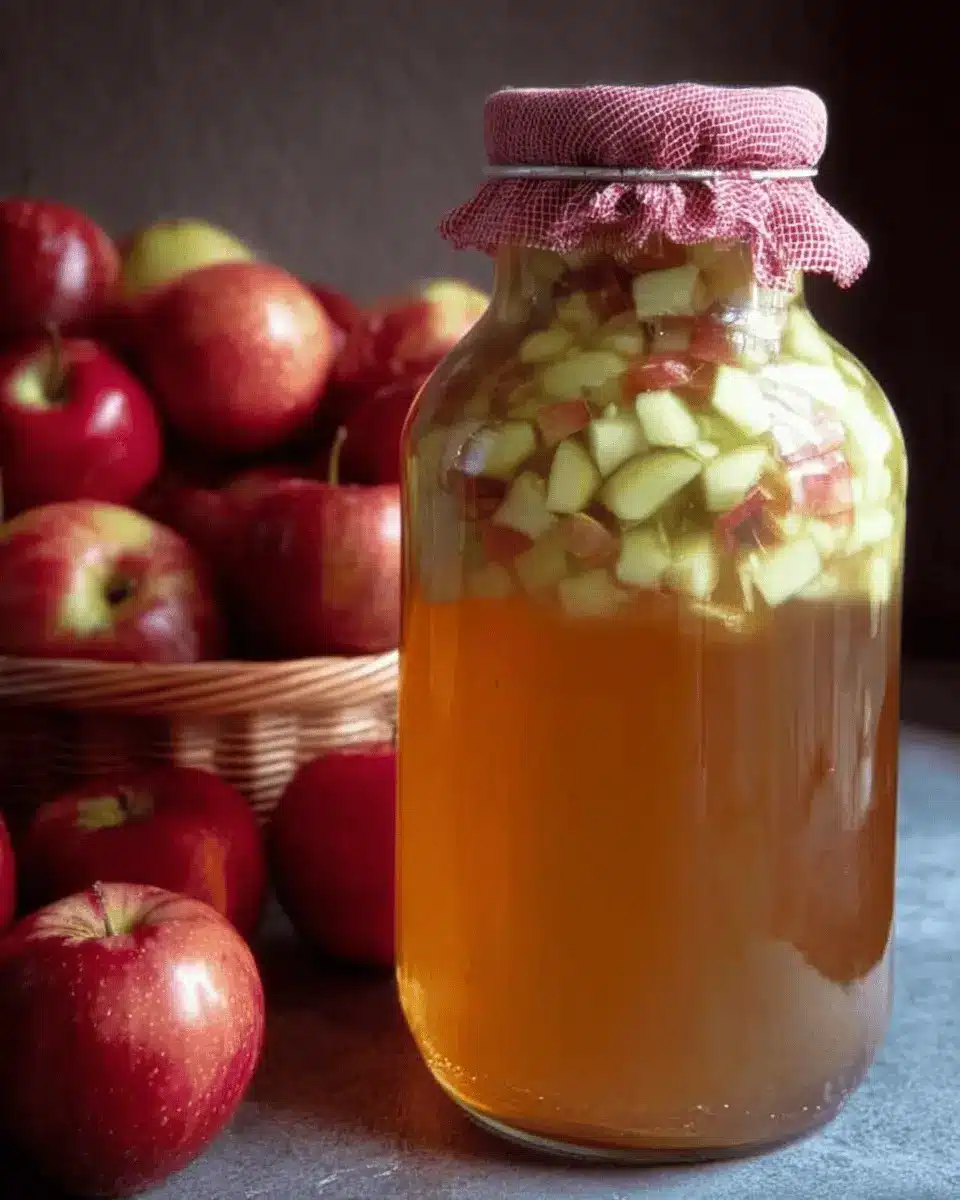
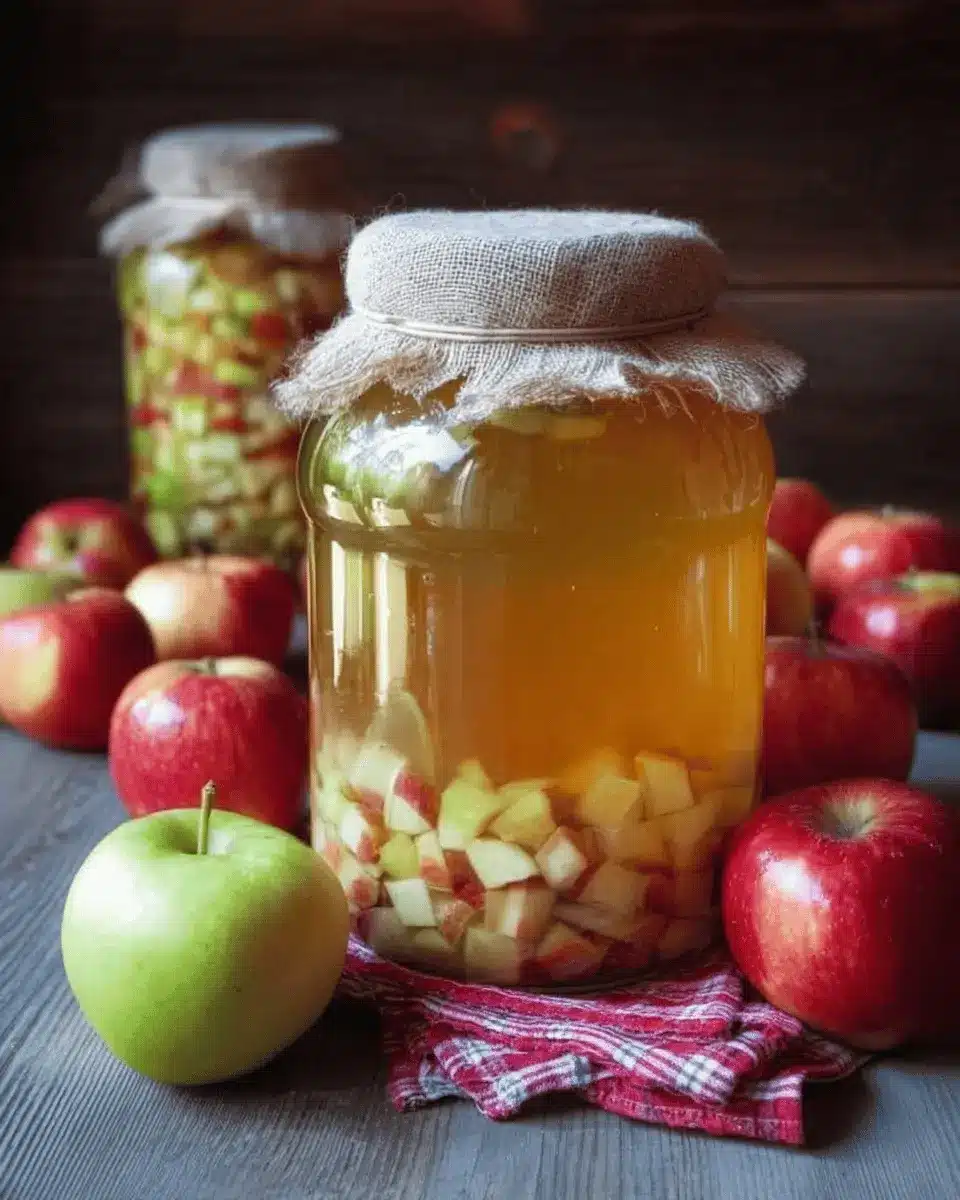
Begin by collecting your apples. Whether you have diced apple chunks or apple scraps—like skins and cores—this recipe embraces zero-waste. Aim to fill your fermenting vessel (like a quart jar or a half-gallon jar) about halfway. Choosing organic apples is ideal, as they tend to produce better flavors and healthier results.
Mix Sugar and Water
Next, it’s time to prepare the sugar solution. For every cup of filtered water you added, mix in one tablespoon of sugar. If you’re making a larger batch, use one cup of sugar for every gallon of water. Stir the mixture until the sugar is fully dissolved. This will help create the perfect environment for the fermentation process, giving your vinegar a rich flavor and the good bacteria it needs.
Combine Ingredients and Cover
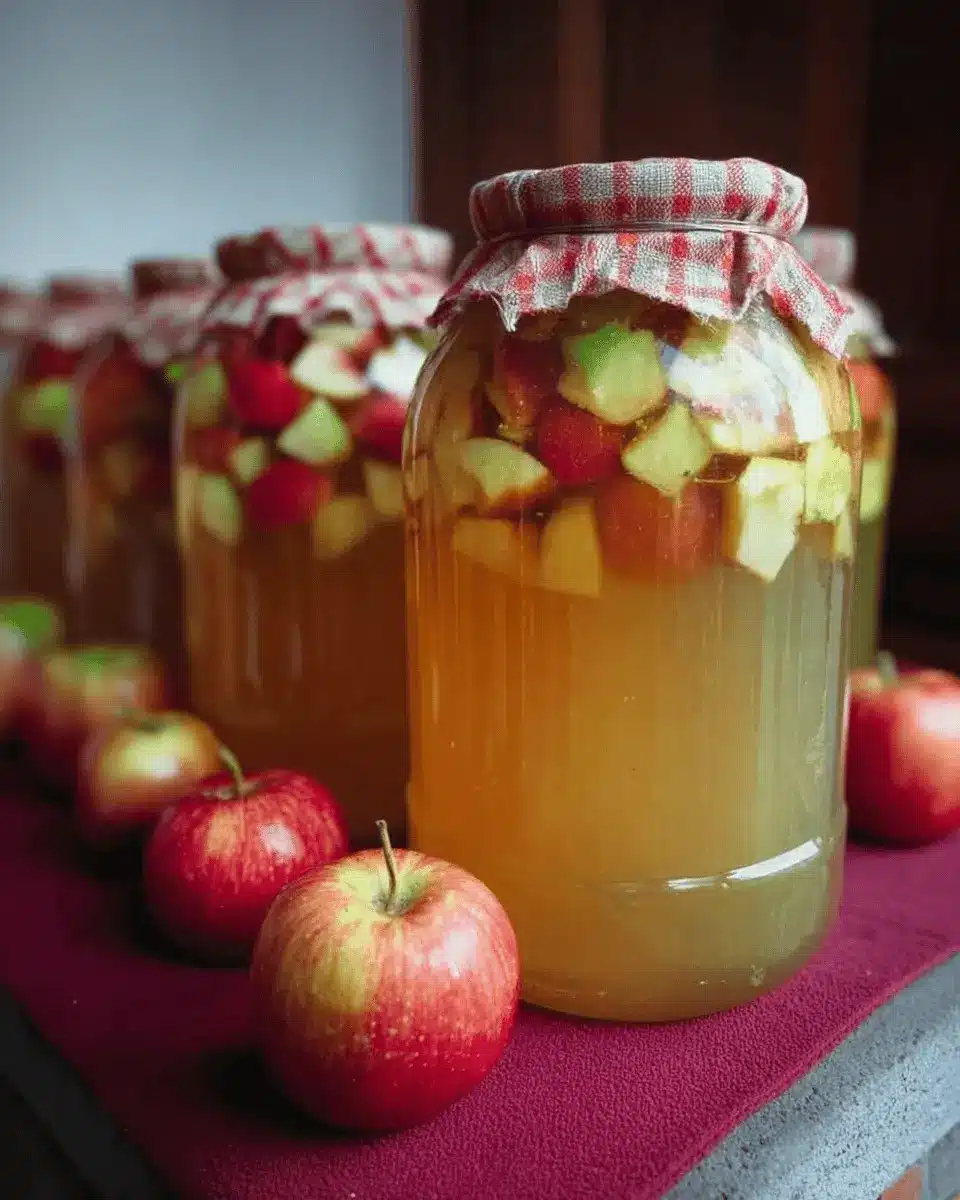
Now that your apples and sugar solution are ready, combine them in your ermenting vessel. Pour the lukewarm filtered water over the apples, ensuring you almost fill the container. For an extra boost of fermentation, consider adding a splash of finished organic apple cider vinegar to the mix. Once everything is thoroughly combined, cover the jar with a breathable material, such as cheesecloth or a coffee filter. This allows air to circulate while keeping unwanted pests out.
Daily Care During Fermentation
Place your fermenting vessel in a dark, warm location, ideally between 70 to 75 degrees Fahrenheit. Here’s where your daily routine begins! For the next two weeks, stir your mixture once a day to prevent mold from forming on the top. Don’t let a little mold scare you—just skim it off if it appears! If necessary, add a second layer of material like a dark towel to block excess light.
Strain and Store the Vinegar
After the initial two weeks, it’s time to strain your probiotic-rich liquid. Use a fine mesh strainer to separate the liquid from the apple solids, composting the leftover fruit. Store the strained vinegar in another container, covering it once again. For the next month, continue to let it ferment out of the way while occasionally tasting it to check your progress. Depending on your preference for tartness, you may allow it to sit for two to three months.
Once your homemade apple cider vinegar achieves your desired flavor, transfer it into bottles with lids or swing-top closures. You can enjoy this tangy goodness at room temperature or in the refrigerator. With proper fermentation, your vinegar could last well over a year—making it a fantastic addition to your kitchen.
For more information on preserving apples and fermentation tips, consider checking The Kitchn or Fermentation Association for expert guidance.
Variations on Homemade Apple Cider Vinegar
Infused Apple Cider Vinegar Flavors
Why stop at plain apple cider vinegar when you can explore delicious infused variations? Consider adding herbs like rosemary or thyme, spices such as cinnamon or ginger, or even fruits like pears or berries! Simply add your selected flavorings to the vinegar during the second fermentation phase for a tantalizing twist. This not only enhances the taste but also adds unique health benefits. Discover more about flavor infusion techniques here.
Uses for Different Types of Apples
When it comes to preserving apples for vinegar, not all apples are created equal. Tart apples like Granny Smith produce a more robust, tangy vinegar, while sweet varieties like Gala result in a milder flavor. Use whichever apples you have on hand—just keep in mind the flavor profile you’re aiming for. What’s your favorite type for vinegar? Consider experimenting, and you might just find your new go-to recipe!
Cooking Tips and Notes for Homemade Apple Cider Vinegar
Best practices for fermentation
When preserving apples into vinegar, ensuring proper fermentation is crucial. Keep everything clean to avoid unwanted bacteria—sterilize your fermenting vessel if you can. Use filtered water to remove chlorine and other chemicals. Remember, a breathable cover is essential; it allows the wild yeasts to mingle with your mixture while keeping debris out. Make sure to stir daily—this prevents mold and helps aerate the mixture, promoting healthier fermentation.
Troubleshooting common issues
If your vinegar isn’t bubbling after a few days, it could be due to a lack of warmth or sugar. Try moving it to a warmer spot or adding a bit more sugar to stimulate fermentation. If you spot mold, worry not—just scrape it off, but make sure your liquid isn’t affected. Ultimately, trust your taste buds! If it’s not tart enough after a month, give it more time. For more in-depth tips, you can check out this helpful resource on fermentation.
Serving Suggestions for Your Homemade Apple Cider Vinegar
Delicious salad dressings
Transform your homemade apple cider vinegar into flavorful salad dressings. Combine it with olive oil, mustard, and a touch of honey for a sweet and tangy vinaigrette. This pairs beautifully with fresh greens, roasted vegetables, or even as a marinade for chicken. The possibilities are endless!
Unique beverage ideas
Why not experiment with your homemade apple cider vinegar in beverages? Try mixing a tablespoon into a glass of sparkling water along with a splash of fruit juice for a refreshing twist. You can also create a soothing hot drink by adding it to herbal teas or warm water with honey, perfect for cozy nights or chilly mornings.
For more ideas on enhancing your drinks with vinegar, check out this article on the benefits of apple cider vinegar [link to reputable source].
Time Breakdown for Homemade Apple Cider Vinegar
Preparation Time
Creating your own apple cider vinegar takes about 20 minutes. This includes washing and chopping your apples or gathering scraps, mixing in the sugar, and prepping your fermentation vessel.
Fermentation Time
The fermentation process is where the magic happens! You'll need approximately 60 days for the vinegar to develop its rich flavor. During this time, daily stirring helps promote a healthy fermentation environment.
Total Time Required
With both preparation and fermentation, you’re looking at a total commitment of about two months and 20 minutes of active prep. This is a small investment for a natural product that can enhance your everyday meals and snacks!
For those interested in preserving apples, making your own apple cider vinegar can be an extraordinary way to minimize waste and enjoy a natural ingredient. If you're excited to dive into this process, check out resources like The Kitchn for tips and inspiration.
Nutritional Facts for Homemade Apple Cider Vinegar
Calories
Homemade apple cider vinegar is very low in calories, containing approximately 3 calories per tablespoon. This makes it an excellent choice for adding flavor without extra calories.
Health Benefits
Apple cider vinegar is renowned for its health benefits. It may help regulate blood sugar levels, support weight management, and promote digestion due to its probiotic content. These properties make it a valuable addition to your wellness routine.
Nutritional Contributions
While ACV isn’t a significant source of vitamins or minerals, it offers acetic acid, which can enhance nutrient absorption. Additionally, it’s a zero-waste solution for preserving apples, turning scraps into a functional condiment that adds zest to salads and sauces. For more information on the health benefits of apple cider vinegar, consider checking out sources like Healthline or WebMD.
FAQs about Preserving Apples and Cider Vinegar
How long does homemade apple cider vinegar last?
Homemade apple cider vinegar can last for over a year when stored properly. You'll want to keep it in a cool, dark place to maintain its flavor and quality. Just be sure to check for any visible mold or unusual smells before using it—if anything seems off, it's best to discard it.
Can I use any apples for cider vinegar?
Absolutely! While specific apple varieties lend different flavors, you can use any apples for making cider vinegar. This includes cores and peels from apples you've used in baking or snacking—making it a perfect choice for anyone interested in sustainable living and preserving apples.
What are the benefits of apple cider vinegar?
Apple cider vinegar is known for a myriad of health benefits, including potential blood sugar regulation, improved digestion, and weight management. It's also rich in probiotics, which can contribute to gut health. For a deeper dive into its benefits, check out Healthline's article on the topic.
Whether you're new to vinegar-making or looking to refine your skills, this journey is both rewarding and delicious!
Conclusion on Preserving Apples
Embrace the Joy of Homemade Vinegar
Making homemade apple cider vinegar is a fantastic way to harness the bounty of apple season. Not only will you enjoy a delicious, tangy condiment, but you'll also reduce waste in a fulfilling, sustainable way. Imagine the satisfaction of creating something nourishing straight from your kitchen!
Encouragement to Experiment with Flavors
Don't hesitate to get creative! Consider adding spices like cinnamon or ginger, or even infusing your vinegar with herbs for unique flavors. Each batch can be a delicious new adventure, reflecting your taste and preferences. So, roll up your sleeves and embrace the art of preserving apples—the results are sure to be rewarding!
Homemade Apple Cider Vinegar
Equipment
- quart jar
- half-gallon jar
- 1 gallon crock
Ingredients
Apple Ingredients
- 0.5 gallons apple chunks or apple scraps enough to fill half of your chosen fermenting vessel
- 1 tablespoon sugar per 1 cup filtered water
- 1 cup sugar per 1 gallon filtered water
Instructions
Preparation and Fermentation
- Wash and chop the apples into chunks, or gather collected apple scraps and add them to your jar or fermenting vessel until filled halfway.
- Pour lukewarm filtered water over the apples into the container until it is almost full and note the total amount of water added.
- Stir in sugar in ratios of 1 tablespoon of sugar per cup of water added, or for larger batches, 1 cup of sugar per gallon of water.
- Optional: Add a splash of finished organic apple cider vinegar to inoculate the culture and encourage fermenting.
- Stir combined ingredients until thoroughly mixed, and cover with breathable material.
- Store in a dark location around 70 to 75 degrees F for two weeks to ferment, stirring every day to prevent mold.
- After two weeks, strain and reserve the liquid into a similar sized container and cover again. Compost the spent fruit.
- Move the covered container of liquid to a location out of the way to continue long term fermentation.
- After one month, sample the vinegar to see if it’s finished fermenting. Allow it to ferment for two to three months if needed.
- Once fermented to your desired flavor, transfer the apple cider vinegar into bottles with lids and store at room temperature or in the refrigerator.
- Properly fermented apple cider vinegar should stay good for over a year.


Leave a Reply